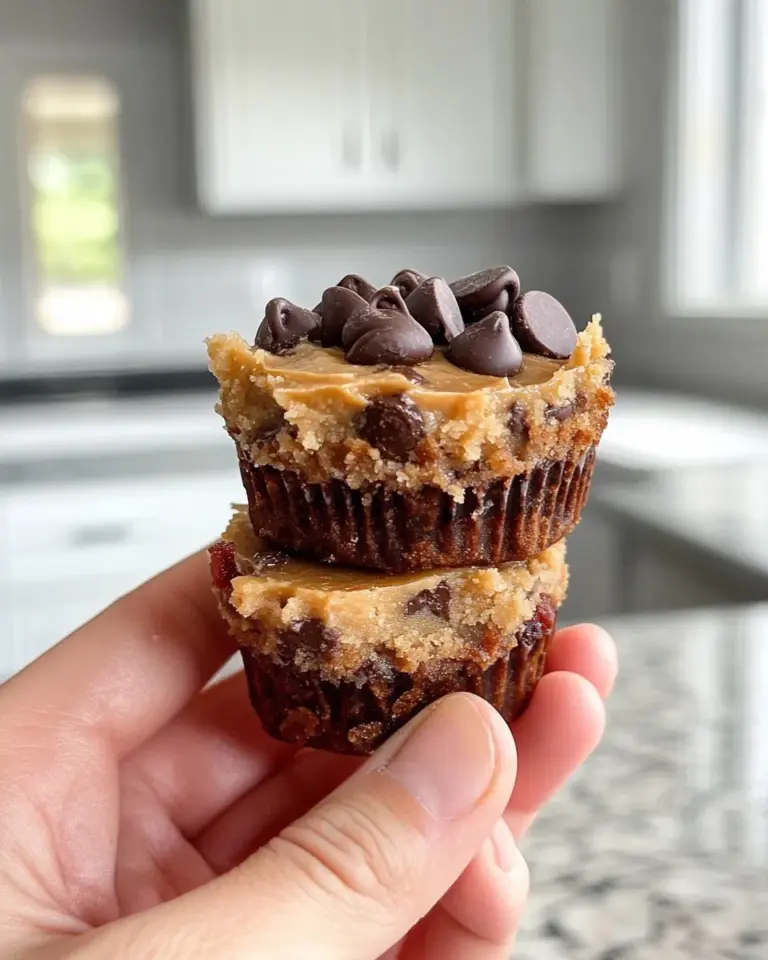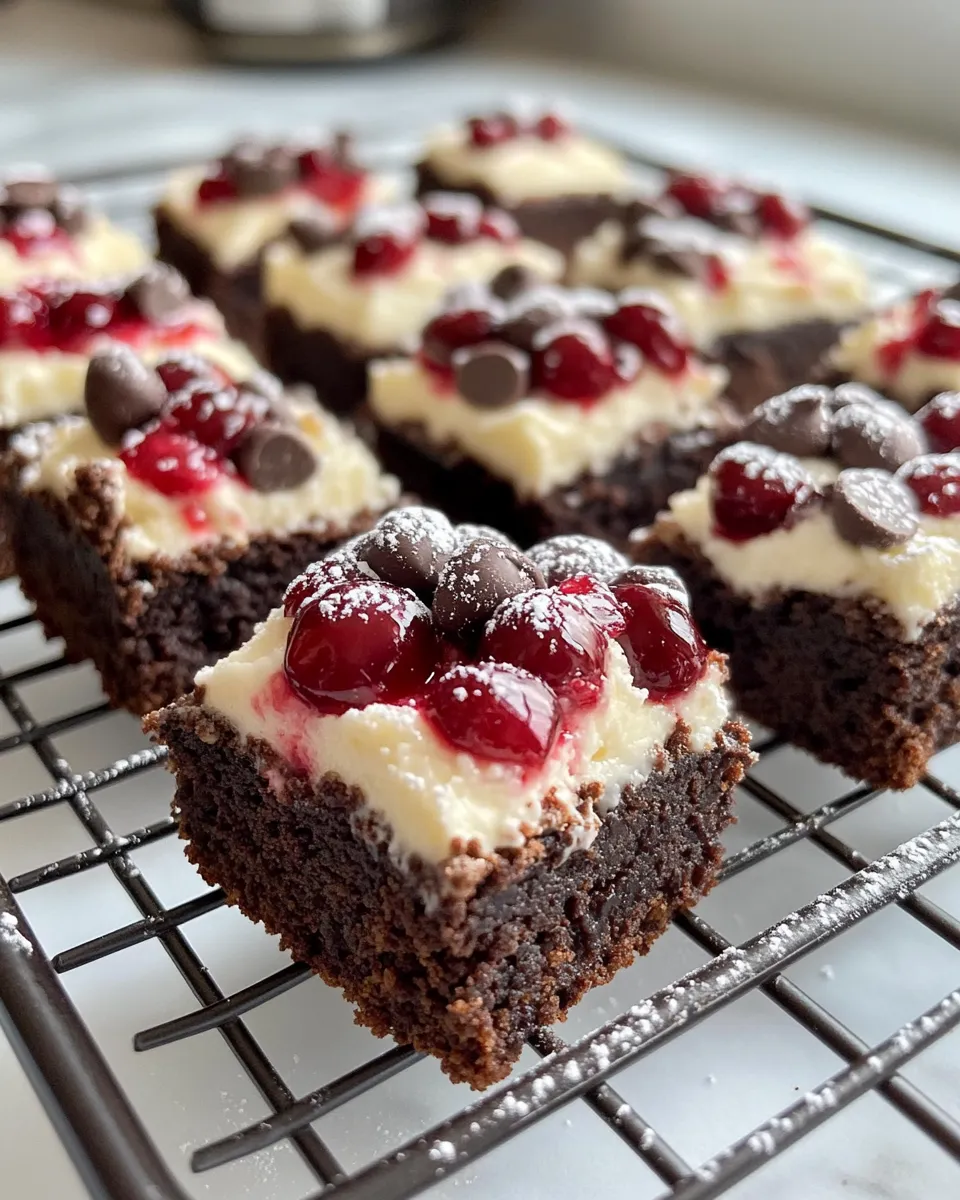
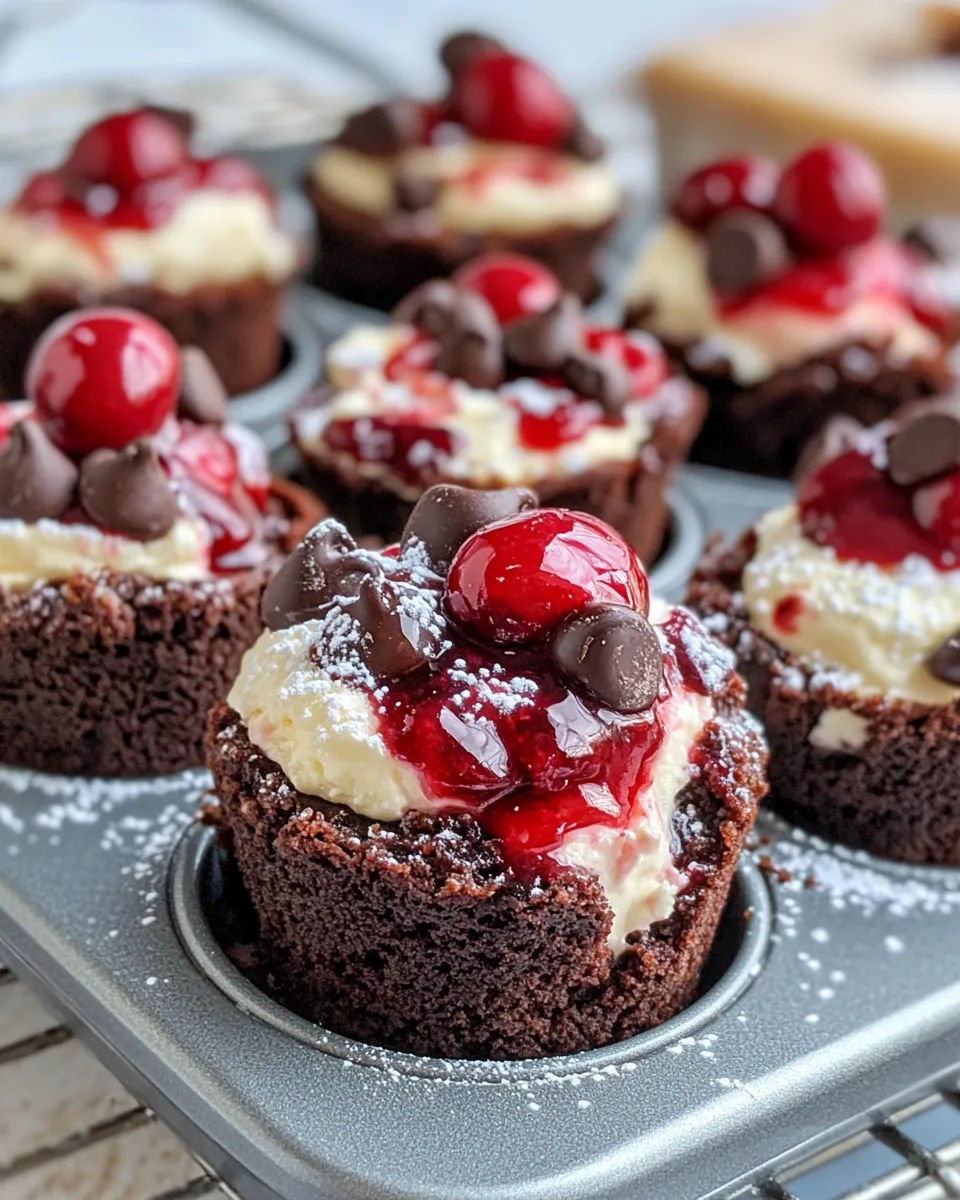
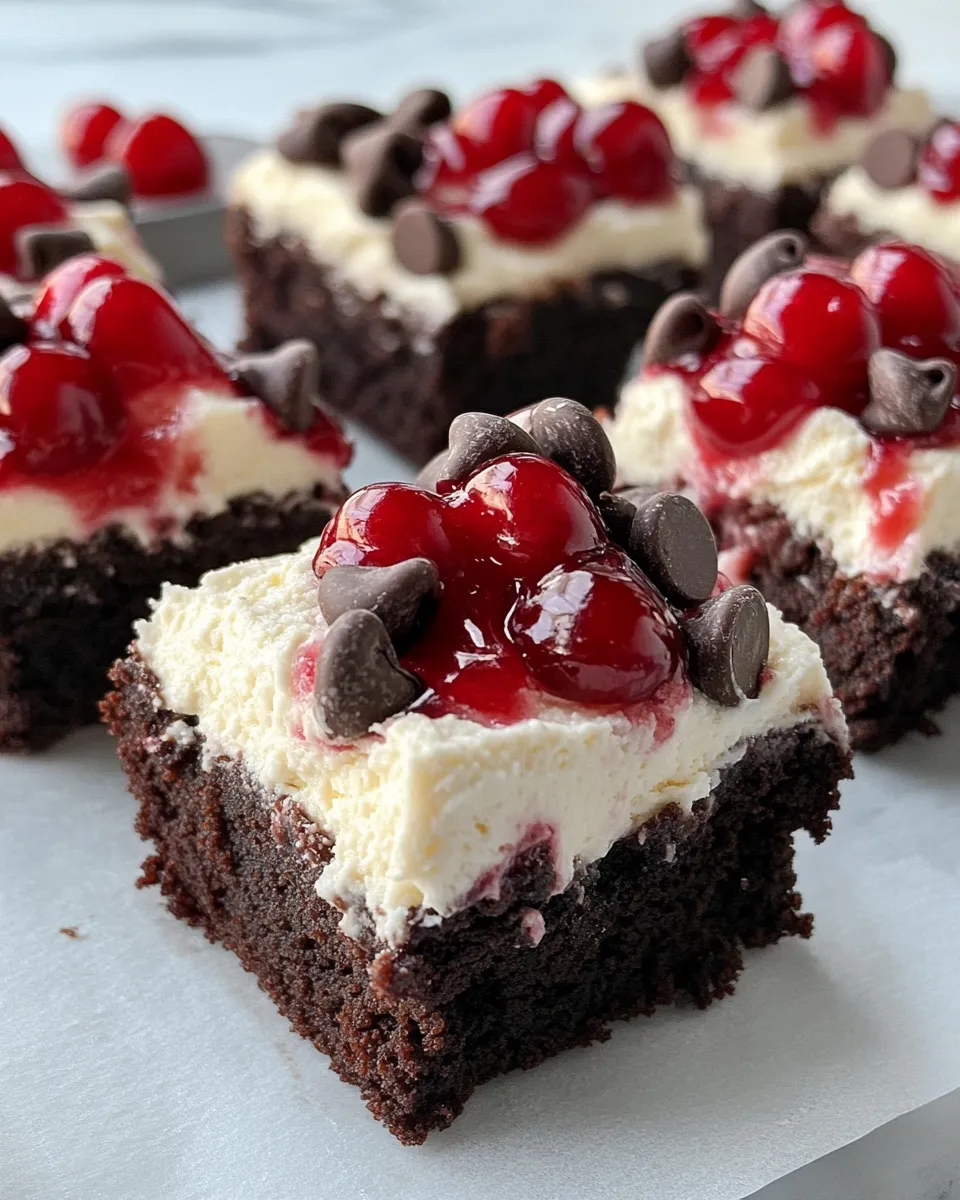
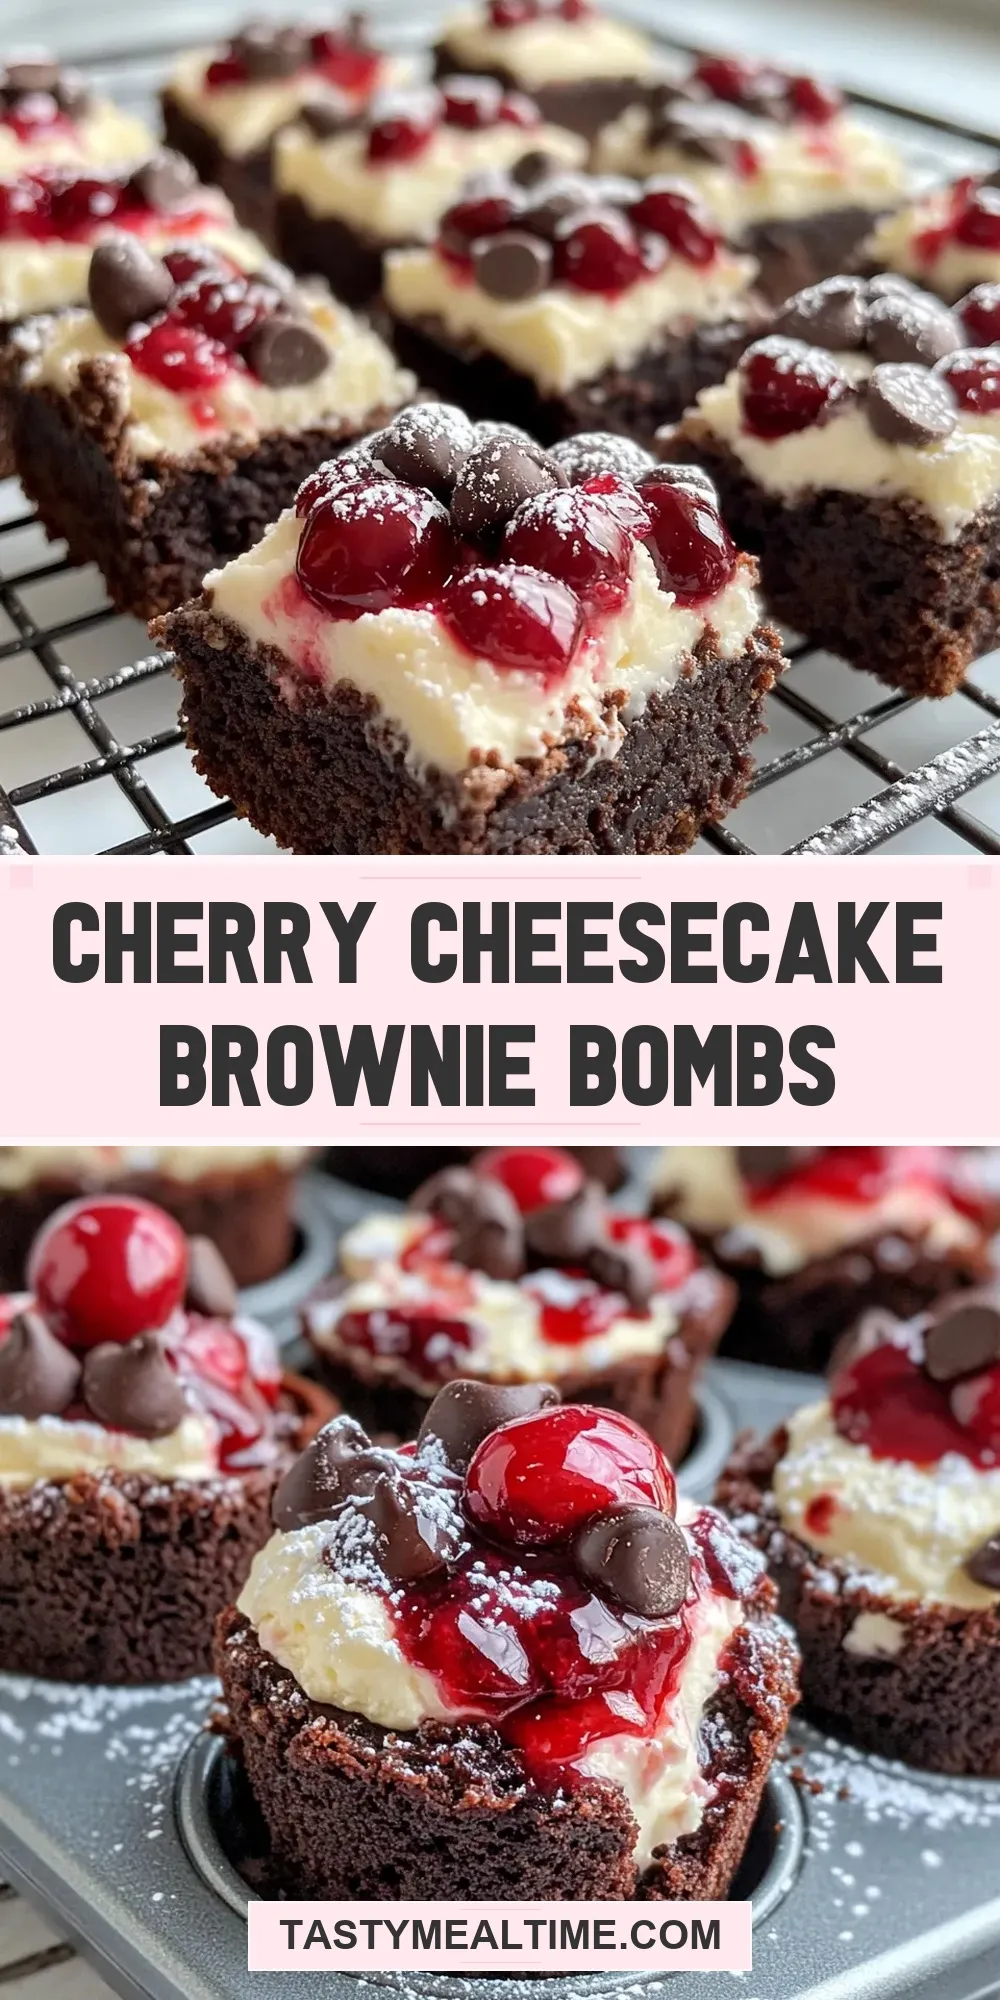
There’s something utterly irresistible about the combination of rich, fudgy brownies and creamy cheesecake swirled with a burst of cherry sweetness. Enter Cherry Cheesecake Brownie Bombs — bite-sized, decadent treats that pack all those flavors into one perfect little bomb of deliciousness. These delightful morsels are easy to whip up using a simple brownie mix, cream cheese, and a luscious cherry pie filling, making them ideal for weeknight baking or a festive occasion. Whether you’re sharing with friends or savoring a sweet moment alone, these brownie bombs are guaranteed to become a beloved staple in your recipe rotation.
Why This Recipe is a Keeper
If you’ve ever been torn between making brownies or cheesecake for dessert, why not have both? This recipe beautifully marries the best of both worlds with minimal fuss. Using just one box of brownie mix keeps things simple, while the cheesecake layer adds a luscious creaminess that elevates the entire experience. The cherry pie filling brings a pop of fruity brightness that cuts through the richness, creating a perfectly balanced bite. Plus, these Cherry Cheesecake Brownie Bombs are portable, shareable, and make a stunning presentation for parties or potlucks. They’re a crowd-pleaser that’s as fun to make as they are to eat!
What’s in the Bowl
- 1 box brownie mix – Your base for fudgy, chocolatey goodness.
- 1/4 cup vegetable oil – Provides moisture and richness to the brownie batter.
- 2 large eggs – Helps bind everything together and adds structure.
- 8 oz cream cheese, softened – The star of the cheesecake layer, offering creamy texture.
- 1/4 cup granulated sugar – Sweetens the cheesecake layer just right.
- 1 tsp vanilla extract – Enhances flavor depth in the cheesecake mix.
- 1/2 cup cherry pie filling – Adds fruity bursts and a touch of tartness.
- 1/4 cup all-purpose flour – Helps thicken and stabilize the cheesecake filling.
- 1/4 cup powdered sugar – A light dusting for a pretty finish.
- 1/4 cup mini chocolate chips – Optional but highly recommended for extra chocolatey bites.
Gear Checklist
- Muffin tin – For shaping the brownie bombs perfectly.
- Muffin liners – Makes removal easier and cleanup quicker.
- Mixing bowls – One for the brownie batter, one for the cheesecake filling.
- Electric mixer or whisk – To beat the cream cheese mixture smooth.
- Spoon or cookie scoop – For even portioning of batter and filling.
- Cooling rack – Allows the brownie bombs to cool evenly without getting soggy.
Cherry Cheesecake Brownie Bombs: How It’s Done
Step 1: Prep Your Oven and Muffin Tin
Preheat your oven to 350°F (175°C). Line a 12-cup muffin tin with paper liners or lightly grease it to prevent sticking.
Step 2: Make the Brownie Batter
In a medium bowl, combine the brownie mix, vegetable oil, and eggs. Stir until just combined — don’t overmix to keep the brownies tender. If you love chocolate chips, fold in half of the mini chocolate chips here for extra bursts of chocolate.
Step 3: Whip Up the Cheesecake Filling
In a separate bowl, beat the softened cream cheese with the granulated sugar, vanilla extract, and all-purpose flour until smooth and creamy. This ensures a luscious cheesecake layer that won’t crack or separate during baking.
Step 4: Assemble the Brownie Bombs
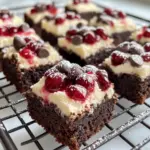
Scoop a tablespoon of brownie batter into each muffin cup, spreading it slightly to cover the bottom. Add about a teaspoon of the cheesecake filling on top of the brownie layer, then drop a small spoonful of cherry pie filling right in the center of the cheesecake layer. Add another tablespoon of brownie batter over the top to “bomb” the cheesecake and cherry filling inside. Finish by sprinkling the remaining mini chocolate chips on top for a gorgeous finish.
Step 5: Bake to Perfection
Bake the muffin tin in the preheated oven for 18-22 minutes, or until the tops are set and a toothpick inserted into the brownie layer (avoiding the cheesecake center) comes out with moist crumbs. The cheesecake layer will remain soft and creamy inside.
Step 6: Cool and Dust
Allow the brownie bombs to cool in the pan for 10 minutes, then transfer them to a cooling rack. Once completely cool, dust with powdered sugar for a pretty, sweet finish.
Holiday-Friendly Variations
- Swap cherry pie filling with raspberry or strawberry for a different berry twist.
- Add a sprinkle of chopped nuts, like pecans or almonds, into the brownie batter for crunch.
- Mix in a teaspoon of instant espresso powder to the brownie mix to deepen the chocolate flavor.
- Top with white chocolate chips or drizzle melted white chocolate for a festive look.
- For a holiday party, pair these Dark Cherry Chocolate Chunk Cookies alongside for a cherry-themed dessert spread.
- Try swirling in some crushed peppermint candies into the cheesecake filling for a seasonal mint twist.
- Serve with a dollop of whipped cream and fresh cherries for an elegant presentation.
Slip-Ups to Skip
- Overmixing the brownie batter: This can make your brownies tough rather than fudgy.
- Using cold cream cheese: This makes it harder to achieve a smooth cheesecake layer and can cause lumps.
- Overbaking: You want the brownie layer set but still moist, and the cheesecake creamy inside — avoid baking until completely firm.
- Skipping the flour in the cheesecake mix: This can cause the cheesecake to crack or weep during baking.
- Ignoring muffin liners: The brownie bombs are sticky and can be difficult to remove without liners or proper greasing.
Meal Prep & Storage Notes
These Cherry Cheesecake Brownie Bombs are perfect for making ahead. Store them in an airtight container at room temperature for up to 3 days. For longer storage, keep them in the refrigerator for up to a week — just bring them to room temperature before serving for the best texture. They also freeze beautifully! Wrap each brownie bomb individually in plastic wrap and place in a freezer-safe container. When ready to enjoy, thaw overnight in the fridge and warm slightly in the microwave for a freshly-baked feel.
FAQ
Can I make these brownie bombs gluten-free?
Absolutely! Use a gluten-free brownie mix and substitute the all-purpose flour in the cheesecake filling with a gluten-free all-purpose flour blend to keep these treats safe for gluten-sensitive friends.
Is it necessary to use a boxed brownie mix?
While this recipe is designed for convenience with a boxed mix, you can use your favorite homemade brownie batter if you prefer. Just ensure the batter is thick enough to hold the cheesecake and cherry filling inside the muffin cups.
Can I substitute the cherry pie filling with fresh cherries?
Fresh cherries can be used, but they won’t have the same syrupy sweetness and texture as pie filling. If using fresh cherries, consider tossing them with a bit of sugar and cornstarch to mimic the pie filling consistency.
What’s the best way to serve these brownie bombs?
They’re perfect on their own or paired with a scoop of vanilla ice cream. For a fun twist, serve alongside Pink Strawberry Cheesecake Crumble Cookies or Brownie Lava Center Cookie Cups for a decadent dessert spread.
Next Up in Your Queue
- Dark Cherry Chocolate Chunk Cookies – Another cherry-chocolate delight to keep your dessert game strong.
- Pink Strawberry Cheesecake Crumble Cookies – If you love cheesecake and cookies, these are a must-try.
- Brownie Lava Center Cookie Cups – Gooey, chocolatey centers that will satisfy any sweet tooth.
Final Thoughts
These Cherry Cheesecake Brownie Bombs are the kind of dessert that feels indulgent yet effortless. Their combination of fudgy brownie, creamy cheesecake, and sweet cherry filling creates a trifecta of flavors that’s simply unforgettable. Whether you’re baking for a special occasion or just because, these brownie bombs bring joy with every bite. They’re versatile, easy to customize, and perfect for sharing — or not! So grab your muffin tin, get mixing, and prepare to have a new favorite dessert in your baking arsenal.
Rich chocolate, tangy cheesecake, and juicy cherries all wrapped up in one bite-sized bomb of bliss — what’s not to love?
Share on Pinterest
Cherry Cheesecake Brownie Bombs
Ingredients
- 1 box brownie mix
- 1/4 cup vegetable oil
- 2 large eggs
- 8 oz cream cheese softened
- 1/4 cup granulated sugar
- 1 tsp vanilla extract
- 1/2 cup cherry pie filling
- 1/4 cup all-purpose flour
- 1/4 cup powdered sugar for dusting
- 1/4 cup mini chocolate chips optional
Instructions
- Preheat your oven to 350°F (175°C). Line a 12-cup muffin tin with paper liners or lightly grease it to prevent sticking.
- In a medium bowl, combine the brownie mix, vegetable oil, and eggs. Stir until just combined — don’t overmix to keep the brownies tender. Fold in half of the mini chocolate chips if using.
- In a separate bowl, beat the softened cream cheese with the granulated sugar, vanilla extract, and all-purpose flour until smooth and creamy.
- Scoop a tablespoon of brownie batter into each muffin cup, spreading it slightly to cover the bottom. Add about a teaspoon of the cheesecake filling on top, then drop a small spoonful of cherry pie filling in the center. Add another tablespoon of brownie batter over the top. Sprinkle the remaining mini chocolate chips on top.
- Bake for 18-22 minutes, or until the tops are set and a toothpick inserted into the brownie layer (avoiding the cheesecake center) comes out with moist crumbs. The cheesecake will remain soft and creamy inside.
- Allow to cool in the pan for 10 minutes, then transfer to a cooling rack. Once completely cool, dust with powdered sugar before serving.
Equipment
- Muffin Tin
- Muffin liners
- Mixing Bowls
- Electric Mixer or Whisk
- Spoon or cookie scoop
- Cooling Rack
Notes
- For a berry twist, swap cherry pie filling with raspberry or strawberry filling.
- Store in an airtight container at room temperature for up to 3 days or refrigerate up to a week.
- Freeze individually wrapped brownie bombs for longer storage and thaw before serving.