
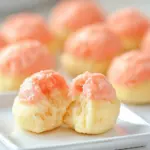
If you’re looking for a dessert that’s as whimsical as it is delicious, let me introduce you to the Jigglypuff Pink Cream Puffs. Inspired by the adorable Pokémon, these cream puffs are not only visually appealing but also an absolute delight to eat. With a light, airy shell and a sweet, luscious filling, they make for the perfect treat at any gathering or simply as a sweet indulgence for yourself. Let’s dive into the world of baking and create these delightful puffs that will have everyone singing your praises!
Why It’s My Go-To
The Jigglypuff Pink Cream Puffs have quickly become one of my favorite desserts to whip up for special occasions. They’re versatile, allowing for endless flavor combinations in the cream filling, and their charming pink hue is perfect for parties. Plus, they bring back nostalgic memories of childhood games and adventures with friends. Whether it’s a birthday, a casual get-together, or just a weekend treat, these cream puffs never fail to impress!
Your Shopping Guide
- Milk: 1 cup of any percentage will do, but whole milk gives a richer flavor.
- Heavy cream: 1/2 cup for that luscious filling.
- Granulated sugar: 1/2 cup (100g) to sweeten the cream and dough.
- Cornstarch: 2 tablespoons for a thick and creamy filling.
- Salt: 1/4 teaspoon to balance sweetness.
- Egg yolks: 4 large for a rich custard-like filling.
- Vanilla extract: 1 teaspoon for a classic flavor.
- Water: 1/2 cup to help with the choux pastry.
- Unsalted butter: 1/4 cup (2oz), diced for flavor in the pastry.
- Sugar: 1 teaspoon for the choux pastry.
- All-purpose flour: 1/2 cup (60g) for making the pastry.
- Red food coloring: 2 to 3 drops to achieve that perfect pink shade.
- Eggs: 2 large and 1 additional large egg for egg wash.
- Water: 1 tablespoon for the egg wash.
Equipment & Tools
- Mixing bowls: For preparing your filling and dough.
- Whisk: Essential for blending your ingredients smoothly.
- Double boiler: To ensure gentle heating of your custard filling.
- Piping bag: For filling the cream puffs with ease.
- Baking sheet: To hold the puffs while they bake.
- Parchment paper: For easy cleanup and to prevent sticking.
- Oven thermometer: To ensure your oven is at the right temperature for baking.
Jigglypuff Pink Cream Puffs Made Stepwise
Step 1: Prepare the Pastry Cream
In a medium saucepan, whisk together the milk, half the sugar (1/4 cup), cornstarch, and salt until smooth. Heat this mixture over medium heat until it starts to simmer. In a separate bowl, whisk together the egg yolks and the remaining sugar. Gradually add a few spoonfuls of the hot milk mixture into the yolks to temper them, then pour the yolk mixture back into the saucepan.
Step 2: Thicken the Cream
Continue to cook the mixture over medium heat, whisking constantly until it thickens and starts to bubble. Remove from heat and stir in the vanilla extract. Cover with plastic wrap directly on the surface and let it cool in the refrigerator.
Step 3: Make the Choux Pastry
In another saucepan, combine the water, diced butter, sugar, and salt. Bring to a boil over medium heat. Once boiling, remove from heat and add the flour all at once. Stir vigorously until the mixture forms a ball and pulls away from the sides of the pan.
Step 4: Add Eggs to the Dough
Let the dough cool slightly before adding the eggs one at a time, mixing well after each addition until fully incorporated. Add 2 to 3 drops of red food coloring to give the dough that signature pink hue.
Step 5: Pipe the Puffs
Preheat your oven to 400°F (200°C). Transfer the choux pastry to a piping bag fitted with a large round tip. Pipe small mounds (about 1.5 inches wide) onto a baking sheet lined with parchment paper, leaving space between each puff.
Step 6: Egg Wash
In a small bowl, whisk together the extra large egg with 1 tablespoon of water. Brush the tops of the puffs with the egg wash for a beautiful golden color.
Step 7: Bake the Puffs
Bake in the preheated oven for about 20-25 minutes, or until the puffs are golden brown and puffed up. Do not open the oven door while they bake, as this can cause them to deflate.
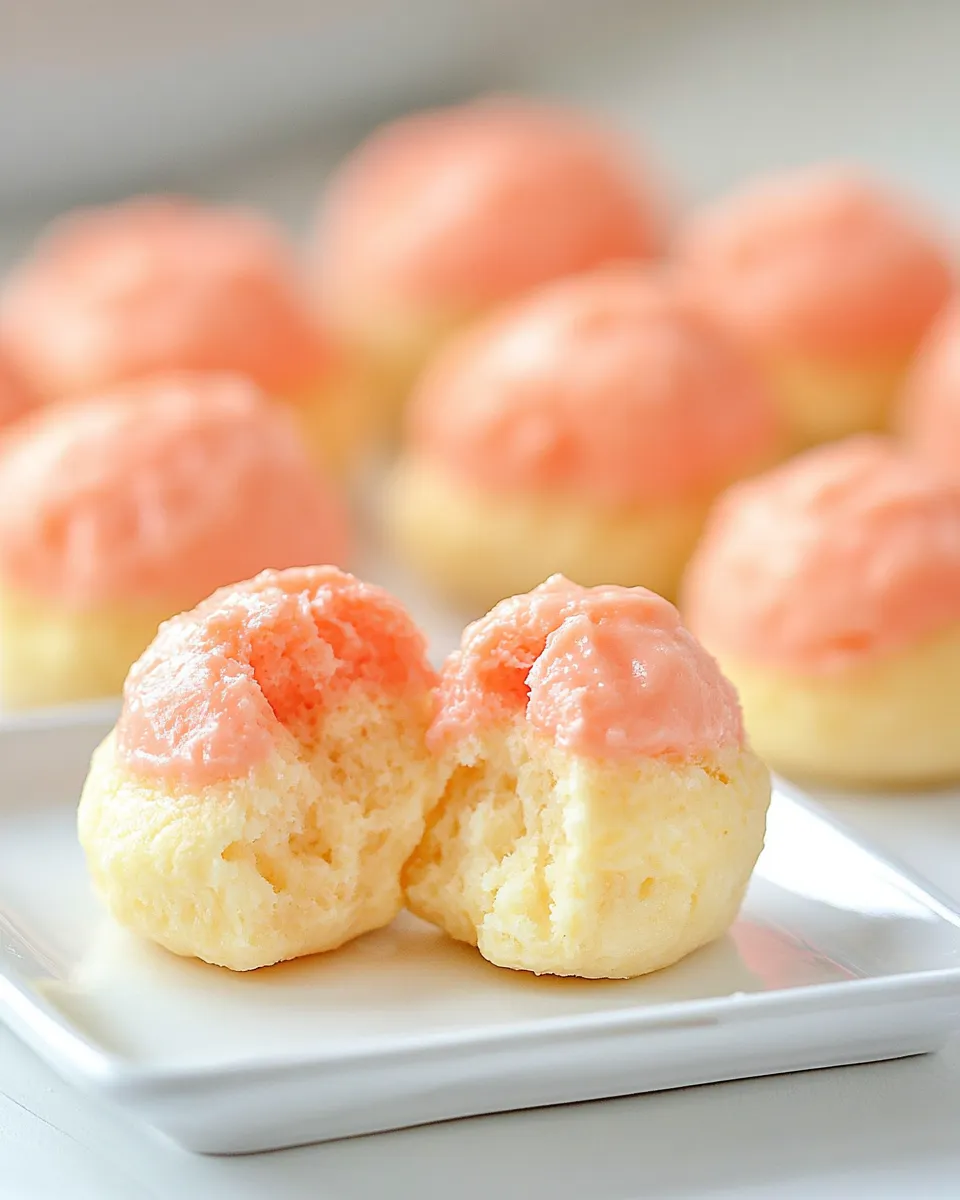
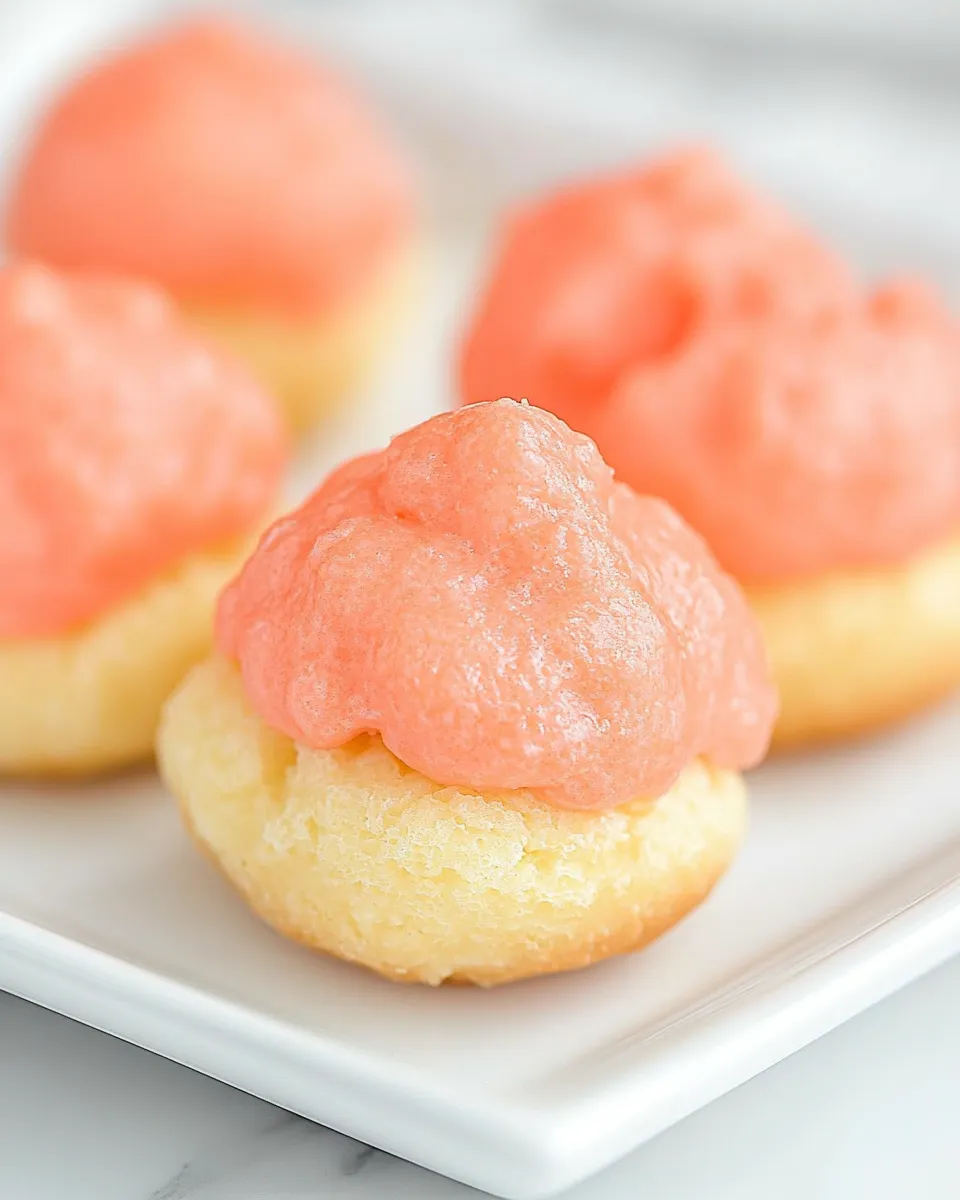
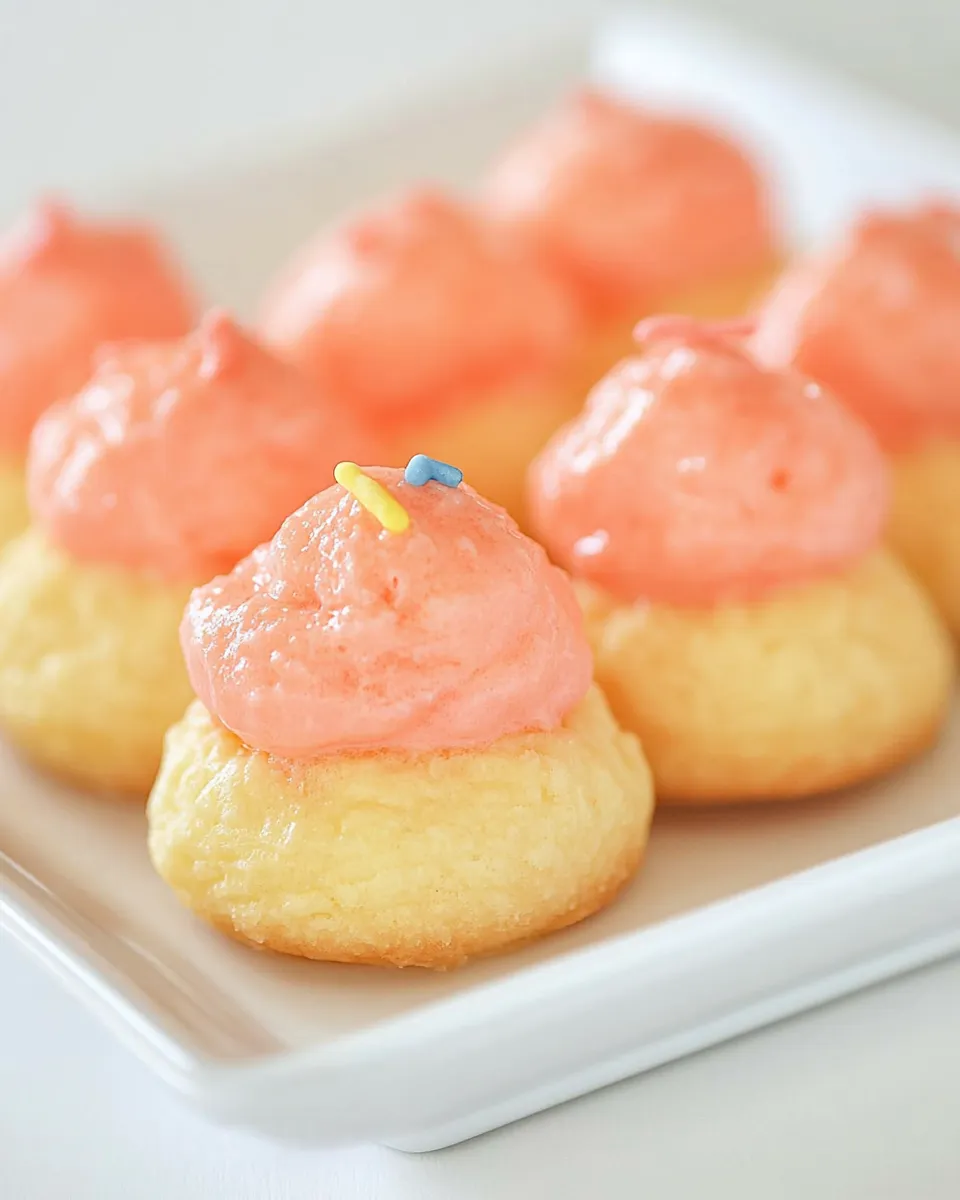
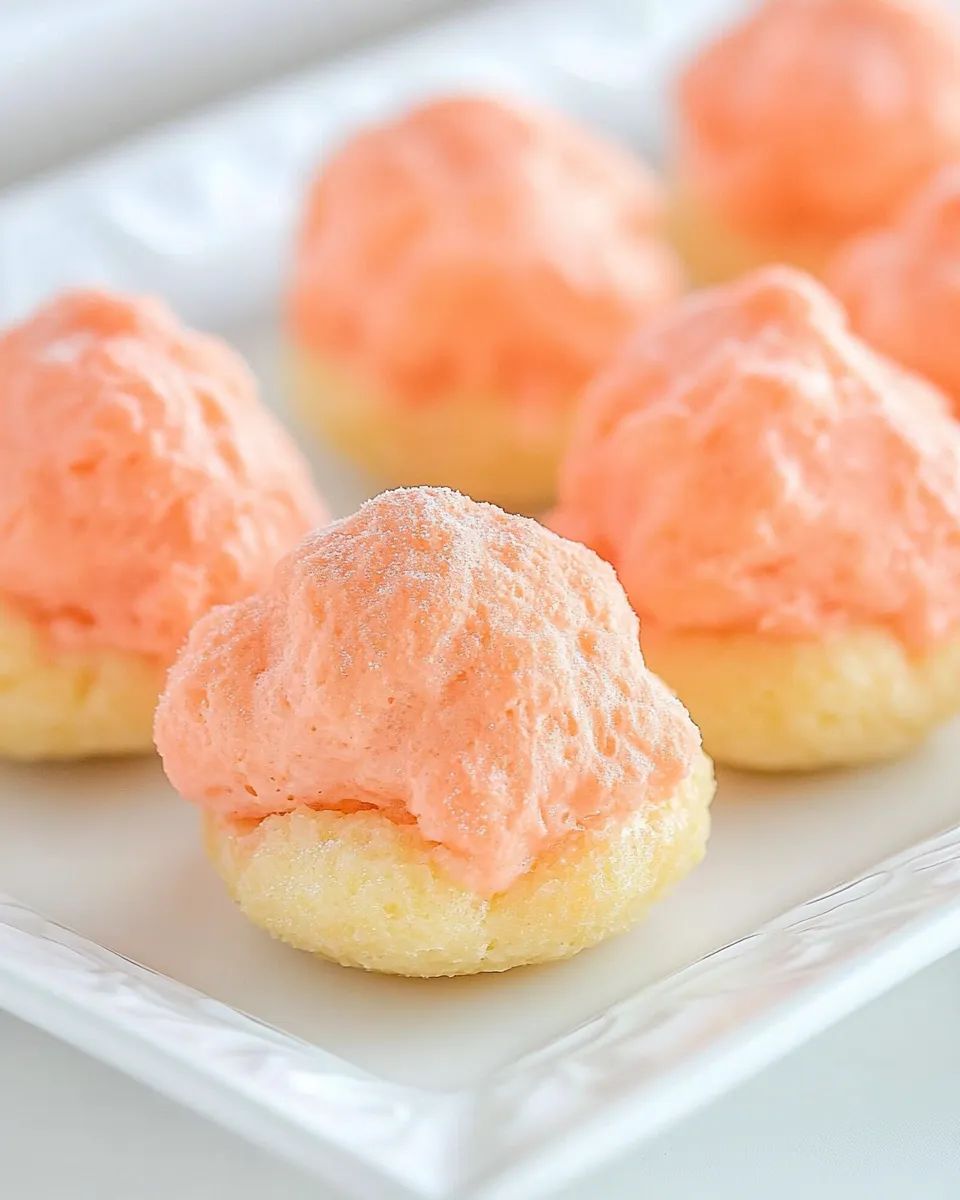
Step 8: Fill the Cream Puffs
Once baked, remove the puffs from the oven and let them cool completely on a wire rack. Once cool, use a small knife to cut a slit in the side of each puff and fill them with the chilled pastry cream using your piping bag.
Step 9: Serve & Enjoy
Dust the filled Jigglypuff Pink Cream Puffs with powdered sugar for a finishing touch and serve immediately. Enjoy the delightful blend of flavors and textures as you take a bite!
Dietary Swaps & Alternatives
- Non-dairy milk: Substitute almond, soy, or oat milk for the milk.
- Plant-based cream: Use coconut cream or any non-dairy heavy cream alternative.
- Gluten-free flour: Swap all-purpose flour with a gluten-free blend for a gluten-free version.
- Natural sweeteners: Use coconut sugar or maple syrup for a healthier sweetening option.
Avoid These Traps
- Don’t open the oven door while the puffs are baking; this can cause them to collapse.
- Ensure your butter is fully melted before adding flour to avoid lumps in your dough.
- Make sure to cool the dough a bit before adding eggs to prevent scrambling.
- Be careful not to overfill the cream puffs, as this can cause them to burst.
Freezer-Friendly Notes
The Jigglypuff Pink Cream Puffs can be made ahead of time! Store the baked but unfilled puffs in an airtight container in the freezer for up to a month. When you’re ready to enjoy them, simply thaw and fill with the cream. Avoid filling them until just before serving to ensure they stay crisp!
Jigglypuff Pink Cream Puffs FAQs
Can I make the pastry cream in advance?
Absolutely! You can prepare the pastry cream a day ahead and keep it stored in the refrigerator. Just make sure to cover it with plastic wrap to prevent a skin from forming on top.
What’s the best way to store leftover cream puffs?
Store any leftover filled cream puffs in the refrigerator in an airtight container for up to 2 days. They are best enjoyed fresh, but they will still be tasty for a short time.
Can I customize the filling flavor?
Yes! Feel free to experiment with different flavors by adding extracts like almond or lemon to the pastry cream, or even folding in some melted chocolate for a decadent twist!
Why did my cream puffs flatten after baking?
This can occur if the oven temperature is too low, resulting in insufficient heat to create steam, which is crucial for puffing. Ensure your oven is properly preheated and avoid opening the door during baking.
Hungry for More?
Whether you’re a seasoned baker or just starting out, the Jigglypuff Pink Cream Puffs are sure to charm your friends and family with their delightful taste and fun presentation. They are a fantastic way to bring creativity into your kitchen, and I hope you enjoy every step of the process as much as the final result. Happy baking!
Jigglypuff Pink Cream Puffs
Ingredients
For the Pastry Cream:
- 1 cup Milk any percentage, whole milk preferred
- 1/2 cup Heavy cream
- 1/2 cup Granulated sugar
- 2 tablespoons Cornstarch
- 1/4 teaspoon Salt
- 4 large Egg yolks
- 1 teaspoon Vanilla extract
For the Choux Pastry:
- 1/2 cup Water
- 1/4 cup Unsalted butter diced
- 1 teaspoon Sugar
- 1/2 cup All-purpose flour
- 2 to 3 drops Red food coloring to achieve the perfect pink shade
- 2 large Eggs
- 1 large Egg for egg wash
- 1 tablespoon Water for egg wash
Instructions
Instructions
- In a medium saucepan, whisk together the milk, half the sugar (1/4 cup), cornstarch, and salt until smooth. Heat this mixture over medium heat until it starts to simmer. In a separate bowl, whisk together the egg yolks and the remaining sugar. Gradually add a few spoonfuls of the hot milk mixture into the yolks to temper them, then pour the yolk mixture back into the saucepan.
- Continue to cook the mixture over medium heat, whisking constantly until it thickens and starts to bubble. Remove from heat and stir in the vanilla extract. Cover with plastic wrap directly on the surface and let it cool in the refrigerator.
- In another saucepan, combine the water, diced butter, sugar, and salt. Bring to a boil over medium heat. Once boiling, remove from heat and add the flour all at once. Stir vigorously until the mixture forms a ball and pulls away from the sides of the pan.
- Let the dough cool slightly before adding the eggs one at a time, mixing well after each addition until fully incorporated. Add 2 to 3 drops of red food coloring to give the dough that signature pink hue.
- Preheat your oven to 400°F (200°C). Transfer the choux pastry to a piping bag fitted with a large round tip. Pipe small mounds (about 1.5 inches wide) onto a baking sheet lined with parchment paper, leaving space between each puff.
- In a small bowl, whisk together the extra large egg with 1 tablespoon of water. Brush the tops of the puffs with the egg wash for a beautiful golden color.
- Bake in the preheated oven for about 20-25 minutes, or until the puffs are golden brown and puffed up. Do not open the oven door while they bake, as this can cause them to deflate.
- Once baked, remove the puffs from the oven and let them cool completely on a wire rack. Once cool, use a small knife to cut a slit in the side of each puff and fill them with the chilled pastry cream using your piping bag.
- Dust the filled Jigglypuff Pink Cream Puffs with powdered sugar for a finishing touch and serve immediately. Enjoy the delightful blend of flavors and textures as you take a bite!
Equipment
- Mixing Bowls
- Whisk
- Double Boiler
- Piping Bag
- Baking Sheet
- Parchment Paper
- Oven thermometer
Notes
- These cream puffs can be made ahead and frozen unfilled for up to a month.
- Experiment with different flavors by adding extracts or melted chocolate to the filling.
- Store leftover filled puffs in the refrigerator for up to 2 days for best freshness.


