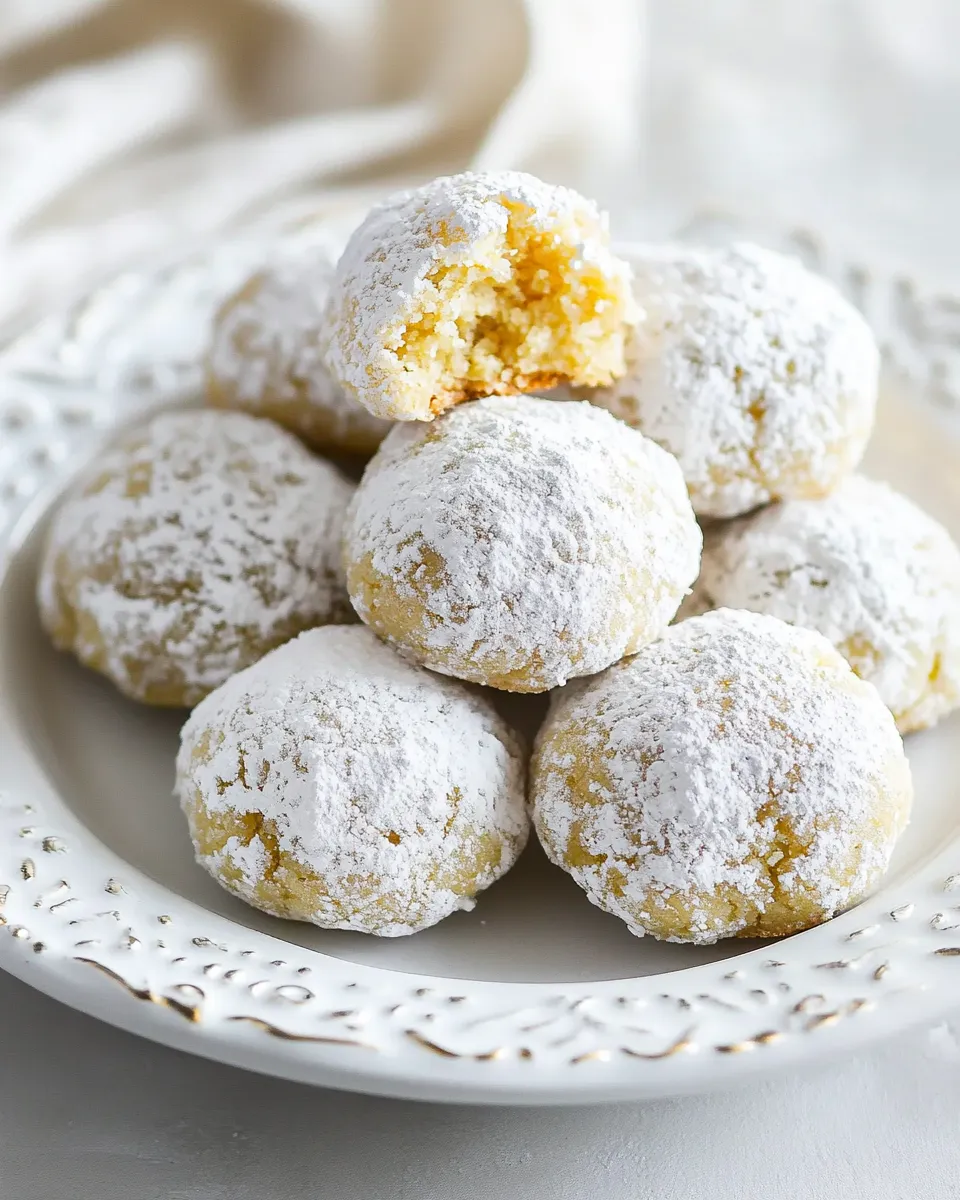
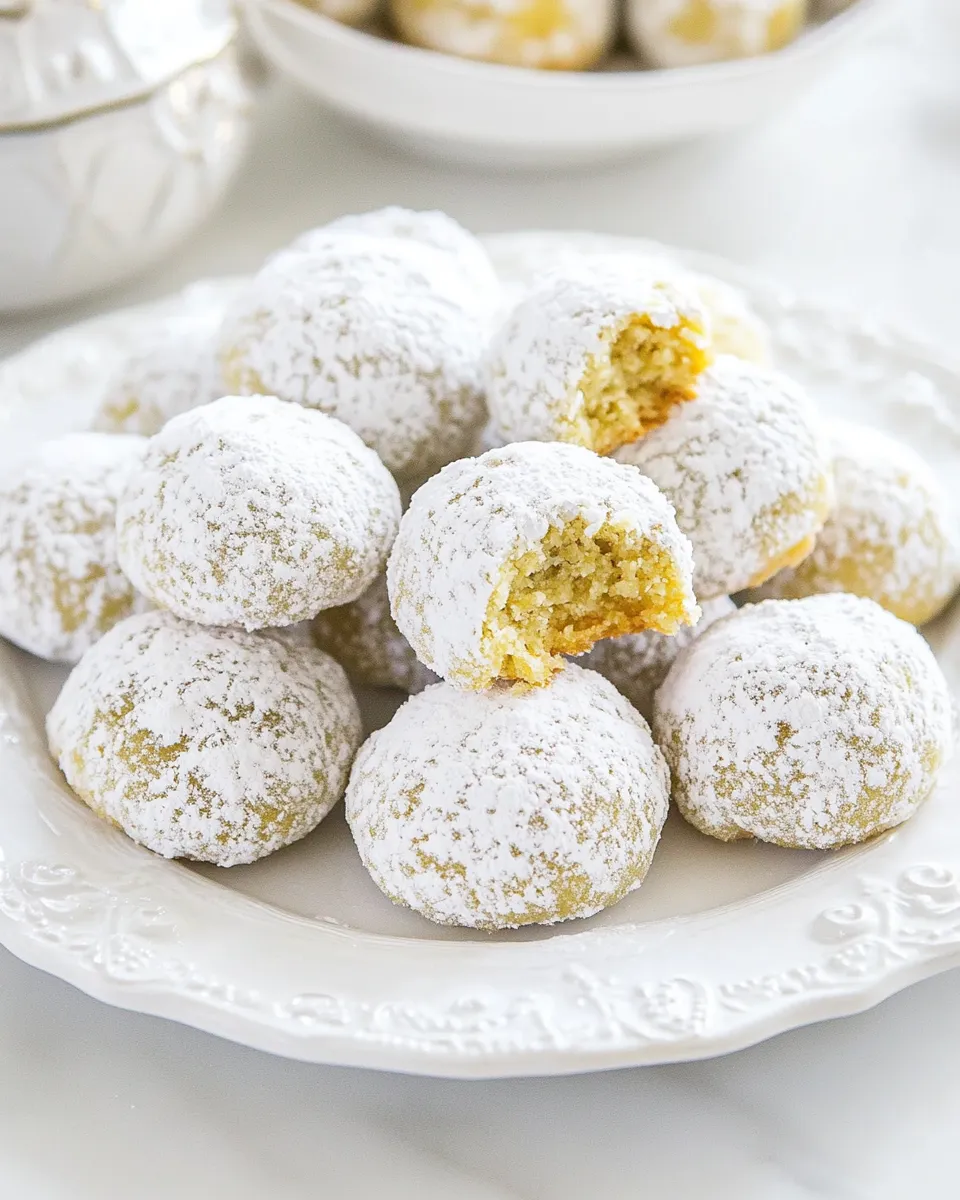
Italian Wedding Cookies, also known as Italian Butter Nuts or Snowball Cookies, are a delightful treat often found on dessert tables at celebrations. These melt-in-your-mouth cookies are not only delicious but also carry a rich cultural history, traditionally served at weddings, holidays, and festive gatherings. With their delicate texture and nutty flavor, they encapsulate the essence of Italian baking. Today, we’re diving into a simple yet elegant recipe that will make your taste buds sing and leave your guests asking for more.
What Makes This Recipe Special
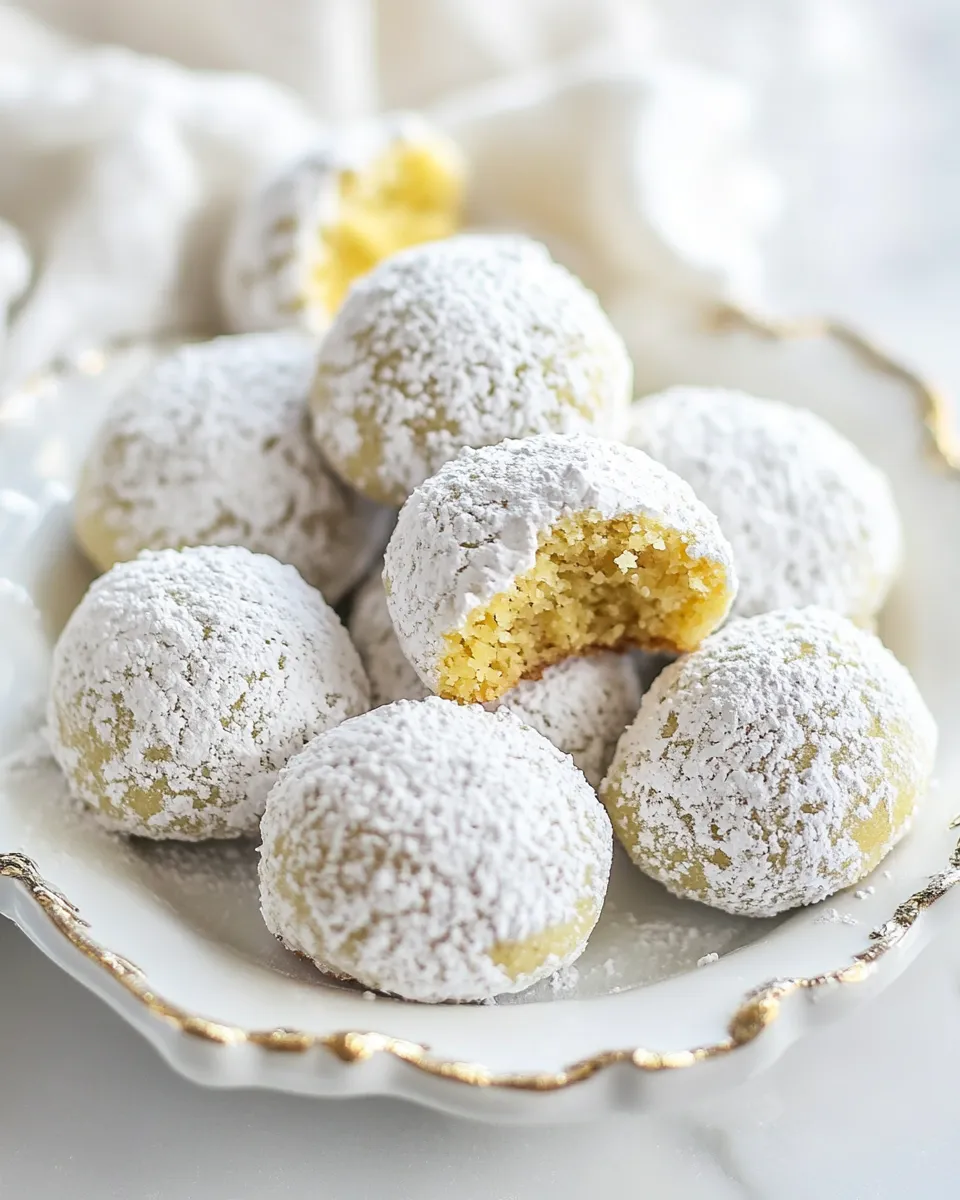
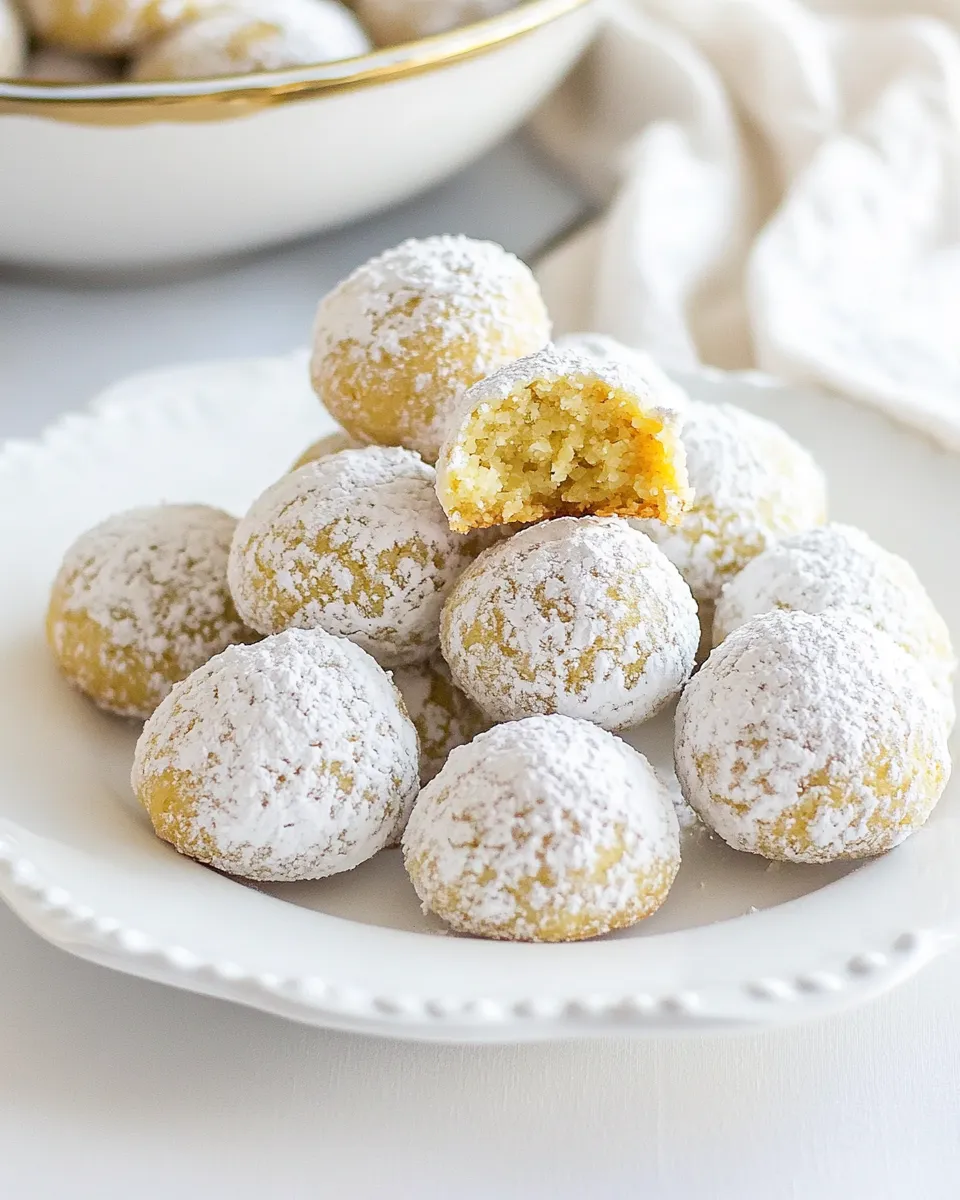
This recipe for Italian Wedding Cookies stands out because it combines the richness of butter with the unique flavor of finely ground pistachios (or almonds) and a hint of vanilla. The cookies are rolled in powdered sugar, creating a beautiful and inviting presentation. The balance of flavors and textures makes them a perfect companion for coffee or tea, and their versatility allows them to shine on any dessert table, whether it’s a wedding, holiday gathering, or just a cozy night at home.
What You’ll Need
- 3 cups all-purpose flour
- 2 cups finely ground pistachios (or almonds)
- 2 cups powdered sugar, divided
- 1 tablespoon vanilla extract
- 1 teaspoon salt
- 1 ½ cups unsalted butter, softened
Tools of the Trade
- Mixing bowl – For combining ingredients.
- Electric mixer – To cream the butter and sugar.
- Baking sheet – For baking the cookies.
- Parchment paper – To prevent sticking.
- Wire rack – For cooling the cookies.
- Measuring cups and spoons – For accurate ingredient measurements.
Step-by-Step: Italian Wedding Cookies
Step 1: Prepare Your Ingredients
Start by measuring out all your ingredients. This makes the baking process smoother and ensures you don’t forget anything.
Step 2: Preheat the Oven
Preheat your oven to 350°F (175°C). Line your baking sheets with parchment paper to avoid sticking.
Step 3: Cream the Butter and Sugar
In a large mixing bowl, cream the 1 ½ cups of softened unsalted butter with 1 cup of powdered sugar until light and fluffy. This process usually takes about 2-3 minutes with an electric mixer.
Step 4: Add the Vanilla and Dry Ingredients
Mix in the tablespoon of vanilla extract. Gradually add the 3 cups of all-purpose flour, 2 cups of finely ground pistachios (or almonds), and 1 teaspoon of salt. Stir until the mixture is well combined, but be careful not to overmix.
Step 5: Form the Cookies
Using your hands, form small balls of dough, about 1 inch in diameter. Place them on the prepared baking sheets, leaving some space between each cookie as they will spread slightly.
Step 6: Bake
Bake in the preheated oven for 15-20 minutes, or until the edges are lightly golden. Keep an eye on them to prevent over-baking, as you want them to remain soft and tender.
Step 7: Cool and Dust with Sugar
Once baked, remove the cookies from the oven and let them cool on the baking sheet for about 5 minutes. Then, transfer them to a wire rack to cool completely. After they are cool, roll them in the remaining powdered sugar until well coated.
Holiday & Seasonal Touches
- Substitute ground pistachios with hazelnuts for a different flavor profile.
- Add a teaspoon of almond extract for an extra layer of nuttiness.
- Incorporate festive sprinkles in the powdered sugar for a holiday touch.
- Serve these cookies alongside other traditional Italian desserts during the holidays.
Watch Outs & How to Fix
Here are some common pitfalls and how to avoid them:
- Overmixing the dough can lead to tough cookies. Mix just until combined.
- If the dough feels too crumbly, let it rest for a few minutes to allow the butter to soften slightly.
- Cookies that spread too much in the oven may need a bit more flour. Add in 1-2 tablespoons at a time until the desired consistency is reached.
- Be cautious with baking time; every oven is different. Check your cookies a few minutes early to ensure they don’t overbake.
Save for Later: Storage Tips
To keep your Italian Wedding Cookies fresh and delicious:
- Store them in an airtight container at room temperature for up to one week.
- For longer storage, freeze the cookies. Layer them between sheets of parchment paper in an airtight container for up to three months.
- Thaw frozen cookies at room temperature before serving, and feel free to dust them with additional powdered sugar for a fresh look.
Reader Questions
Can I use different nuts for this recipe?
Absolutely! While this recipe traditionally uses pistachios or almonds, you can experiment with other nuts like walnuts or hazelnuts for a unique flavor.
What can I do if my dough is too dry?
If your dough feels too dry, try adding a tablespoon of softened butter or a splash of milk to bring it together. Mix just until combined.
Can I make these cookies ahead of time?
Yes! You can make the dough ahead of time, roll it into balls, and freeze them. When you’re ready to bake, just pop them in the oven straight from the freezer; you may need to add a couple of extra minutes to the baking time.
Why do my cookies crumble when I try to roll them?
If your cookies are crumbling, it may be due to the dough being too dry. Make sure to cream the butter and sugar well, and consider adding a little more butter if needed.
In Closing
Italian Wedding Cookies are a wonderful blend of tradition and taste, perfect for any occasion. Whether you’re sharing them at a celebration or enjoying them with a cup of coffee, these cookies will surely impress. With their unique flavor and delightful texture, they are a true testament to the beauty of Italian baking. So gather your ingredients, follow the steps, and enjoy this delightful treat with your loved ones. Happy baking!

Italian Wedding Cookies
Ingredients
- 3 cups all-purpose flour
- 2 cups finely ground pistachios (or almonds)
- 2 cups powdered sugar divided
- 1 tablespoon vanilla extract
- 1 teaspoon salt
- 1.5 cups unsalted butter softened
Instructions
- Start by measuring out all your ingredients. This makes the baking process smoother and ensures you don’t forget anything.
- Preheat your oven to 350°F (175°C). Line your baking sheets with parchment paper to avoid sticking.
- In a large mixing bowl, cream the 1 ½ cups of softened unsalted butter with 1 cup of powdered sugar until light and fluffy. This process usually takes about 2-3 minutes with an electric mixer.
- Mix in the tablespoon of vanilla extract. Gradually add the 3 cups of all-purpose flour, 2 cups of finely ground pistachios (or almonds), and 1 teaspoon of salt. Stir until the mixture is well combined, but be careful not to overmix.
- Using your hands, form small balls of dough, about 1 inch in diameter. Place them on the prepared baking sheets, leaving some space between each cookie as they will spread slightly.
- Bake in the preheated oven for 15-20 minutes, or until the edges are lightly golden. Keep an eye on them to prevent over-baking, as you want them to remain soft and tender.
- Once baked, remove the cookies from the oven and let them cool on the baking sheet for about 5 minutes. Then, transfer them to a wire rack to cool completely. After they are cool, roll them in the remaining powdered sugar until well coated.
Equipment
- Mixing Bowl
- Electric Mixer
- Baking Sheet
- Parchment Paper
- Wire Rack
- Measuring cups and spoons
Notes
- Store cookies in an airtight container at room temperature for up to one week.
- Freeze cookies for longer storage, layered between parchment paper.
- Thaw frozen cookies at room temperature before serving and dust with powdered sugar.