
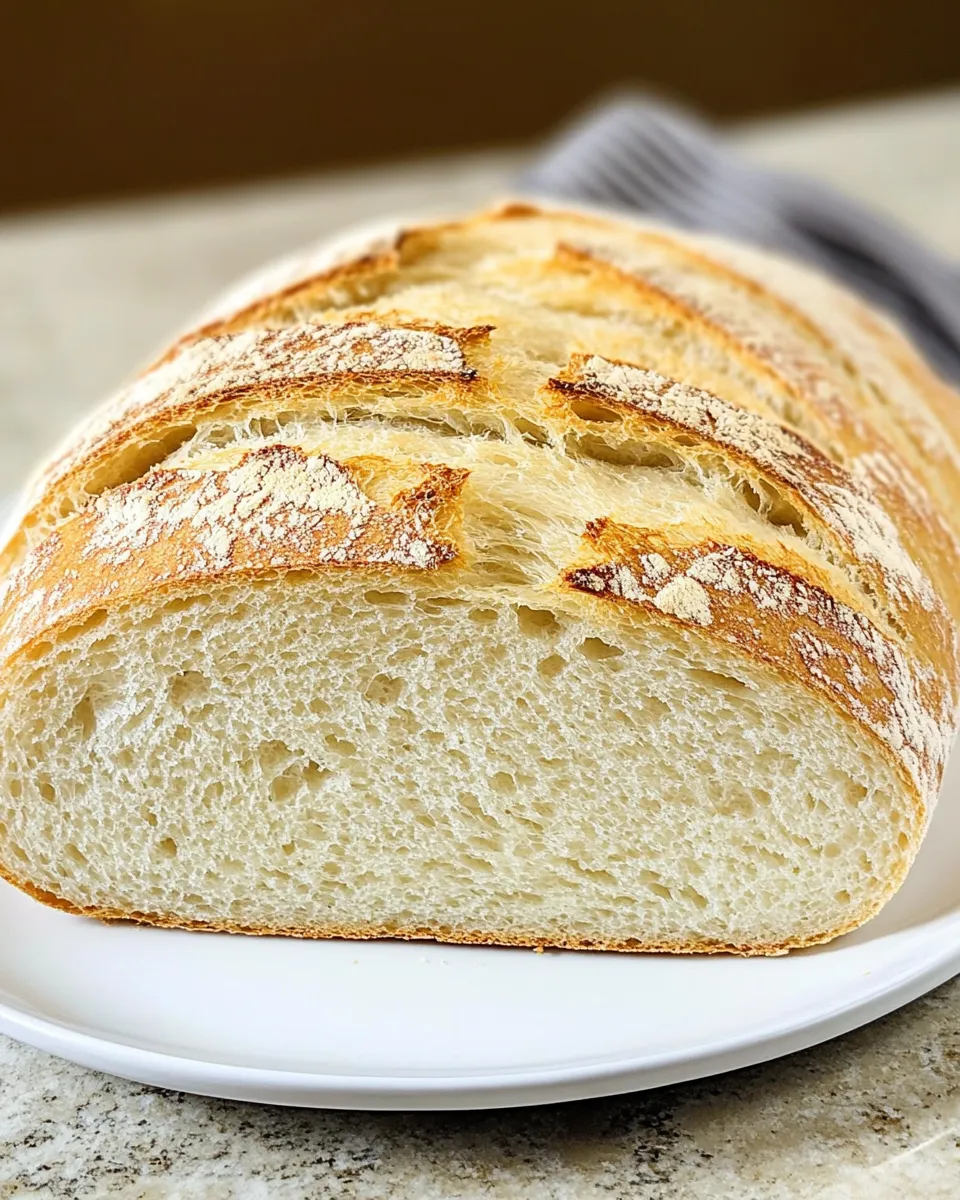
Artisan bread has a way of transforming our kitchens into warm and inviting spaces filled with the rich aroma of freshly baked goodness. Whether you’re a novice baker or a seasoned pro, this rustic loaf is a rewarding project that yields delicious results. With just a handful of ingredients, you can create a beautiful, crusty bread that’s perfect for sandwiches, toasting, or simply enjoying with a pat of butter. Let’s dive into the art of making artisan bread and discover why it’s worth the effort.
Top Reasons to Make Artisan Bread
- Freshness: There’s nothing quite like the taste of freshly baked bread, warm from the oven. You control the ingredients and the process, ensuring maximum freshness.
- Healthier Ingredients: You can avoid preservatives and artificial additives found in store-bought bread, making your loaf a healthier choice.
- Customization: With artisan bread, you can experiment with different flours, herbs, and add-ins to create a loaf tailored to your tastes.
- Skill Development: Baking artisan bread is a fantastic way to develop your baking skills, learning techniques that can be applied to other baked goods.
- Impressive Presentation: A beautifully baked artisan loaf is a show-stopper, perfect for gatherings or as a gift for friends and family.
What’s in the Bowl
- 3 cups water (lukewarm): This activates the yeast and creates a perfect environment for it to thrive.
- 1 tablespoon active dry yeast: The star ingredient that helps the bread rise and develop that lovely texture.
- 1 tablespoon salt: Essential for flavor and also helps control the fermentation process.
- 6 cups all-purpose flour: The backbone of your bread; it provides structure and helps with the rise.
Cook’s Kit
- Large mixing bowl: For combining your ingredients.
- Wooden spoon or dough whisk: To mix the dough without overworking it.
- Plastic wrap or a clean kitchen towel: To cover the dough while it rises.
- Baking stone or sheet: For creating a crispy crust in the oven.
- Sharp knife or bread lame: For scoring the dough before baking.
- Cooling rack: To let your bread cool down properly after baking.
Artisan Bread: How It’s Done
Step 1: Prepare the Yeast
In a large mixing bowl, combine the lukewarm water and active dry yeast. Let it sit for about 5-10 minutes until it becomes frothy. This means the yeast is activated and ready to work its magic.
Step 2: Mix the Ingredients
Once the yeast is frothy, add the salt and gradually stir in the all-purpose flour, one cup at a time. Use a wooden spoon or dough whisk to mix until a shaggy dough forms. You may not need all the flour; add it until the dough is cohesive but still slightly sticky.
Step 3: Knead the Dough
Turn the dough out onto a lightly floured surface. Knead it gently for about 5-7 minutes until it becomes smooth and elastic. Remember, you want to avoid overworking it.
Step 4: First Rise
Place the dough back into the mixing bowl and cover it with plastic wrap or a clean kitchen towel. Let it rise in a warm, draft-free area for about 1-2 hours or until it has doubled in size.
Step 5: Shape the Loaf
Once the dough has risen, gently punch it down to release the air. Turn it out onto a floured surface and shape it into a round or oblong loaf, depending on your preference.
Step 6: Second Rise
Place your shaped loaf onto a floured baking sheet or a parchment-lined baking stone. Cover it again and let it rise for about 30-60 minutes.
Step 7: Preheat the Oven
While the dough is rising, preheat your oven to 450°F (232°C). If you’re using a baking stone, place it in the oven to preheat as well.
Step 8: Score the Dough
Once the dough has risen, use a sharp knife or bread lame to score the top of the loaf. This allows the bread to expand while baking and creates a beautiful finished look.
Step 9: Bake the Bread
Carefully transfer the loaf to the preheated oven. Bake for 30-35 minutes, or until the crust is golden brown and the loaf sounds hollow when tapped on the bottom.
Step 10: Cool and Enjoy
Remove the bread from the oven and let it cool on a wire rack for at least 30 minutes before slicing. This allows the crumb to set properly and enhances the flavor.
Adaptations for Special Diets
- Gluten-Free: Substitute all-purpose flour with a gluten-free flour blend. Ensure you add xanthan gum for structure.
- Whole Wheat: Use whole wheat flour instead of all-purpose flour, but consider adding a little more water due to the absorbency of whole wheat.
- Herb-Infused: Add dried herbs such as rosemary or thyme to the flour for a flavorful twist.
- Seeded Variations: Incorporate seeds like sesame, poppy, or sunflower into the dough for added texture and flavor.
Slip-Ups to Skip
- Don’t skip the proofing time – it’s essential for developing the right texture.
- Avoid using water that is too hot, as it can kill the yeast. Stick to lukewarm.
- Don’t rush the cooling process. Let your bread cool completely to avoid a gummy texture.
Storing, Freezing & Reheating
To store your artisan bread, wrap it in a clean kitchen towel and keep it at room temperature for up to three days. For longer storage, slice the bread and place it in an airtight container or zip-top bag in the freezer. To reheat, simply pop it in a preheated oven at 350°F (175°C) for about 10-15 minutes, or until warmed through.
Common Qs About Artisan Bread
Can I use instant yeast instead of active dry yeast?
Yes, you can substitute instant yeast for active dry yeast. Just mix it directly with the flour and skip the proofing step.
Why is my bread dense?
A dense loaf can occur if the dough was not kneaded enough, the yeast is expired, or the bread didn’t rise properly. Make sure to give it enough time to rise and knead well.
How do I know when my bread is done baking?
Your bread is done when it’s golden brown and sounds hollow when tapped on the bottom. You can also use a thermometer; the internal temperature should be around 190°F (88°C).
Can I add ingredients like cheese or olives?
Absolutely! You can fold in ingredients like cheese, olives, or dried fruits during the shaping step for extra flavor and texture.
Ready, Set, Cook
Now that you have all the knowledge you need, it’s time to roll up your sleeves and start creating your own artisan bread. Gather your ingredients, prepare your space, and embrace the process. Baking artisan bread is not just about the end result; it’s about enjoying every moment of kneading, rising, and the anticipation of that first warm slice.
As you embark on this baking adventure, remember that each loaf is a learning experience. Don’t be afraid to experiment, make mistakes, and adjust based on your preferences. The beauty of artisan bread lies in its simplicity and versatility. Happy baking!

Artisan Bread
Ingredients
For the Bread:
- 3 cups water (lukewarm)
- 1 tablespoon active dry yeast
- 1 tablespoon salt
- 6 cups all-purpose flour
Instructions
Instructions
- Step 1: In a large mixing bowl, combine the lukewarm water and active dry yeast. Let it sit for about 5-10 minutes until it becomes frothy.
- Step 2: Once the yeast is frothy, add the salt and gradually stir in the all-purpose flour, one cup at a time, until a shaggy dough forms.
- Step 3: Turn the dough out onto a lightly floured surface and knead gently for about 5-7 minutes until smooth and elastic.
- Step 4: Place the dough back into the mixing bowl, cover with plastic wrap or a clean kitchen towel, and let rise for 1-2 hours until doubled in size.
- Step 5: Gently punch down the dough, turn it out onto a floured surface, and shape it into a loaf.
- Step 6: Place the shaped loaf onto a floured baking sheet or parchment-lined baking stone, cover again, and let rise for 30-60 minutes.
- Step 7: Preheat your oven to 450°F (232°C) and place the baking stone inside if using.
- Step 8: Score the top of the loaf with a sharp knife or bread lame.
- Step 9: Transfer the loaf to the oven and bake for 30-35 minutes until golden brown and hollow sounding when tapped.
- Step 10: Remove the bread from the oven and let it cool on a wire rack for at least 30 minutes before slicing.
Equipment
- Large Mixing Bowl
- Wooden spoon or dough whisk
- Plastic wrap or clean kitchen towel
- Baking stone or sheet
- Sharp knife or bread lame
- Cooling Rack
Notes
- Wrap leftover bread in a clean kitchen towel to keep it fresh for up to three days.
- Freeze sliced bread in an airtight container for longer storage.
- Experiment with different flours and add-ins for unique flavors.


