
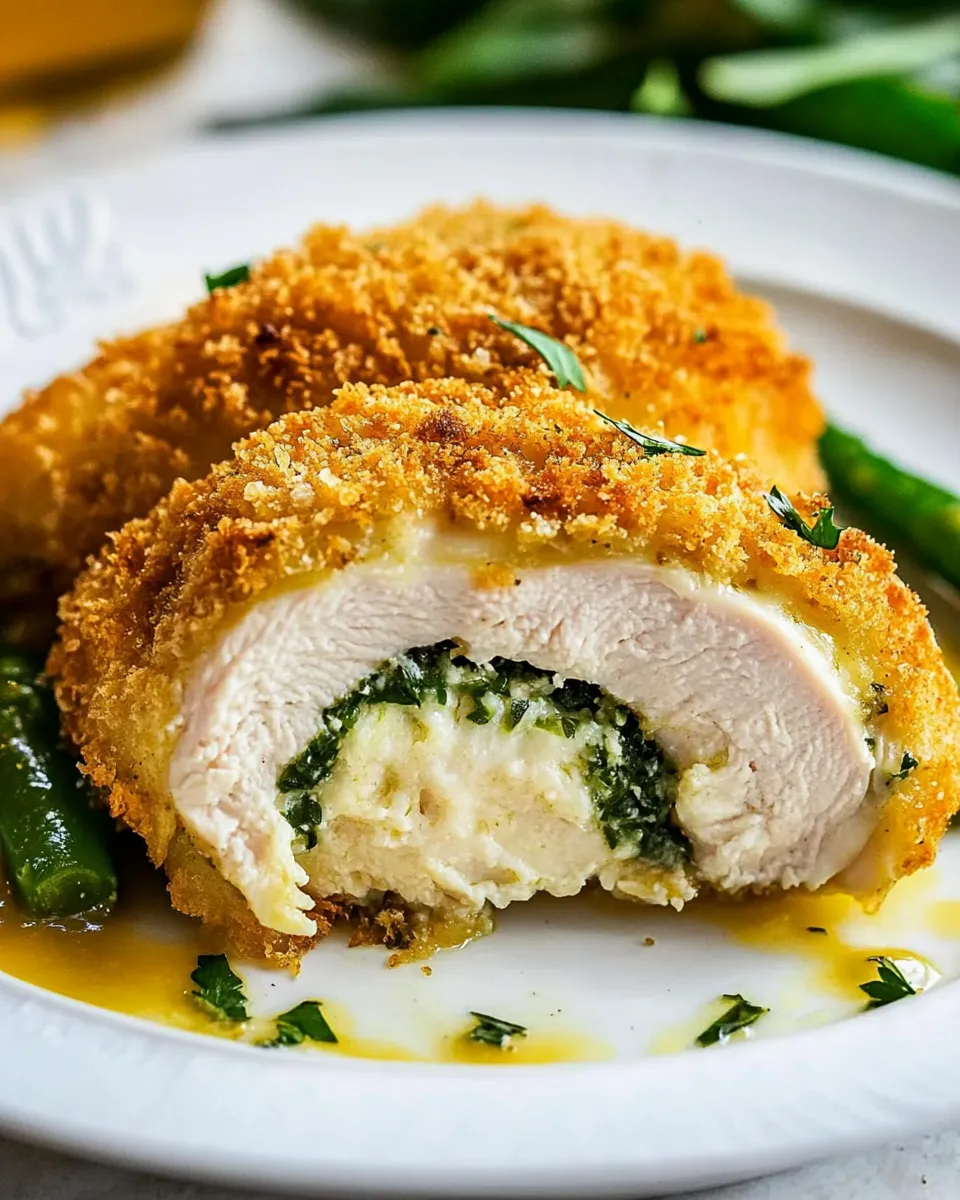
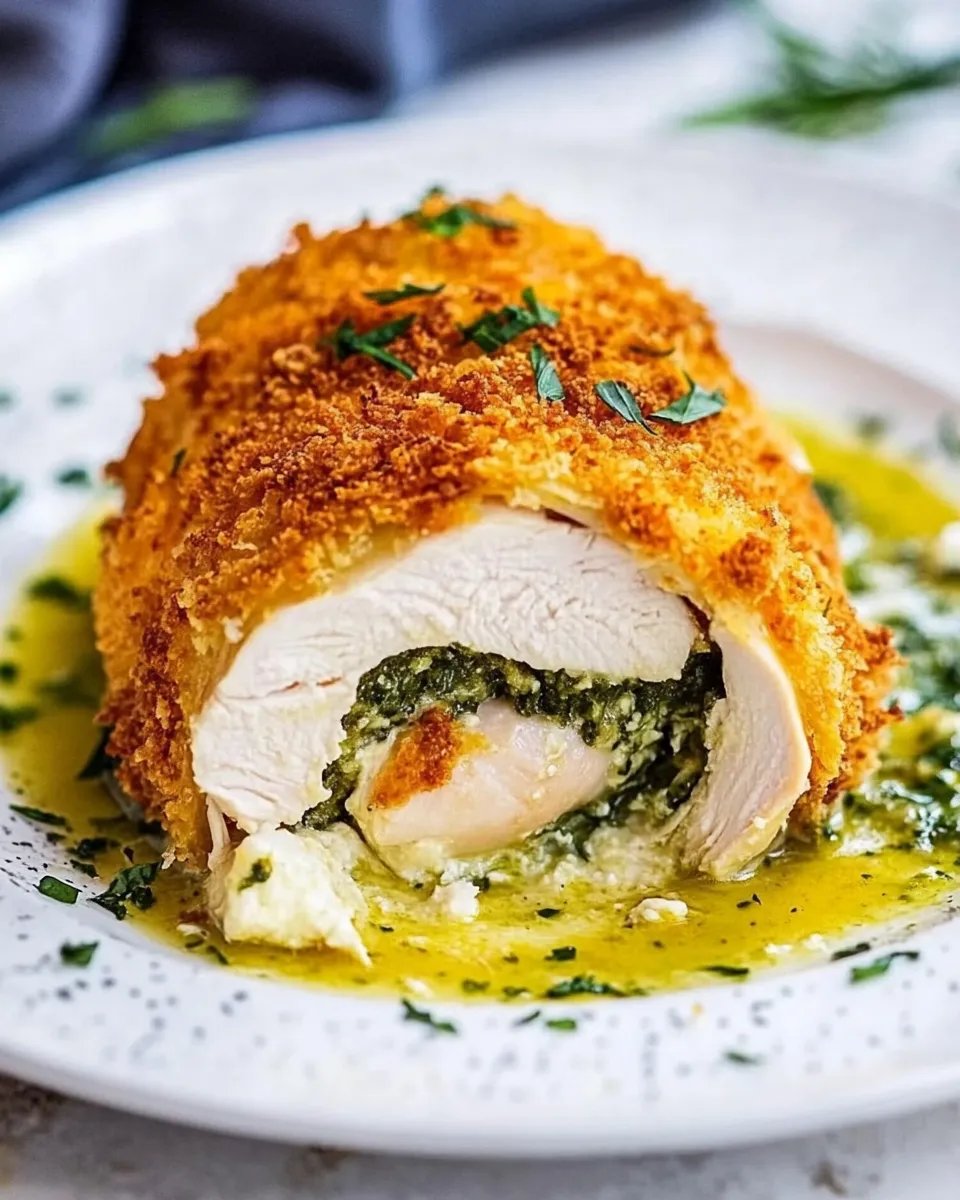
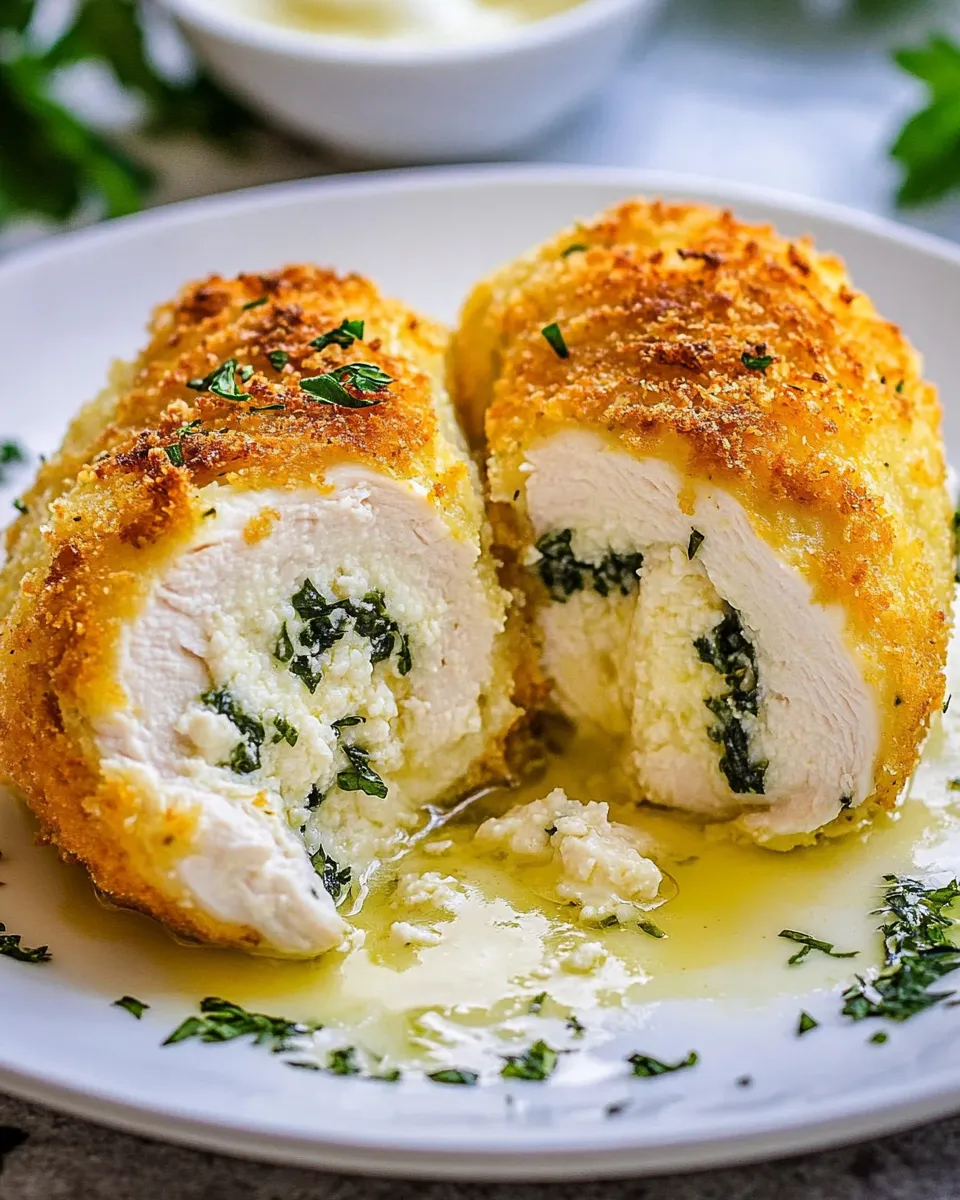
There’s something irresistibly delightful about biting into a perfectly cooked Chicken Kiev. The crispy exterior gives way to tender, juicy chicken, and then the magic happens: a burst of flavorful garlic and herb butter oozes out, making every bite a savory experience. This Best Chicken Kiev Recipe will guide you through creating this classic dish at home, ensuring it’s just as delicious as what you’d find in a fine restaurant.
Why This Recipe Is Reliable
This recipe is reliable because it balances flavor and technique, allowing even novice cooks to achieve restaurant-quality Chicken Kiev in their own kitchens. The use of fresh herbs and a flavorful butter mixture elevates the dish, ensuring that every bite is packed with taste. Plus, the step-by-step instructions make it easy to follow, resulting in a dish that’s sure to impress family and friends alike.
The Ingredient Lineup
To create this mouthwatering dish, you’ll need the following ingredients:
- 6 tablespoons unsalted butter (room temperature)
- 4 cloves garlic (minced)
- 1/4 teaspoon salt
- 3 tablespoons chopped parsley
- 1 teaspoon fresh rosemary (finely chopped)
- 1 teaspoon lemon zest
- 1 teaspoon lemon juice
- 1/2 teaspoon fresh thyme (finely chopped)
- 4 small/medium chicken breasts (skinless and boneless)
- Salt and pepper (to taste)
- 1 cup all-purpose flour
- 1 teaspoon salt
- 2 eggs (beaten)
- 2 cups panko bread crumbs
- 1/2 teaspoon paprika
- 1 teaspoon garlic powder
- 1 teaspoon onion powder
- 2 cups vegetable oil (for frying or as needed)
What You’ll Need (Gear)

To create the Best Chicken Kiev Recipe, you’ll need a few essential kitchen tools:
- Meat mallet or rolling pin – for flattening the chicken breasts.
- Mixing bowls – for preparing the butter and breading.
- Frying pan or skillet – for frying the chicken.
- Meat thermometer – to ensure the chicken is cooked through.
- Paper towels – for draining excess oil after frying.
Best Chicken Kiev Recipe Cooking Guide
Follow these steps to create the perfect Chicken Kiev:
Step 1: Prepare the Garlic Herb Butter
In a mixing bowl, combine the room temperature unsalted butter, minced garlic, salt, chopped parsley, finely chopped rosemary, lemon zest, lemon juice, and fresh thyme. Use a fork to mix everything until well combined. Once mixed, transfer the butter onto a piece of plastic wrap, shape it into a log, and wrap it tightly. Place it in the fridge to firm up for about 30 minutes.
Step 2: Flatten the Chicken Breasts
Take the chicken breasts and place them between two sheets of plastic wrap. Use a meat mallet or rolling pin to gently pound the chicken until it’s about 1/2-inch thick. This step helps the chicken cook evenly and makes it easier to roll.
Step 3: Assemble the Chicken Kiev
Remove the garlic herb butter from the fridge and cut it into four equal pieces. Place a piece of the butter in the center of each flattened chicken breast. Fold the sides of the chicken over the butter, then roll it up tightly from the bottom to the top, tucking in the ends to seal. Secure each roll with toothpicks if necessary.
Step 4: Breading the Chicken
Set up a breading station with three shallow dishes. In the first dish, combine the flour and 1 teaspoon of salt. In the second dish, place the beaten eggs. In the third dish, mix the panko bread crumbs, paprika, garlic powder, and onion powder.
Take each chicken roll and coat it first in the flour mixture, then dip it in the beaten eggs, and finally roll it in the panko mixture to coat evenly. Make sure to press the breadcrumbs onto the chicken to adhere well.
Step 5: Frying the Chicken Kiev
In a large skillet, heat the vegetable oil over medium-high heat. Once the oil is hot (around 350°F), carefully add the breaded chicken rolls to the pan. Fry them for about 4-5 minutes on each side, or until they are golden brown and cooked through. Use a meat thermometer to ensure the internal temperature reaches 165°F.
Step 6: Drain and Serve
Once the chicken is cooked, transfer it to a plate lined with paper towels to drain any excess oil. Let them rest for a few minutes before serving. Remove any toothpicks and serve the Chicken Kiev hot, garnished with additional parsley if desired.
No-Store Runs Needed
You may already have many of these ingredients in your pantry! Check your supplies before heading out. Here’s a quick list of commonly found items:
- Garlic
- Salt
- Paprika
- Garlic powder
- Onion powder
- Panko breadcrumbs
Notes from the Test Kitchen
Here are some tips for making the Best Chicken Kiev Recipe even better:
- Make sure the butter is at room temperature to ensure easy mixing and spreading.
- For a fun twist, try adding different herbs like dill or chives to the butter.
- Allow the chicken to rest after frying to help retain its juices.
- Experiment with different types of oils for frying. While vegetable oil is recommended, canola or peanut oil works well too.
Storing, Freezing & Reheating
If you have leftovers (which is unlikely, but it happens!), here’s how to store them:
- Storing: Place any leftover Chicken Kiev in an airtight container in the refrigerator for up to 3 days.
- Freezing: You can freeze un-cooked, breaded chicken rolls for up to 2 months. Just make sure to separate them with parchment paper.
- Reheating: Reheat leftovers in the oven at 350°F until warmed through, or in a skillet over medium heat, adding a little oil to keep the exterior crisp.
Common Questions
Can I bake Chicken Kiev instead of frying it?
Yes, you can bake Chicken Kiev if you prefer a healthier option! Preheat your oven to 375°F and place the breaded chicken on a baking sheet. Bake for about 25-30 minutes or until the chicken is cooked through and the coating is golden brown.
What can I serve with Chicken Kiev?
Chicken Kiev pairs beautifully with a variety of sides. Consider serving it with mashed potatoes, a fresh green salad, sautéed vegetables, or even rice pilaf for a complete meal.
Can I use chicken thighs instead of breasts?
Absolutely! Chicken thighs can add a richer flavor and stay juicier during cooking. Just be sure to adjust the cooking time accordingly, as thighs may take a little longer to cook through.
How do I know when the chicken is cooked through?
The best way to check is by using a meat thermometer. The internal temperature should reach 165°F for safe consumption. Alternatively, you can cut into the thickest part of the chicken; it should be opaque and the juices should run clear.
Before You Go
The Best Chicken Kiev Recipe is a delightful dish that’s perfect for any occasion, from a casual family dinner to an elegant dinner party. With its flavorful butter filling and crispy coating, this recipe promises to be a hit at your table. So roll up your sleeves, gather your ingredients, and enjoy the process of creating this classic dish in your own kitchen! Happy cooking!

Best Chicken Kiev Recipe
Ingredients
For the Garlic Herb Butter:
- 6 tablespoons unsalted butter (room temperature)
- 4 cloves garlic (minced)
- 1/4 teaspoon salt
- 3 tablespoons chopped parsley
- 1 teaspoon fresh rosemary (finely chopped)
- 1 teaspoon lemon zest
- 1 teaspoon lemon juice
- 1/2 teaspoon fresh thyme (finely chopped)
For the Chicken:
- 4 small/medium chicken breasts (skinless and boneless)
- Salt and pepper (to taste)
For the Breading:
- 1 cup all-purpose flour
- 1 teaspoon salt
- 2 eggs (beaten)
- 2 cups panko bread crumbs
- 1/2 teaspoon paprika
- 1 teaspoon garlic powder
- 1 teaspoon onion powder
- 2 cups vegetable oil (for frying or as needed)
Instructions
Preparation:
- In a mixing bowl, combine the room temperature unsalted butter, minced garlic, salt, chopped parsley, finely chopped rosemary, lemon zest, lemon juice, and fresh thyme. Use a fork to mix everything until well combined. Once mixed, transfer the butter onto a piece of plastic wrap, shape it into a log, and wrap it tightly. Place it in the fridge to firm up for about 30 minutes.
- Take the chicken breasts and place them between two sheets of plastic wrap. Use a meat mallet or rolling pin to gently pound the chicken until it’s about 1/2-inch thick.
- Remove the garlic herb butter from the fridge and cut it into four equal pieces. Place a piece of the butter in the center of each flattened chicken breast. Fold the sides of the chicken over the butter, then roll it up tightly from the bottom to the top, tucking in the ends to seal. Secure each roll with toothpicks if necessary.
- Set up a breading station with three shallow dishes. In the first dish, combine the flour and 1 teaspoon of salt. In the second dish, place the beaten eggs. In the third dish, mix the panko bread crumbs, paprika, garlic powder, and onion powder.
- Take each chicken roll and coat it first in the flour mixture, then dip it in the beaten eggs, and finally roll it in the panko mixture to coat evenly.
- In a large skillet, heat the vegetable oil over medium-high heat. Once the oil is hot (around 350°F), carefully add the breaded chicken rolls to the pan. Fry them for about 4-5 minutes on each side, or until they are golden brown and cooked through. Use a meat thermometer to ensure the internal temperature reaches 165°F.
- Once the chicken is cooked, transfer it to a plate lined with paper towels to drain any excess oil. Let them rest for a few minutes before serving. Remove any toothpicks and serve the Chicken Kiev hot, garnished with additional parsley if desired.
Equipment
- Meat Mallet or Rolling Pin
- Mixing Bowls
- Frying pan or skillet
- Meat Thermometer
- Paper Towels
Notes
- Make sure the butter is at room temperature for easy mixing.
- For a twist, try adding dill or chives to the butter.
- Allow the chicken to rest after frying to retain its juices.
- Experiment with different oils for frying, like canola or peanut oil.


