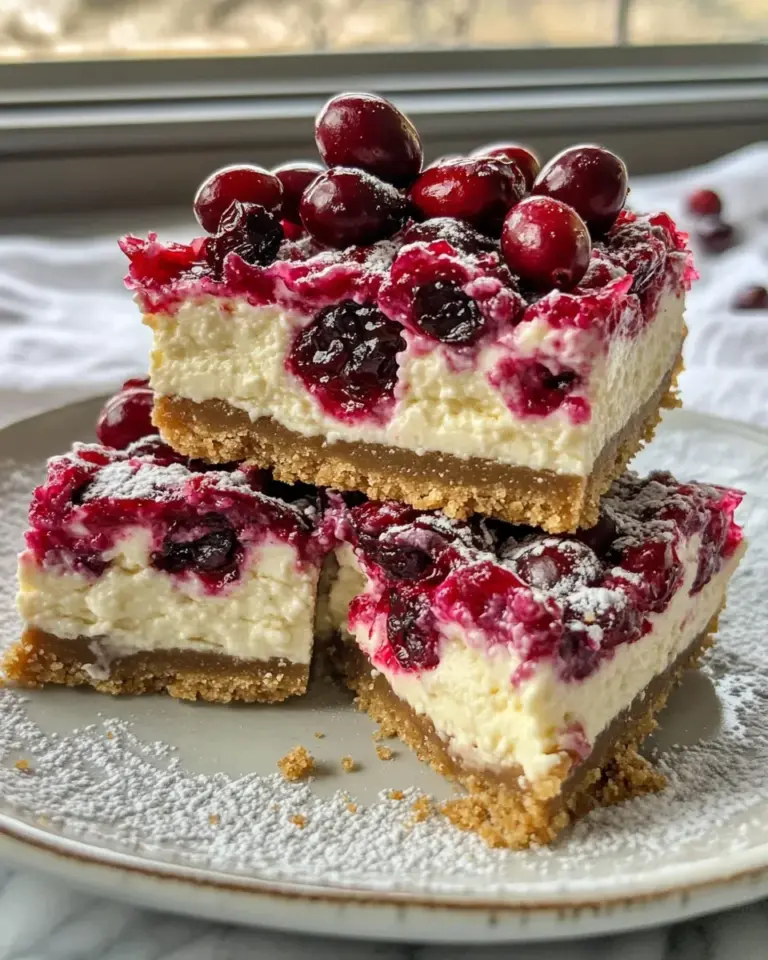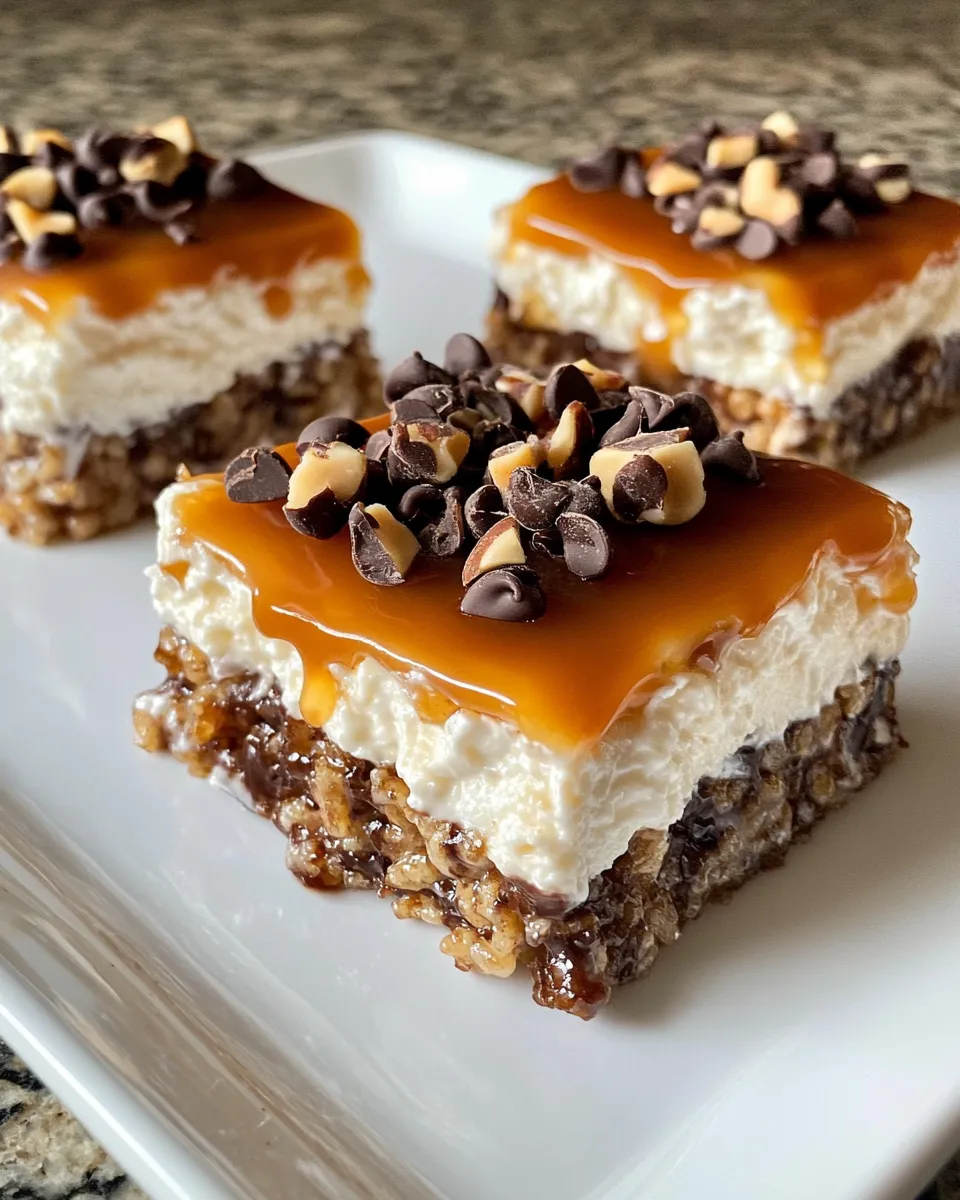
If you’re craving a dessert that combines creamy cheesecake with the irresistible crunch of Rice Krispies, plus luscious swirls of chocolate and caramel, you’re in for a treat. These Chocolate Caramel Cheesecake Rice Krispie Bars are the perfect blend of textures and flavors—rich, gooey, and just the right amount of sweet. Whether you’re making a batch for a party, a special occasion, or just to satisfy your sweet tooth, these bars deliver a crowd-pleasing, indulgent dessert experience that’s surprisingly simple to make.
Why This Recipe Works
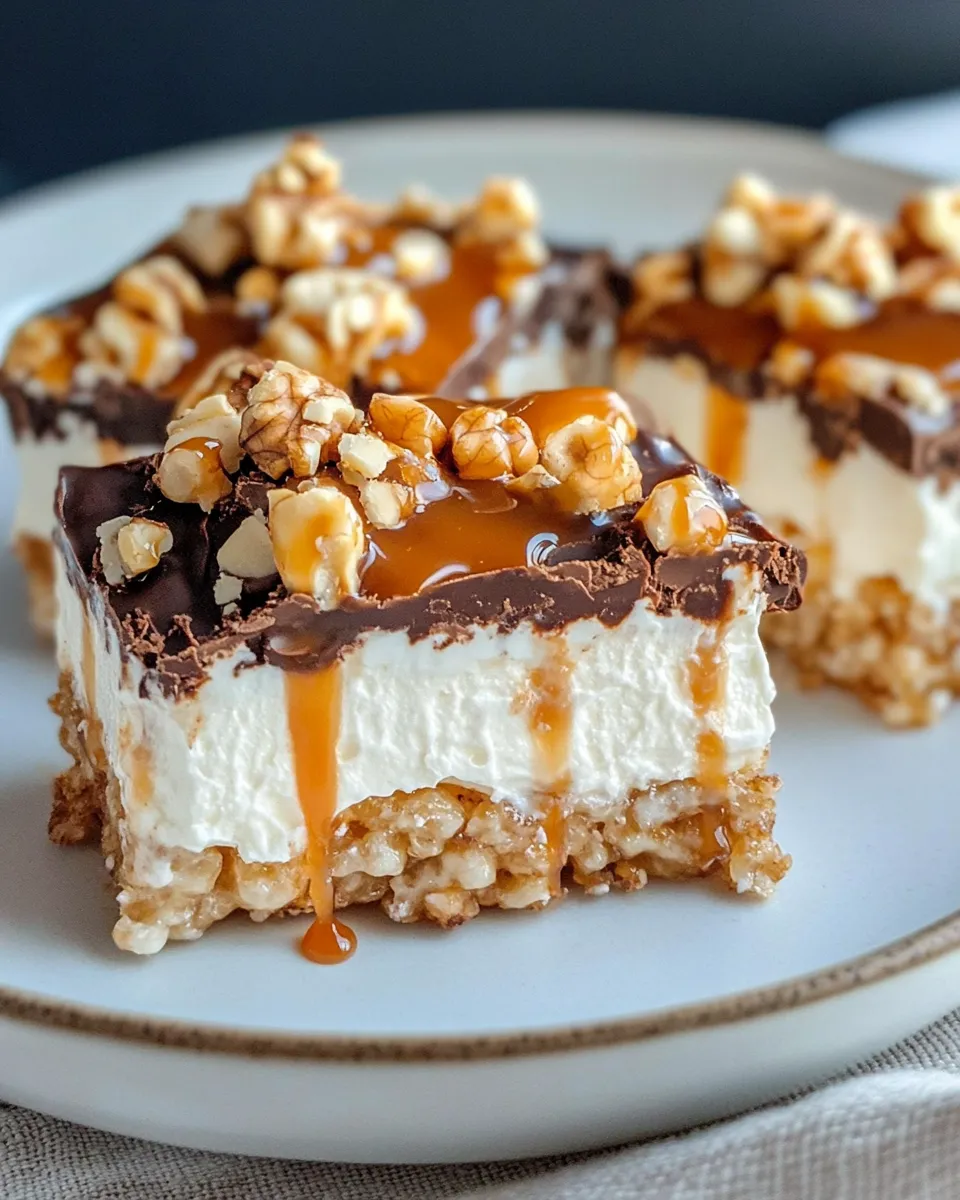
This recipe hits all the right notes with its perfect harmony of creamy and crunchy textures. The cheesecake layer is smooth and tangy, balanced by the sticky, buttery caramel and the semi-sweet chocolate chips that add a touch of decadence. The Rice Krispie cereal provides a light, crispy crunch that prevents the dessert from feeling too heavy. Using whipped cream folded into the cheesecake mixture keeps the bars light and airy, making them easy to slice and serve.
Plus, with just a handful of ingredients and no baking required, this is a straightforward recipe that anyone—even beginners—can master. The optional walnuts add a delightful nutty crunch that complements the other layers beautifully, but the bars are just as delicious without them.
What Goes In
- 3 cups Rice Krispie cereal – for that classic crisp snap and lightness.
- 1 cup semi-sweet chocolate chips – melted to drizzle or swirl for a rich chocolate flavor.
- 1 cup caramel sauce – luscious and sticky, adding a buttery sweetness.
- 1 package (8 oz) cream cheese, softened – the base for the creamy cheesecake layer.
- 1 cup powdered sugar – to sweeten and smooth the cheesecake mixture.
- 1 cup heavy whipping cream – whipped to fold into the cheesecake for lightness.
- 1 teaspoon vanilla extract – for a warm, sweet aroma and depth.
- 1/2 cup walnuts, chopped (optional) – adds texture and a nutty flavor.
Setup & Equipment
- 9×9-inch baking pan – perfect size for sturdy bars.
- Mixing bowls – one for whipping cream, one for mixing cheesecake ingredients.
- Electric mixer or stand mixer – to whip the heavy cream to soft peaks and combine ingredients smoothly.
- Spoon or spatula – for folding and spreading layers evenly.
- Microwave-safe bowl – to melt chocolate chips.
- Measuring cups and spoons – for accuracy.
- Parchment paper – optional, to line the pan for easy removal.
Make Chocolate Caramel Cheesecake Rice Krispie Bars: A Simple Method
Step 1: Prepare the cheesecake layer
In a large bowl, beat the softened cream cheese until smooth and creamy. Gradually add in the powdered sugar and vanilla extract, mixing until fully incorporated. In a separate bowl, whip the heavy cream to soft peaks using an electric mixer. Gently fold the whipped cream into the cream cheese mixture until light and fluffy. This will be your cheesecake layer.
Step 2: Assemble the Rice Krispie base
Place the Rice Krispie cereal in a large mixing bowl. If you want to add chopped walnuts, mix them in now for a nutty crunch. Spread half of the Rice Krispie mixture evenly in the bottom of your prepared 9×9-inch pan, pressing gently to form a compact layer.
Step 3: Add caramel sauce
Drizzle half of the caramel sauce over the Rice Krispie base. Use a spatula or the back of a spoon to spread it evenly, making sure it covers the cereal well but doesn’t seep through the gaps.
Step 4: Layer on the cheesecake mixture
Spoon the cheesecake mixture over the caramel layer and spread it out evenly with a spatula. It should be thick enough to hold its shape but smooth on top.
Step 5: Add the remaining Rice Krispies and caramel
Add the remaining Rice Krispie cereal on top of the cheesecake layer, pressing gently to adhere. Drizzle the rest of the caramel sauce evenly over the top.
Step 6: Melt and drizzle chocolate
Melt the semi-sweet chocolate chips in the microwave in 20-second intervals, stirring between each, until smooth. Drizzle the melted chocolate over the top layer of bars in a zigzag pattern for a beautiful finish.
Step 7: Chill and set
Refrigerate the bars for at least 3 hours or until firm enough to slice. This chilling step is crucial to allow the cheesecake to set and the layers to meld together.
Step 8: Slice and serve
Once chilled, cut the bars into squares using a sharp knife. Serve chilled for the best texture and flavor.
Make It Fit Your Plan
- For a nut-free version, simply omit the walnuts without affecting the overall texture.
- Use light caramel sauce for a less sweet option, or swap in homemade caramel for a richer taste.
- To make this recipe vegan, substitute cream cheese and heavy cream with plant-based alternatives and use dairy-free chocolate chips.
- Try swapping walnuts for pecans or almonds for a different nutty flavor.
- For extra indulgence, sprinkle sea salt on top right after drizzling the chocolate for a salted caramel twist.
Recipe Notes & Chef’s Commentary
- Softening cream cheese: Make sure the cream cheese is softened to room temperature to avoid lumps and achieve a smooth cheesecake layer.
- Whipping cream: Whip the heavy cream until soft peaks form; over-whipping can cause it to turn grainy or become butter.
- Pressing layers: Gently press but don’t compact the Rice Krispies too hard, or they may lose their crispness.
- Caramel sauce: Use a thick, high-quality caramel sauce to prevent it from soaking into the layers and making the bars soggy.
Make Ahead Like a Pro
These Chocolate Caramel Cheesecake Rice Krispie Bars are fantastic for preparing in advance. You can assemble the bars and refrigerate them for up to 3 days before serving. For longer storage, wrap the bars tightly in plastic wrap and freeze for up to 1 month. Thaw in the refrigerator overnight before slicing. This makes them a great option for potlucks, parties, or just keeping on hand for a sweet treat anytime.
Your Questions, Answered
Can I use a different cereal instead of Rice Krispies?
Yes! While Rice Krispies provide the classic light crunch, you can substitute with other puffed rice cereals or even gluten-free puffed cereals if you prefer. Just keep in mind the texture and flavor might shift slightly.
How do I prevent the bars from becoming soggy?
Good question! To keep the bars crisp, use a thick caramel sauce and avoid over-pressing the cereal layers. Also, chilling the bars thoroughly before slicing helps them set properly without sogginess.
Can I make these bars nut-free?
Absolutely. The chopped walnuts are optional and can be omitted without any major changes to the recipe. If you want a bit of crunch, consider adding seeds like pumpkin or sunflower seeds instead.
Is it possible to make these bars gluten-free?
Yes! Rice Krispie cereal is usually gluten-free, but always check the packaging to confirm. Using gluten-free caramel sauce and chocolate chips ensures the entire recipe stays gluten-free.
Explore More
- Love caramel and chocolate together? Try the Chocolate Dipped Salted Caramel Shortbread for a buttery, crunchy treat.
- If you’re a cookie fan, the Salted Caramel Turtle Pecan Cookies pack the same irresistible combo of caramel, chocolate, and nuts.
- For a fruity cheesecake twist, check out the Lemon Blueberry Cheesecake Bar Cookies, bursting with fresh flavors.
Serve & Enjoy
Serve your Chocolate Caramel Cheesecake Rice Krispie Bars chilled straight from the fridge for the best texture contrast between creamy cheesecake and crunchy cereal. They pair wonderfully with a cup of coffee or tea, and make a stunning addition to dessert tables or lunchbox treats. For an extra touch, sprinkle a few chopped walnuts or a pinch of sea salt on top before serving. These bars are sure to become a favorite for anyone who loves the marriage of cheesecake, chocolate, and caramel in a fun, handheld form.
Whether you’re making them for a special occasion or just a weekend treat, these bars bring a delightful combination of flavors and textures that’s hard to resist. Enjoy every bite of this luscious, crunchy, creamy dessert!
Share on Pinterest

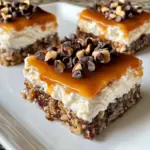
Chocolate Caramel Cheesecake Rice Krispie Bars
Ingredients
- 3 cups Rice Krispie cereal for that classic crisp snap and lightness
- 1 cup semi-sweet chocolate chips melted to drizzle or swirl
- 1 cup caramel sauce luscious and sticky, adding a buttery sweetness
- 8 oz cream cheese softened
- 1 cup powdered sugar to sweeten and smooth the cheesecake mixture
- 1 cup heavy whipping cream whipped to fold into the cheesecake for lightness
- 1 teaspoon vanilla extract for a warm, sweet aroma and depth
- 1/2 cup walnuts chopped (optional)
Instructions
- In a large bowl, beat the softened cream cheese until smooth and creamy. Gradually add in the powdered sugar and vanilla extract, mixing until fully incorporated.
- In a separate bowl, whip the heavy cream to soft peaks using an electric mixer. Gently fold the whipped cream into the cream cheese mixture until light and fluffy to make the cheesecake layer.
- Place the Rice Krispie cereal in a large mixing bowl. If desired, mix in the chopped walnuts.
- Spread half of the Rice Krispie mixture evenly in the bottom of the prepared 9x9-inch pan, pressing gently to form a compact layer.
- Drizzle half of the caramel sauce over the Rice Krispie base and spread evenly with a spatula or the back of a spoon.
- Spoon the cheesecake mixture over the caramel layer and spread it out evenly with a spatula.
- Add the remaining Rice Krispie cereal on top of the cheesecake layer, pressing gently to adhere. Drizzle the rest of the caramel sauce evenly over the top.
- Melt the semi-sweet chocolate chips in the microwave in 20-second intervals, stirring between each, until smooth. Drizzle the melted chocolate over the top layer of bars in a zigzag pattern.
- Refrigerate the bars for at least 3 hours or until firm enough to slice.
- Once chilled, cut the bars into squares using a sharp knife. Serve chilled for the best texture and flavor.
Equipment
- 9x9-inch baking pan
- Mixing Bowls
- Electric Mixer or Stand Mixer
- Spoon or spatula
- Microwave-safe bowl
- Measuring cups and spoons
- Parchment Paper
Notes
- Ensure cream cheese is softened to room temperature for a smooth cheesecake layer.
- Do not over-whip the heavy cream to avoid graininess; whip it to soft peaks only.
- Gently press the Rice Krispies layers to maintain their crispness and avoid sogginess.
- Use a thick, high-quality caramel sauce to prevent the bars from becoming soggy.
- Bars can be assembled ahead and refrigerated up to 3 days or frozen up to 1 month for convenience.