
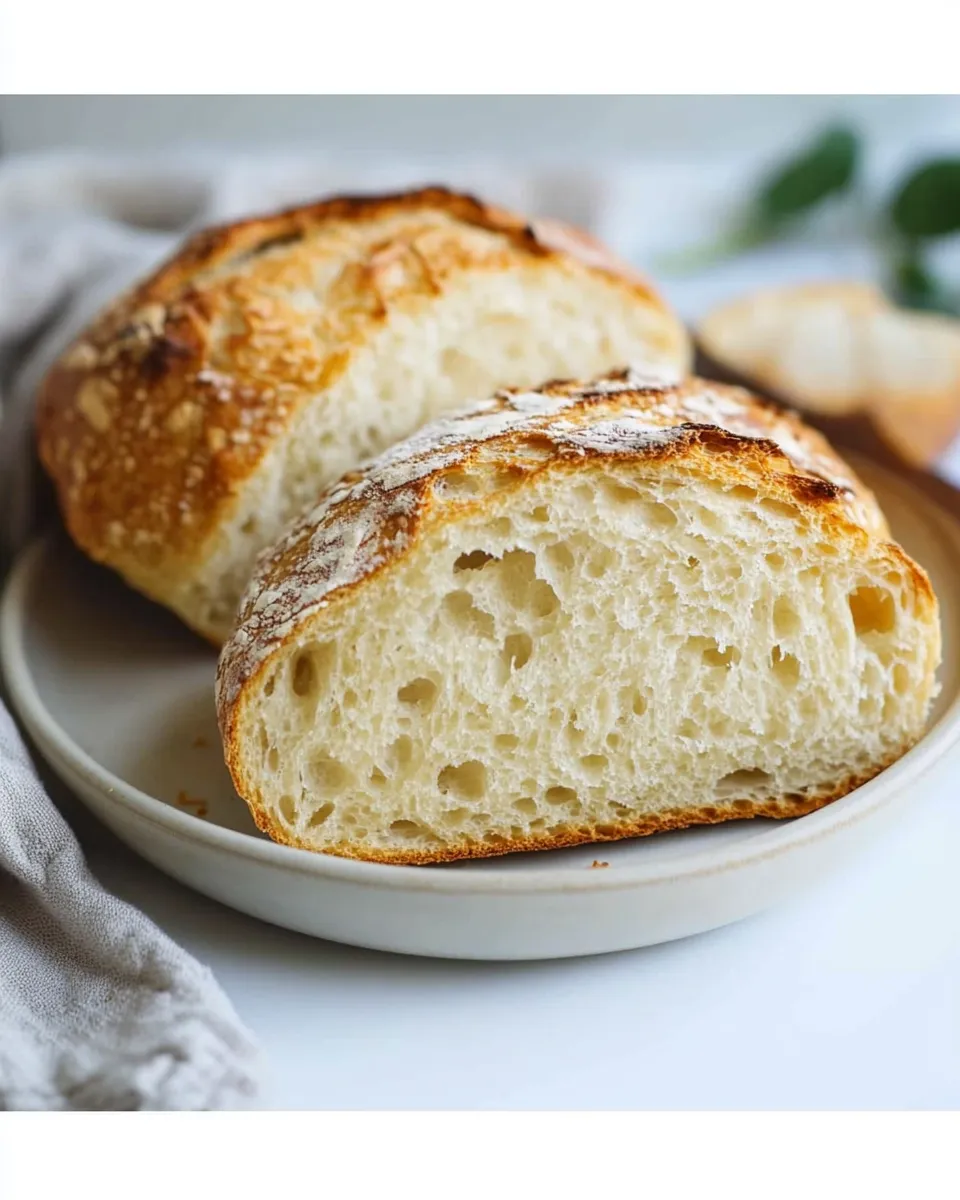
If you’ve ever longed for the aroma of freshly baked bread wafting through your kitchen, but thought it took too much time and effort, you’re in for a treat. This Miracle No Knead Bread recipe is here to change your life. With just four simple ingredients and a little patience, you’ll create a crusty, artisan-style loaf that will impress your family and friends. Imagine serving warm, homemade bread with a pat of butter or using it to create the perfect sandwich. Let’s dive into this miracle of bread-making!
Why This Recipe Works
The beauty of this Miracle No Knead Bread lies in its simplicity and the science behind it. By allowing the dough to rest for an extended period, you enable the gluten to develop naturally without any kneading. The combination of warm water, yeast, and time creates a flavorful, airy loaf with a crispy crust. The coarse sea salt enhances the flavor, making each bite a delight. No fancy equipment or skills are required here—just a mixing bowl and a bit of patience!
What You’ll Gather
- 3 cups all-purpose flour – The foundation of your bread.
- 1 3/4 teaspoons coarse sea salt – For flavor and to control fermentation.
- 1/2 teaspoon active dry yeast – The magic ingredient that makes the bread rise.
- 1 1/2 cups warm water – Helps activate the yeast and hydrates the flour.
Setup & Equipment
- Large mixing bowl – For mixing the dough.
- Wooden spoon or spatula – For combining ingredients.
- Plastic wrap or kitchen towel – To cover the dough while it rises.
- Dutch oven or heavy pot with lid – For baking the bread to create steam.
Stepwise Method: Miracle No Knead Bread
Step 1: Mix the Dry Ingredients
In a large mixing bowl, combine 3 cups of all-purpose flour, 1 3/4 teaspoons of coarse sea salt, and 1/2 teaspoon of active dry yeast. Stir the ingredients together until well mixed.
Step 2: Add Warm Water
Pour in 1 1/2 cups of warm water (not hot, just warm to the touch). Using a wooden spoon or spatula, mix until a shaggy dough forms. The dough will be sticky and rough; that’s okay!
Step 3: First Rise
Cover the bowl with plastic wrap or a kitchen towel and let it sit at room temperature for 12 to 18 hours. This long resting period is essential for developing flavor and texture. You’ll know it’s ready when the surface is bubbly and the dough has doubled in size.
Step 4: Shape the Dough
After the first rise, flour your work surface and gently scrape the dough out of the bowl. With floured hands, fold the dough over itself a couple of times to shape it into a ball. Be careful not to deflate it too much.
Step 5: Second Rise
Place the shaped dough on a floured surface, cover it with a kitchen towel, and let it rise for another 1 to 2 hours, until it has puffed up.
Step 6: Preheat the Oven
About 30 minutes before baking, place your Dutch oven (with the lid) in the oven and preheat it to 450°F (232°C). This will create a hot environment that helps the bread rise and develop a crispy crust.
Step 7: Bake the Bread
Once preheated, carefully remove the hot Dutch oven from the oven. Using parchment paper, transfer the dough into the pot (or place it directly in if you prefer). Cover with the lid and bake for 30 minutes.
Step 8: Uncover and Brown
After 30 minutes, remove the lid to allow the crust to brown. Bake for an additional 15 to 20 minutes, until the bread is golden brown and sounds hollow when tapped on the bottom.
Step 9: Cool and Enjoy
Carefully remove the bread from the pot and let it cool on a wire rack for at least 30 minutes before slicing. This cooling time allows the interior to set, making it easier to cut.
Budget & Availability Swaps
- Flour: You can swap all-purpose flour for bread flour for a chewier texture.
- Yeast: Instant yeast can be used in place of active dry yeast without any changes to the method.
- Water: If warm water isn’t available, you can use milk or a milk alternative for a richer flavor.
- Salt: Table salt can be used, but reduce the amount slightly as it is finer than coarse salt.
Errors to Dodge
Making bread can sometimes be tricky, but here are a few common pitfalls to avoid:
- Using cold water can slow down or halt yeast activation.
- Not allowing enough time for the dough to rise can lead to dense bread.
- Overworking the dough during shaping can deflate the air bubbles.
- Baking in a cold pot will prevent the bread from developing a good crust.
Save It for Later
Leftover Miracle No Knead Bread can be stored in a paper bag at room temperature for 1 to 2 days. For longer storage, wrap it tightly in plastic wrap and freeze. To enjoy, simply thaw and reheat in the oven for a few minutes to restore its crispy crust.
Ask & Learn
Can I use whole wheat flour instead of all-purpose flour?
Yes, you can substitute whole wheat flour, but you may need to adjust the water amount as whole wheat flour absorbs more moisture.
What if my dough doesn’t rise?
If your dough isn’t rising, it could be due to inactive yeast. Always check the expiration date of your yeast before use.
Can I add herbs or spices to the dough?
Absolutely! Feel free to mix in your favorite herbs, spices, or even cheese for added flavor.
How do I know when the bread is done baking?
The bread is done when it reaches a deep golden brown color and sounds hollow when tapped on the bottom. An internal temperature of around 200°F (93°C) is also a good indicator.
Serve & Enjoy
Now that you’ve mastered the art of Miracle No Knead Bread, it’s time to serve it up! This bread pairs beautifully with soups, salads, or as a base for a delightful sandwich. Slice it thick, slather it with butter, or toast it for an even more delightful crunch. The possibilities are endless, and each loaf will be an event in itself. Get ready to share your creation with loved ones, and watch as they marvel at your baking prowess. Happy baking!
Miracle No Knead Bread
Ingredients
Ingredients
- 3 cups all-purpose flour
- 1 3/4 teaspoons coarse sea salt
- 1/2 teaspoon active dry yeast
- 1 1/2 cups warm water
Instructions
Stepwise Method
- In a large mixing bowl, combine 3 cups of all-purpose flour, 1 3/4 teaspoons of coarse sea salt, and 1/2 teaspoon of active dry yeast. Stir the ingredients together until well mixed.
- Pour in 1 1/2 cups of warm water (not hot, just warm to the touch). Using a wooden spoon or spatula, mix until a shaggy dough forms.
- Cover the bowl with plastic wrap or a kitchen towel and let it sit at room temperature for 12 to 18 hours.
- After the first rise, flour your work surface and gently scrape the dough out of the bowl. With floured hands, fold the dough over itself a couple of times to shape it into a ball.
- Place the shaped dough on a floured surface, cover it with a kitchen towel, and let it rise for another 1 to 2 hours.
- About 30 minutes before baking, place your Dutch oven (with the lid) in the oven and preheat it to 450°F (232°C).
- Once preheated, carefully remove the hot Dutch oven from the oven. Using parchment paper, transfer the dough into the pot and cover with the lid. Bake for 30 minutes.
- After 30 minutes, remove the lid to allow the crust to brown. Bake for an additional 15 to 20 minutes.
- Carefully remove the bread from the pot and let it cool on a wire rack for at least 30 minutes before slicing.
Equipment
- Large Mixing Bowl
- Wooden spoon or spatula
- Plastic wrap or kitchen towel
- Dutch oven or heavy pot with lid
Notes
- For a chewier texture, swap all-purpose flour for bread flour.
- Instant yeast can replace active dry yeast without changing the method.
- Store leftover bread in a paper bag for 1 to 2 days or freeze for longer storage.


