
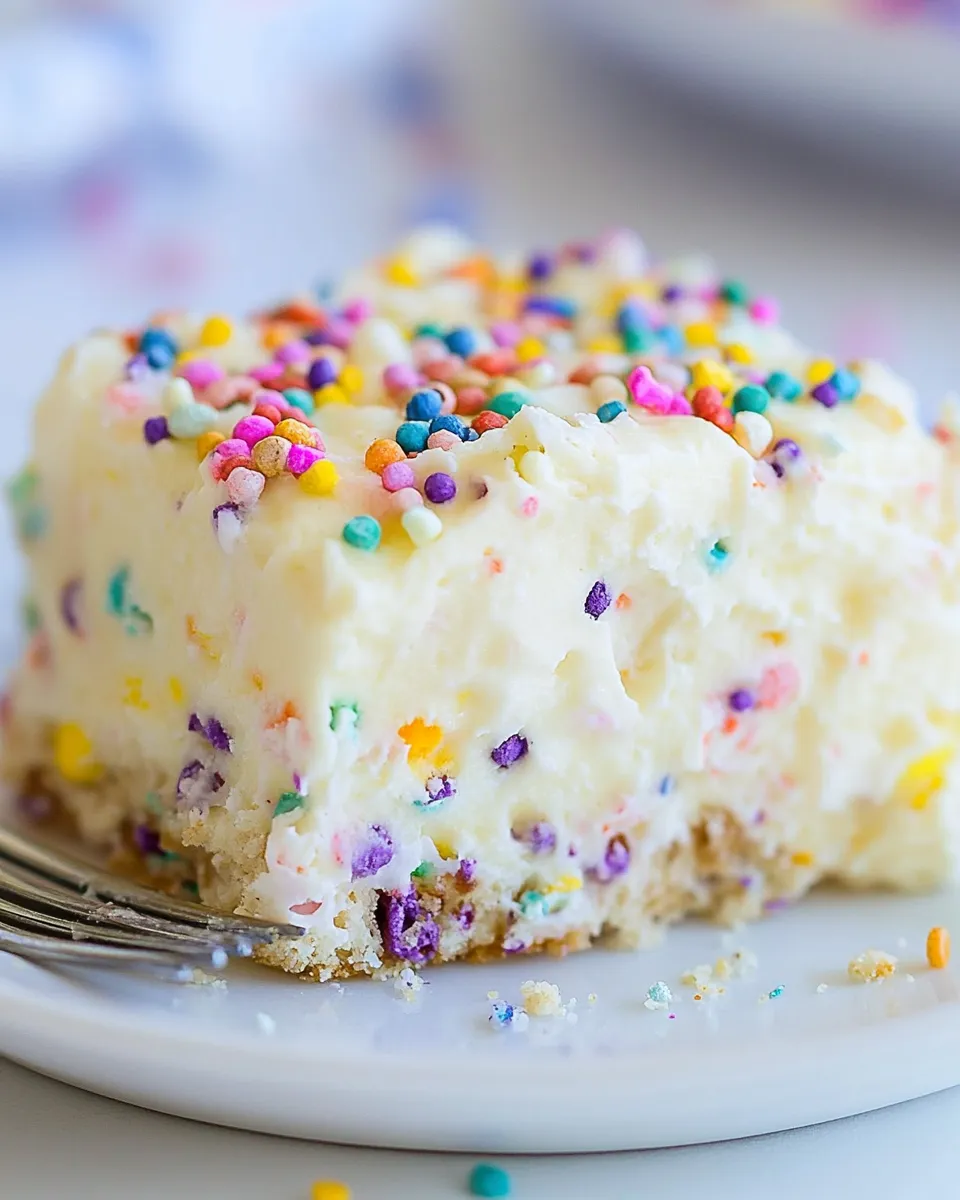
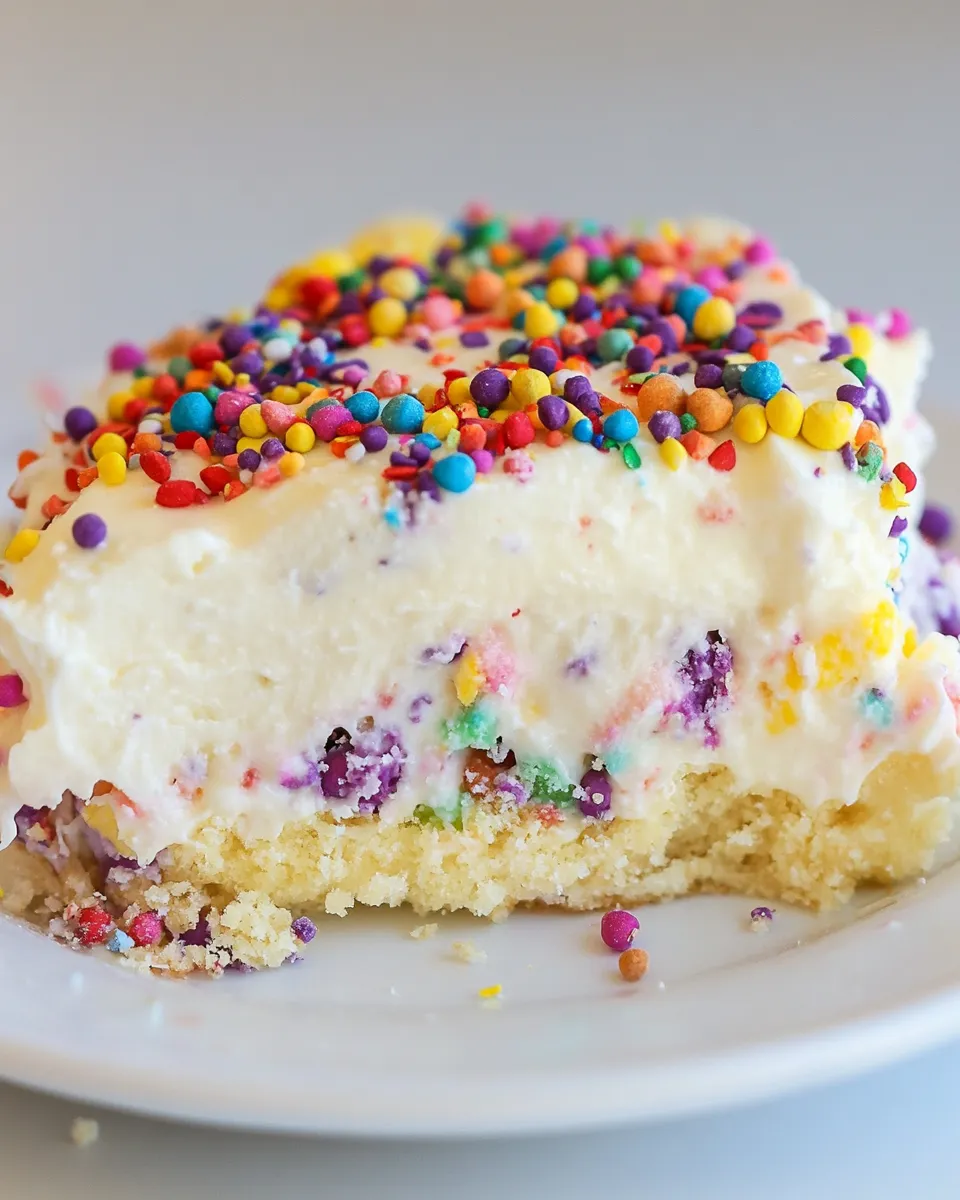
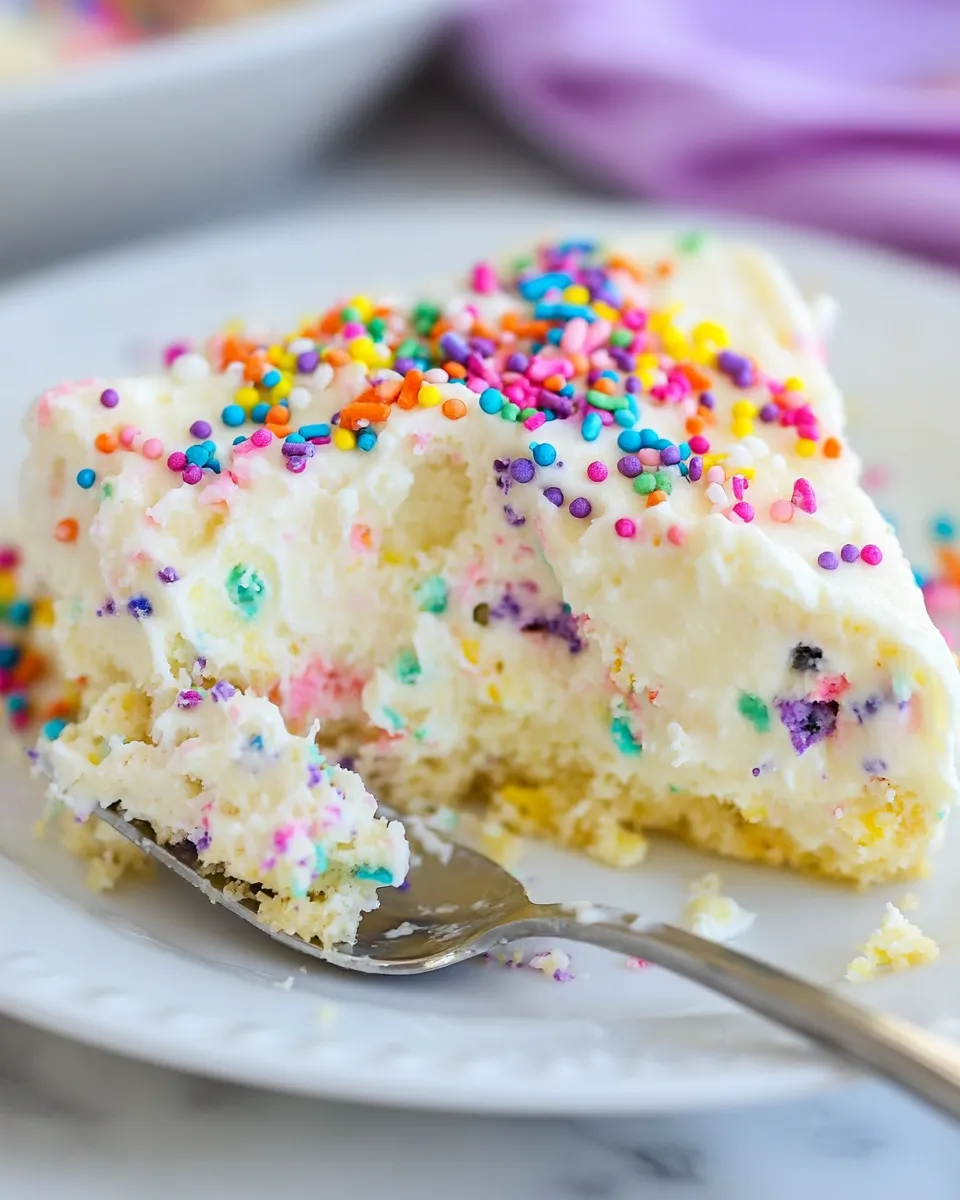
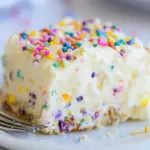
Indulging in sweet, creamy desserts is one of life’s little pleasures, and this No Bake Funfetti Lush Dessert is no exception. Bursting with colorful sprinkles and creamy layers, this delightful treat is perfect for birthdays, celebrations, or simply to satisfy your sweet tooth. Best of all, it requires no baking, making it an easy and fun dessert to whip up any time of the year. The combination of Birthday Cake Oreos, cream cheese, and Cool Whip creates a luscious, layered dessert that’s not only visually appealing but also incredibly delicious. Get ready to impress your friends and family with this show-stopping dessert!
What Sets This Recipe Apart
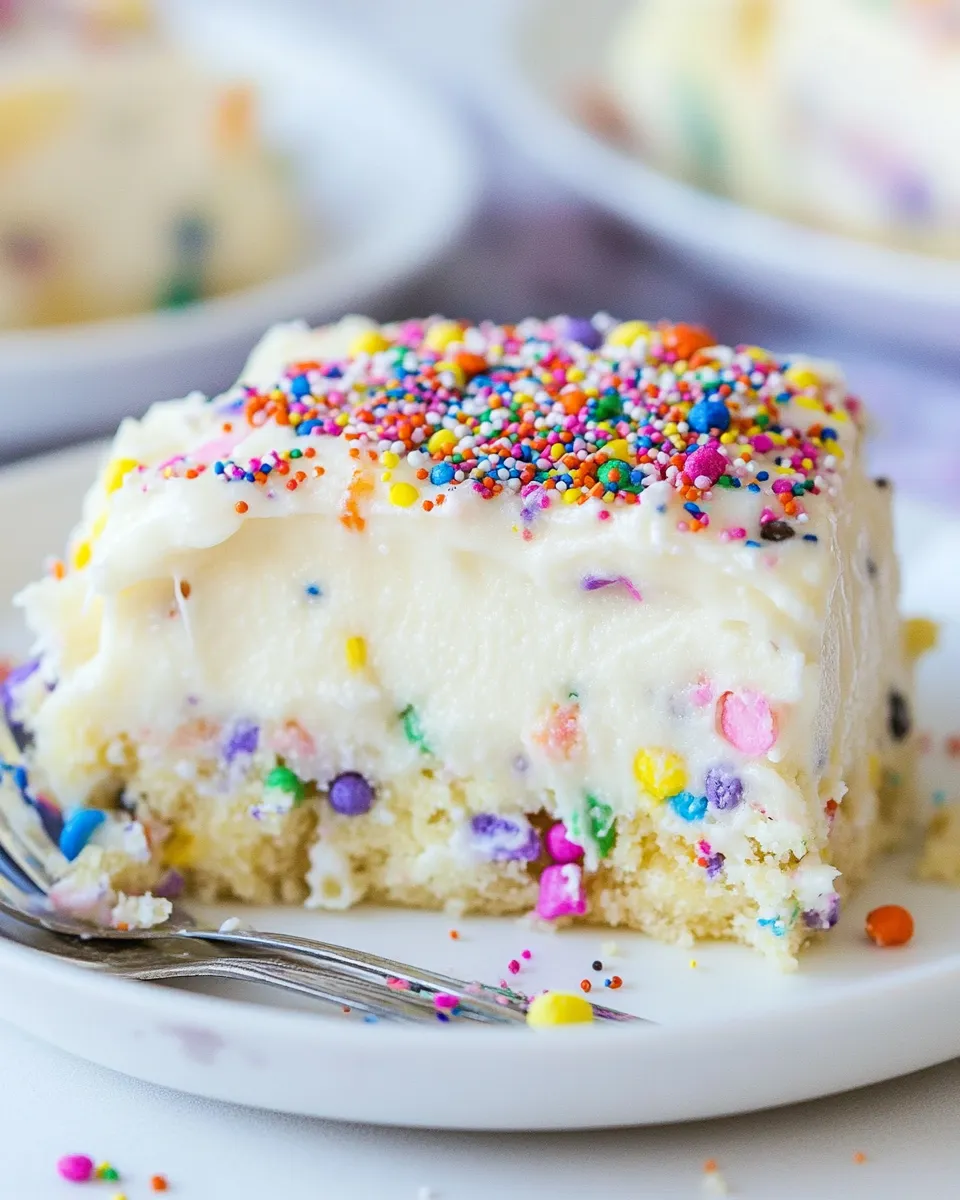
This No Bake Funfetti Lush Dessert stands out for several reasons. First, the use of Birthday Cake Oreos as the base adds a delightful twist to the traditional dessert crust. Their creamy filling and cake-flavored cookie provide a unique flavor profile that pairs beautifully with the creamy layers of the dessert. Additionally, the combination of cream cheese, vanilla pudding, and whipped topping creates a rich, airy texture that melts in your mouth. Finally, the vibrant sprinkles not only add an element of fun but also make this dessert visually stunning, making it the perfect centerpiece for any gathering.
Ingredient List
To make this No Bake Funfetti Lush Dessert, you will need the following ingredients:
- 15.25 ounce (432.33g) package Birthday Cake Oreos, crushed into crumbs
- 4 tablespoons salted butter, melted
- 8 ounces (226.8g) cream cheese, at room temperature
- 1 cup (120g) powdered sugar
- ½ teaspoon vanilla extract
- ½ teaspoon butter extract
- ¼ teaspoon almond extract
- 4 ounces (113.4g) Cool Whip
- 2 tablespoons rainbow sprinkles
- 5.1 ounce (144.58g) box vanilla pudding
- 2 cups (549ml) milk
- 4 ounces (113.4g) Cool Whip
- 8 ounce (226.8g) tub Cool Whip
- 2 tablespoons rainbow sprinkles
Must-Have Equipment
Before you start making your No Bake Funfetti Lush Dessert, gather the following equipment:
- Mixing Bowls: For combining the ingredients throughout the recipe.
- 9×13-inch Baking Dish: The perfect size for layering your dessert.
- Electric Mixer: For a smooth and creamy filling.
- Spatula: To spread the layers evenly.
Step-by-Step: No Bake Funfetti Lush Dessert
Step 1: Prepare the Crust
In a mixing bowl, combine the crushed Birthday Cake Oreos and melted butter. Stir until the crumbs are fully coated. Press the mixture evenly into the bottom of a 9×13-inch baking dish to form the crust.
Step 2: Make the Cream Cheese Layer
In another mixing bowl, beat the cream cheese until smooth using an electric mixer. Gradually add the powdered sugar, vanilla extract, butter extract, and almond extract. Mix until well combined. Gently fold in 4 ounces of Cool Whip until fully incorporated.
Step 3: Spread the Cream Cheese Layer
Spread the cream cheese mixture evenly over the Oreo crust in the baking dish, smoothing it out with a spatula. Sprinkle 2 tablespoons of rainbow sprinkles over the cream cheese layer for a pop of color.
Step 4: Prepare the Vanilla Pudding Layer
In a separate bowl, whisk together the vanilla pudding mix and 2 cups of milk. Continue whisking for about 2 minutes until the pudding thickens.
Step 5: Add the Pudding Layer
Pour the prepared vanilla pudding over the cream cheese layer, spreading it evenly.
Step 6: Add More Cool Whip
Top the pudding layer with the remaining 4 ounces of Cool Whip. Spread it evenly to cover the pudding.
Step 7: Final Touches
Sprinkle the top with the remaining 2 tablespoons of rainbow sprinkles for a festive finish.
Step 8: Chill and Serve
Cover the dish with plastic wrap and refrigerate for at least 4 hours, or overnight for best results. When ready to serve, cut into squares and enjoy your No Bake Funfetti Lush Dessert!
Ingredient Swaps & Substitutions
If you’re looking to customize your No Bake Funfetti Lush Dessert, consider these swaps:
- Gluten-Free Option: Use gluten-free sandwich cookies instead of Birthday Cake Oreos.
- Dairy-Free Option: Substitute cream cheese with a dairy-free alternative and use coconut whipped cream instead of Cool Whip.
- Flavor Variations: Swap out the almond extract for coconut extract for a tropical twist.
Behind the Recipe
This No Bake Funfetti Lush Dessert is inspired by the classic lush desserts that bring together layers of flavor and texture. The concept of layering ingredients creates a delightful surprise with each bite, showcasing the creamy filling and crunchy crust. The playful addition of sprinkles is a nod to the celebration of life’s special moments. Whether it’s a birthday, an anniversary, or just a gathering with friends, this dessert brings joy and sweetness to any occasion.
Shelf Life & Storage
To ensure your No Bake Funfetti Lush Dessert stays fresh, follow these storage tips:
- Store the dessert covered in the refrigerator for up to 4-5 days.
- Do not freeze, as the texture of the Cool Whip and cream cheese can change when frozen and thawed.
Quick Q&A
Can I make this dessert ahead of time?
Absolutely! This No Bake Funfetti Lush Dessert is perfect for making a day in advance. It actually tastes better when allowed to chill overnight, as the flavors meld together beautifully.
What can I use instead of Cool Whip?
If you prefer, you can use homemade whipped cream made from heavy cream and sugar. Just whip the cream until stiff peaks form and fold it into the cream cheese mixture.
Can I use a different flavor of pudding?
Yes! Feel free to experiment with different flavored pudding mixes, such as chocolate or strawberry, to create your own unique version of this dessert.
How do I prevent the layers from mixing together?
Make sure each layer is fully set before adding the next. Chilling the dessert after each layer can help keep them distinct and visually appealing.
To complement your No Bake Funfetti Lush Dessert, consider serving with:
See You at the Table
With its vibrant colors and delicious layers, the No Bake Funfetti Lush Dessert is sure to be a crowd-pleaser at your next gathering. It’s a sweet tribute to fun and celebration, perfect for any occasion. Whether you’re indulging with family, entertaining friends, or simply treating yourself, this dessert will surely bring smiles and satisfaction. Grab your ingredients and get ready to make memories with this delightful treat!
No Bake Funfetti Lush Dessert
Ingredients
For the Crust:
- 15.25 ounce Birthday Cake Oreos crushed into crumbs
- 4 tablespoons salted butter melted
For the Cream Cheese Layer:
- 8 ounces cream cheese at room temperature
- 1 cup powdered sugar
- ½ teaspoon vanilla extract
- ½ teaspoon butter extract
- ¼ teaspoon almond extract
- 4 ounces Cool Whip
For the Pudding Layer:
- 5.1 ounce vanilla pudding box
- 2 cups milk
For the Topping:
- 4 ounces Cool Whip
- 2 tablespoons rainbow sprinkles
Instructions
Instructions:
- In a mixing bowl, combine the crushed Birthday Cake Oreos and melted butter. Stir until the crumbs are fully coated. Press the mixture evenly into the bottom of a 9x13-inch baking dish to form the crust.
- In another mixing bowl, beat the cream cheese until smooth using an electric mixer. Gradually add the powdered sugar, vanilla extract, butter extract, and almond extract. Mix until well combined. Gently fold in 4 ounces of Cool Whip until fully incorporated.
- Spread the cream cheese mixture evenly over the Oreo crust in the baking dish, smoothing it out with a spatula. Sprinkle 2 tablespoons of rainbow sprinkles over the cream cheese layer for a pop of color.
- In a separate bowl, whisk together the vanilla pudding mix and 2 cups of milk. Continue whisking for about 2 minutes until the pudding thickens.
- Pour the prepared vanilla pudding over the cream cheese layer, spreading it evenly.
- Top the pudding layer with the remaining 4 ounces of Cool Whip. Spread it evenly to cover the pudding.
- Sprinkle the top with the remaining 2 tablespoons of rainbow sprinkles for a festive finish.
- Cover the dish with plastic wrap and refrigerate for at least 4 hours, or overnight for best results. When ready to serve, cut into squares and enjoy your No Bake Funfetti Lush Dessert!
Equipment
- Mixing Bowls
- 9x13-inch Baking Dish
- Electric Mixer
- Spatula
Notes
- Store the dessert covered in the refrigerator for up to 4-5 days.
- Do not freeze, as the texture of the Cool Whip and cream cheese can change when frozen and thawed.
- This dessert can be made a day in advance for better flavor.


