
There’s something truly magical about the smell of freshly baked bread wafting through your home. It evokes warmth, comfort, and a sense of togetherness. One of the most delightful breads to create is challah, a traditional Jewish bread that is often braided and enjoyed during special occasions. Today, we’re diving into a no-knead version of this beloved bread, ensuring that anyone can enjoy the process without the hassle of intensive kneading. This No-Knead Challah Bread is perfect for both beginners and seasoned bakers alike, allowing you to create a beautiful and delicious loaf with minimal effort.
What Makes This Recipe Special
What sets this No-Knead Challah Bread apart is its simplicity. Traditional challah recipes often require a significant amount of kneading and skill, but with this method, you can achieve that same soft, fluffy texture without the arm workout. The long fermentation time allows the flavors to deepen, resulting in a rich, slightly sweet bread that’s perfect for any occasion. Plus, the use of just a few basic ingredients means you can whip this up anytime you want a taste of homemade goodness.
What You’ll Gather
- 4 cups all-purpose flour
- 2 teaspoons salt
- 1 teaspoon active dry yeast
- 1 cup warm water
- 2 large eggs (beaten)
- 1/3 cup honey
- 1/3 cup vegetable oil
- 1 large egg (beaten with 1 tablespoon water for egg wash)
Before You Start: Equipment
- Large mixing bowl: For combining your ingredients.
- Plastic wrap: To cover the dough while it rises.
- Baking sheet: To place your braided challah on before baking.
- Pastry brush: For applying the egg wash.
- Oven: To bake your challah to golden perfection.
Make No-Knead Challah Bread: A Simple Method
Step 1: Combine the Dry Ingredients
In a large mixing bowl, whisk together the all-purpose flour, salt, and active dry yeast. This ensures that the yeast is evenly distributed throughout the flour, which is crucial for proper rising.
Step 2: Mix the Wet Ingredients
In a separate bowl, combine the warm water, beaten eggs, honey, and vegetable oil. Mix well until everything is thoroughly combined.
Step 3: Combine Wet and Dry Ingredients
Pour the wet mixture into the bowl with the dry ingredients. Use a wooden spoon or spatula to mix until a shaggy dough forms. Don’t worry about making it perfect; just ensure that there are no dry pockets of flour.
Step 4: Let It Rise
Cover the bowl with plastic wrap and let the dough rise at room temperature for about 1 to 2 hours, or until it has doubled in size. This is where the magic happens, as the yeast works its wonders.
Step 5: Shape the Dough
Once the dough has risen, turn it out onto a lightly floured surface. Divide it into three equal pieces. Roll each piece into a long rope, about 12-15 inches long.
Step 6: Braid the Challah
To braid, place the three ropes side by side, pinch the top ends together, and begin braiding from the center outward. Once you reach the end, pinch the ends together to seal the braid.
Step 7: Second Rise
Transfer your braided challah onto a lined baking sheet. Cover it loosely with plastic wrap and let it rise for another 30-45 minutes.
Step 8: Preheat the Oven
While your challah is rising for the second time, preheat your oven to 375°F (190°C).
Step 9: Apply Egg Wash
Before baking, brush the top of the challah with the egg wash mixture (beaten egg and water). This will give it a beautiful golden color when baked.
Step 10: Bake
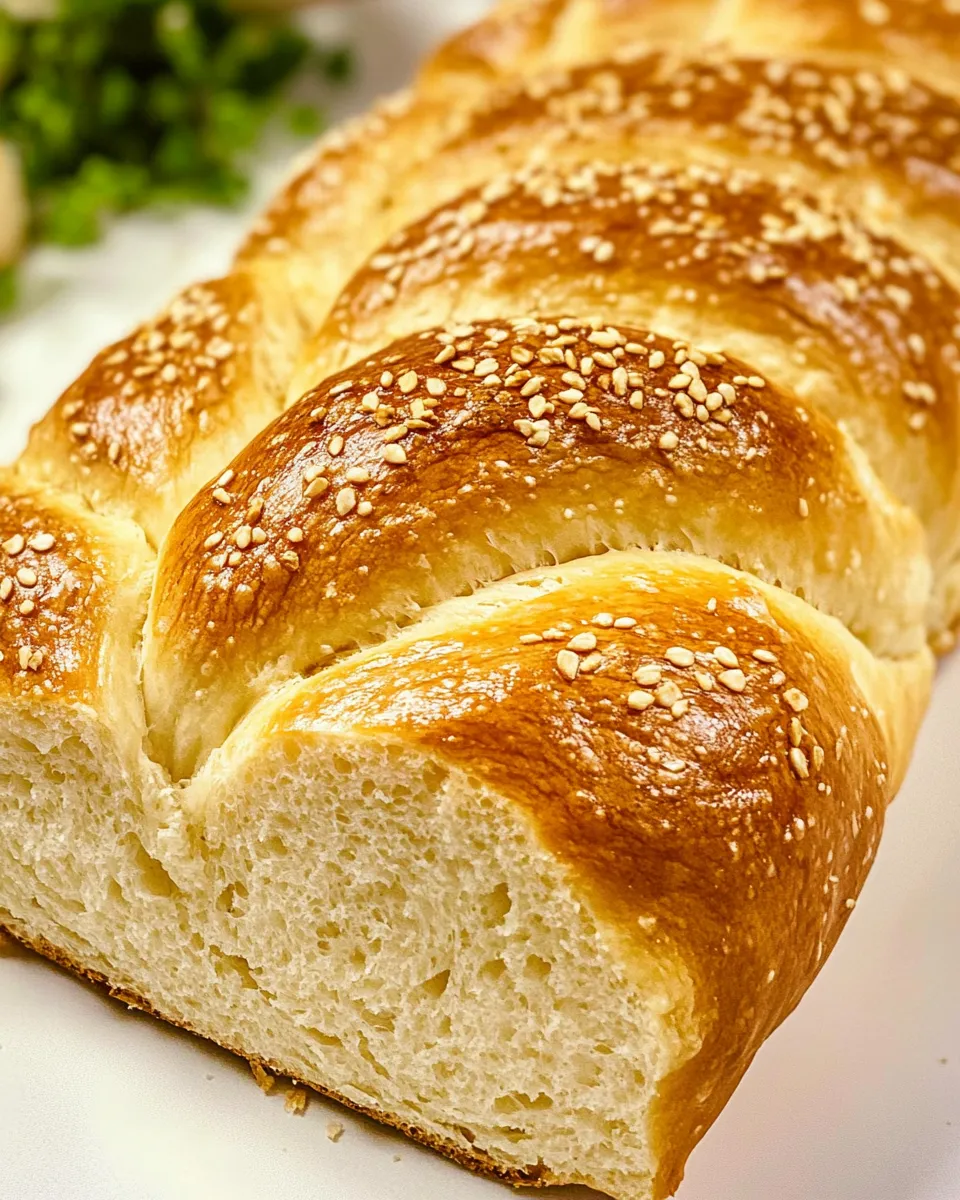
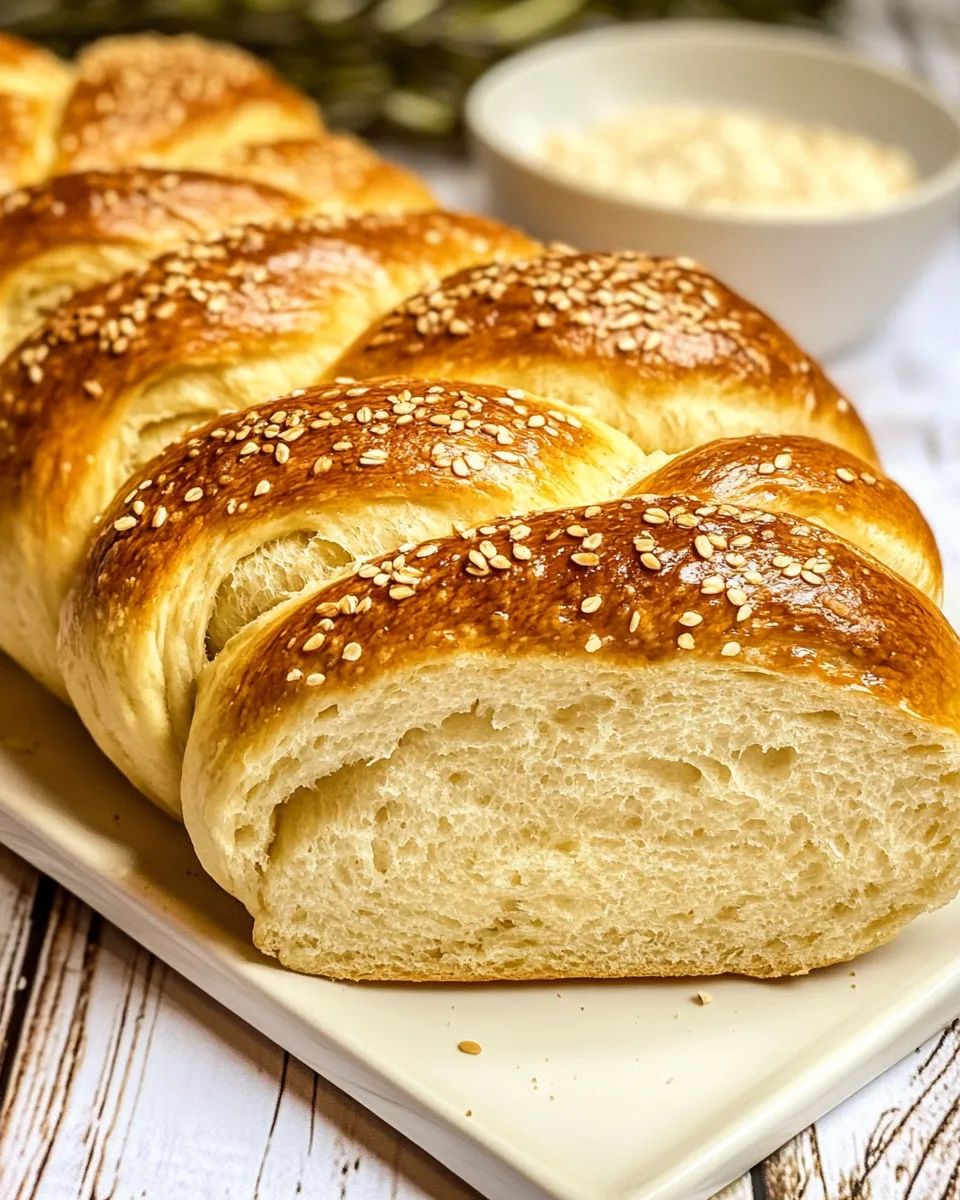
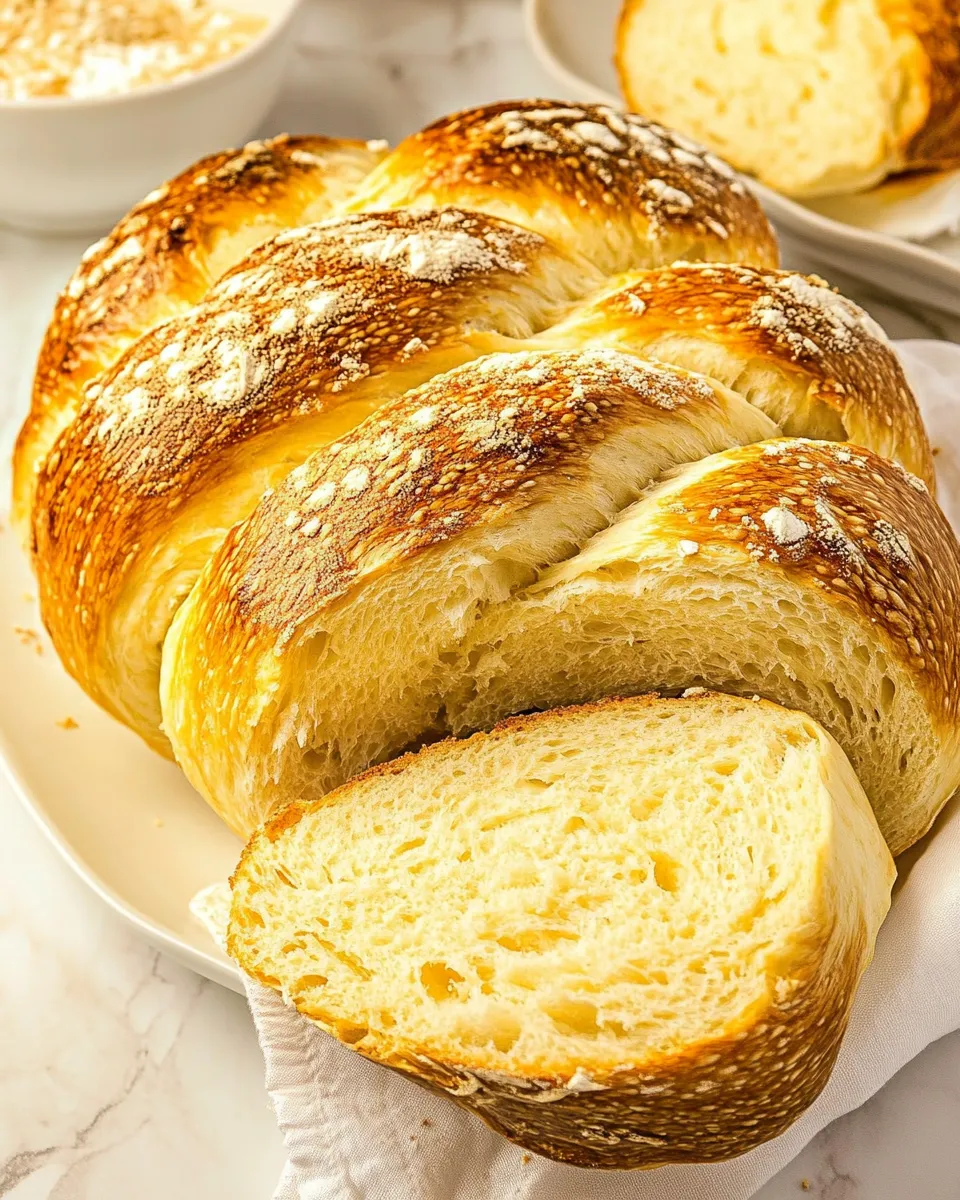
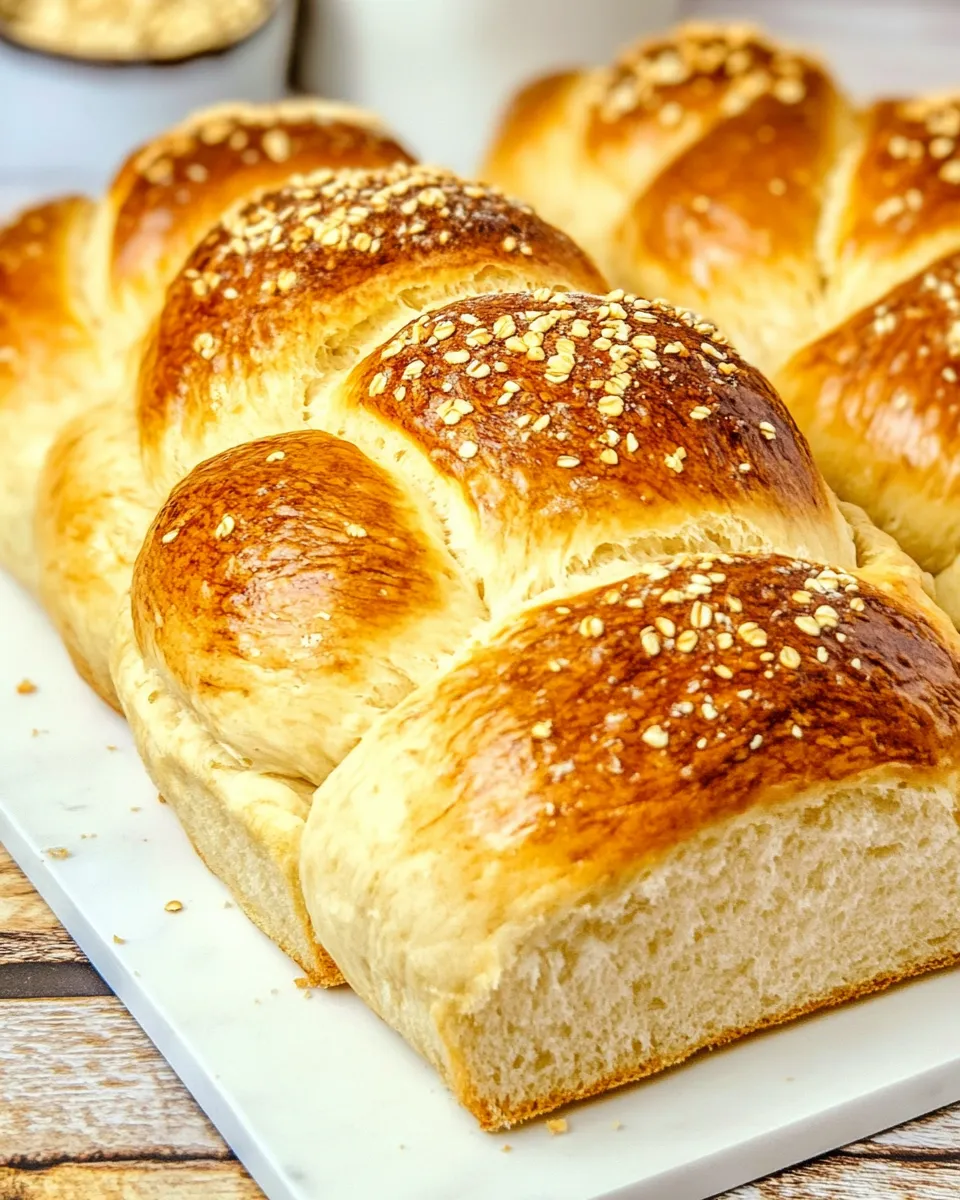
Place the baking sheet in the preheated oven and bake for 25-30 minutes, or until the challah is golden brown and sounds hollow when tapped on the bottom.
Step 11: Cool and Enjoy
Once baked, remove the challah from the oven and let it cool on a wire rack. Slice and enjoy your No-Knead Challah Bread fresh, or use it for sandwiches, French toast, or simply slathered with butter.
Season-by-Season Upgrades
- Fall: Add spices like cinnamon or nutmeg for a cozy flavor.
- Winter: Incorporate dried fruits such as cranberries or raisins for a festive touch.
- Spring: Mix in citrus zest for a fresh, bright taste.
- Summer: Try adding herbs like rosemary or thyme for a unique twist.
Cook’s Commentary
This No-Knead Challah Bread is not just for special occasions; it can be enjoyed any day of the week. The beauty of this recipe lies in its versatility. Feel free to experiment with different flavors and toppings. The long fermentation process enhances the flavor profile, and the final product is a rich, slightly sweet bread that pairs beautifully with a variety of spreads. Whether you’re serving it at a holiday gathering or enjoying it for breakfast, it’s sure to impress.
Meal Prep & Storage Notes
Once your No-Knead Challah Bread has cooled, you can store it in an airtight container at room temperature for up to 3 days. For longer storage, wrap it tightly in plastic wrap and freeze. It will keep well for up to 3 months. To enjoy, simply thaw at room temperature and refresh it in the oven for a few minutes to regain its fresh-baked taste.
Common Questions
Can I use whole wheat flour instead of all-purpose flour?
Yes, you can substitute whole wheat flour, but the texture may be denser. Consider using a mix of whole wheat and all-purpose flour for a lighter loaf.
What can I use instead of honey?
If you’re looking for an alternative to honey, maple syrup or agave nectar can be used. They will impart a slightly different flavor, but the bread will still turn out delicious.
How can I tell when the bread is done baking?
The bread is done when it is a deep golden brown and sounds hollow when tapped on the bottom. An internal temperature of around 190°F (88°C) also indicates that it’s fully baked.
Can I make this recipe vegan?
Yes! You can replace the eggs with flax eggs (1 tablespoon of ground flaxseed mixed with 2.5 tablespoons of water per egg) and use a plant-based oil. The bread will still be delicious!
The Last Word
Baking bread can seem intimidating, but this No-Knead Challah Bread recipe demystifies the process, allowing everyone to enjoy homemade bread. With its rich flavor and beautiful texture, this challah will become a staple in your baking repertoire. Whether you serve it at a family gathering or enjoy a slice with your morning coffee, you’ll be amazed at how easy it is to create something so wonderful. So roll up your sleeves, gather your ingredients, and start baking this delightful loaf today!

No-Knead Challah Bread
Ingredients
- 4 cups all-purpose flour
- 2 teaspoons salt
- 1 teaspoon active dry yeast
- 1 cup warm water
- 2 large eggs beaten
- 1/3 cup honey
- 1/3 cup vegetable oil
- 1 large egg beaten with 1 tablespoon water for egg wash
Instructions
- In a large mixing bowl, whisk together the all-purpose flour, salt, and active dry yeast.
- In a separate bowl, combine the warm water, beaten eggs, honey, and vegetable oil. Mix well.
- Pour the wet mixture into the bowl with the dry ingredients. Mix until a shaggy dough forms.
- Cover the bowl with plastic wrap and let the dough rise at room temperature for 1 to 2 hours.
- Turn the dough onto a lightly floured surface. Divide it into three equal pieces and roll each into a long rope.
- Braid the three ropes together and pinch the ends to seal.
- Transfer the braided challah onto a lined baking sheet and let it rise for another 30-45 minutes.
- Preheat your oven to 375°F (190°C).
- Brush the top with the egg wash mixture.
- Bake for 25-30 minutes until golden brown and sounds hollow when tapped.
- Let cool on a wire rack. Slice and enjoy!
Equipment
- Large Mixing Bowl
- Plastic Wrap
- Baking Sheet
- Pastry brush
- Oven
Notes
- Store in an airtight container at room temperature for up to 3 days.
- Freeze tightly wrapped for up to 3 months.
- Thaw at room temperature and refresh in the oven.


