Looking for a show-stopping dessert that’s perfect for summer barbecues, picnics, or any festive occasion? Look no further than this delightful Berry Cheesecake Flag Dessert. With its creamy cheesecake filling, buttery crust, and vibrant berry topping, this dessert not only tastes amazing but also looks stunning on any table. Inspired by the colors of the American flag, it’s a sweet treat that celebrates the spirit of togetherness and joy. Let’s dive into the details of this crowd-pleasing dessert that will leave your guests asking for seconds.
Why It’s Crowd-Pleasing

The Berry Cheesecake Flag Dessert is a guaranteed hit for several reasons. First, the combination of creamy cheesecake and fresh berries creates a harmonious balance of flavors. The richness of the cheesecake contrasts beautifully with the tartness of the berries, making every bite satisfying. Second, the visual appeal of this dessert is undeniable. The red, white, and blue theme makes it perfect for patriotic holidays, and it’s an excellent way to showcase seasonal fruits. Lastly, it’s easy to make and can be prepared in advance, making it a great option for entertaining. Your friends and family will be delightfully surprised by this deliciously beautiful dessert!
What You’ll Need
To bring this beautiful dessert to life, you’ll need the following ingredients:
- 2 cups all-purpose flour
- 1/3 cup granulated sugar
- 1 cup cold butter (2 sticks), cubed
- 1 package (8 oz) cream cheese, softened
- 1/2 cup powdered sugar
- 1 teaspoon vanilla extract
- 1 cup heavy cream
- 1 cup strawberries, sliced
- 1 cup blueberries
Equipment at a Glance
Before you start baking, gather the following equipment:
- 9×13 inch baking dish – perfect for assembling the dessert.
- Mixing bowls – for combining your crust and cheesecake filling.
- Electric mixer – to achieve a smooth and creamy cheesecake texture.
- Spatula – for spreading the cheesecake mixture evenly.
- Knife – for slicing the strawberries and serving the dessert.
Berry Cheesecake Flag Dessert, Made Easy
Now, let’s walk through the steps to create your stunning Berry Cheesecake Flag Dessert.
Step 1: Prepare the Crust
Start by preheating your oven to 350°F (175°C). In a mixing bowl, combine the 2 cups of all-purpose flour and 1/3 cup of granulated sugar. Add the 1 cup of cold, cubed butter to the bowl. Using a pastry cutter or your fingers, mix the ingredients until the mixture resembles coarse crumbs.
Step 2: Bake the Crust
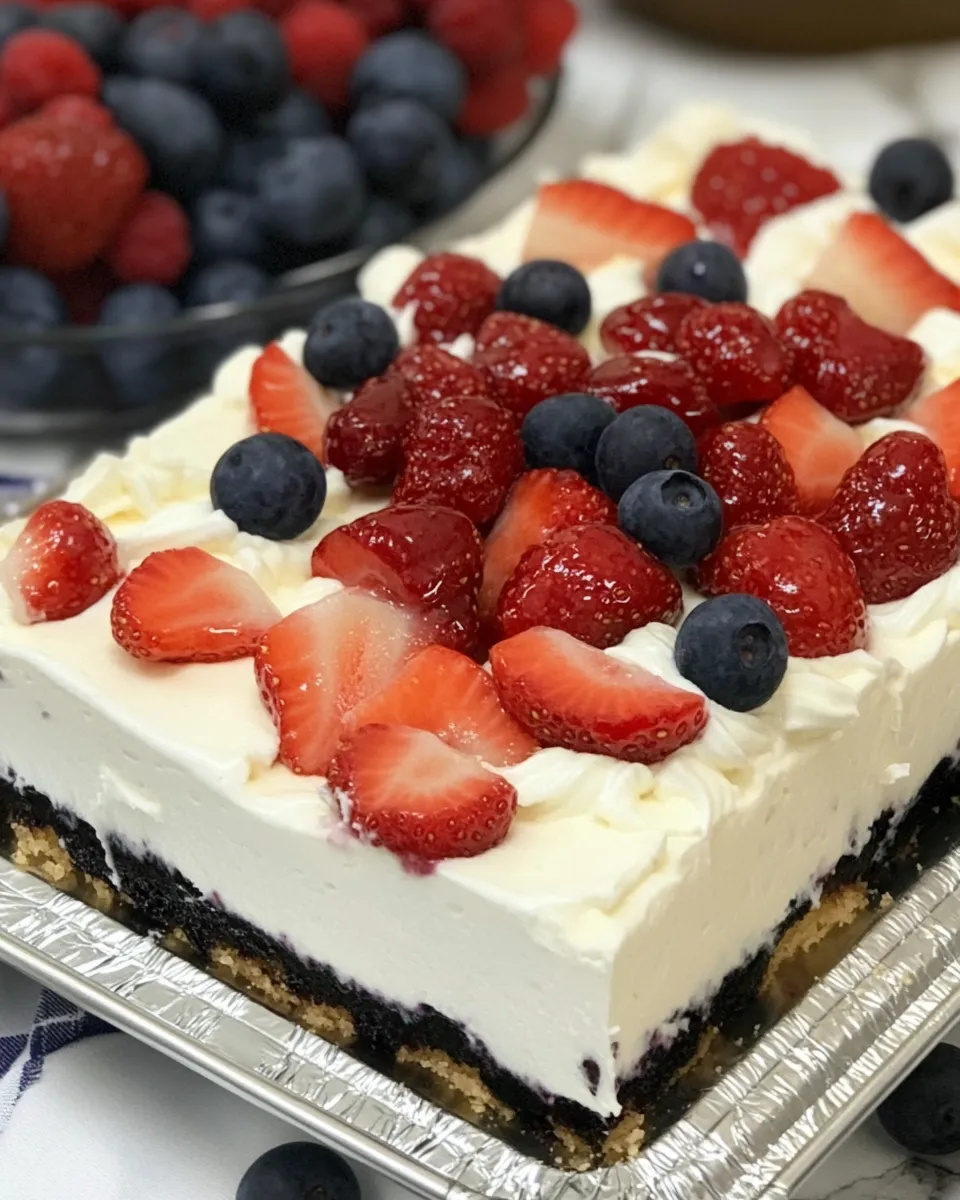
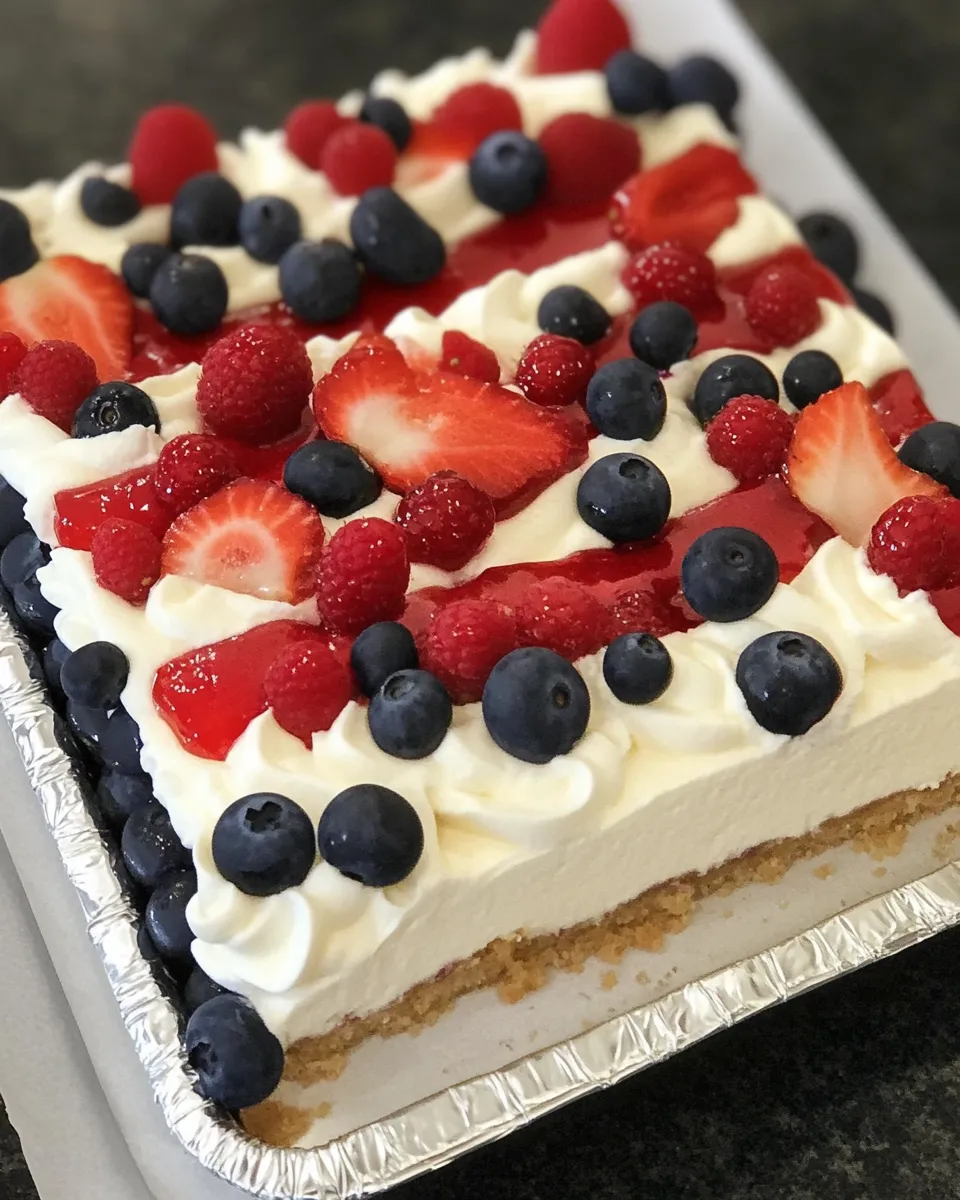
Press the mixture evenly into the bottom of the 9×13 inch baking dish. Bake in the preheated oven for about 15-20 minutes, or until the edges are lightly golden. Once done, remove it from the oven and let it cool completely.
Step 3: Make the Cheesecake Filling
While the crust is cooling, prepare the cheesecake filling. In a mixing bowl, beat the softened cream cheese with an electric mixer until smooth. Gradually add the 1/2 cup of powdered sugar and 1 teaspoon of vanilla extract, mixing until well combined.
Step 4: Whip the Cream
In another bowl, whip the 1 cup of heavy cream until stiff peaks form. Gently fold the whipped cream into the cream cheese mixture until fully combined and fluffy.
Step 5: Assemble the Dessert
Once the crust is completely cooled, spread the cheesecake filling evenly over the crust. Use a spatula for a smooth finish.
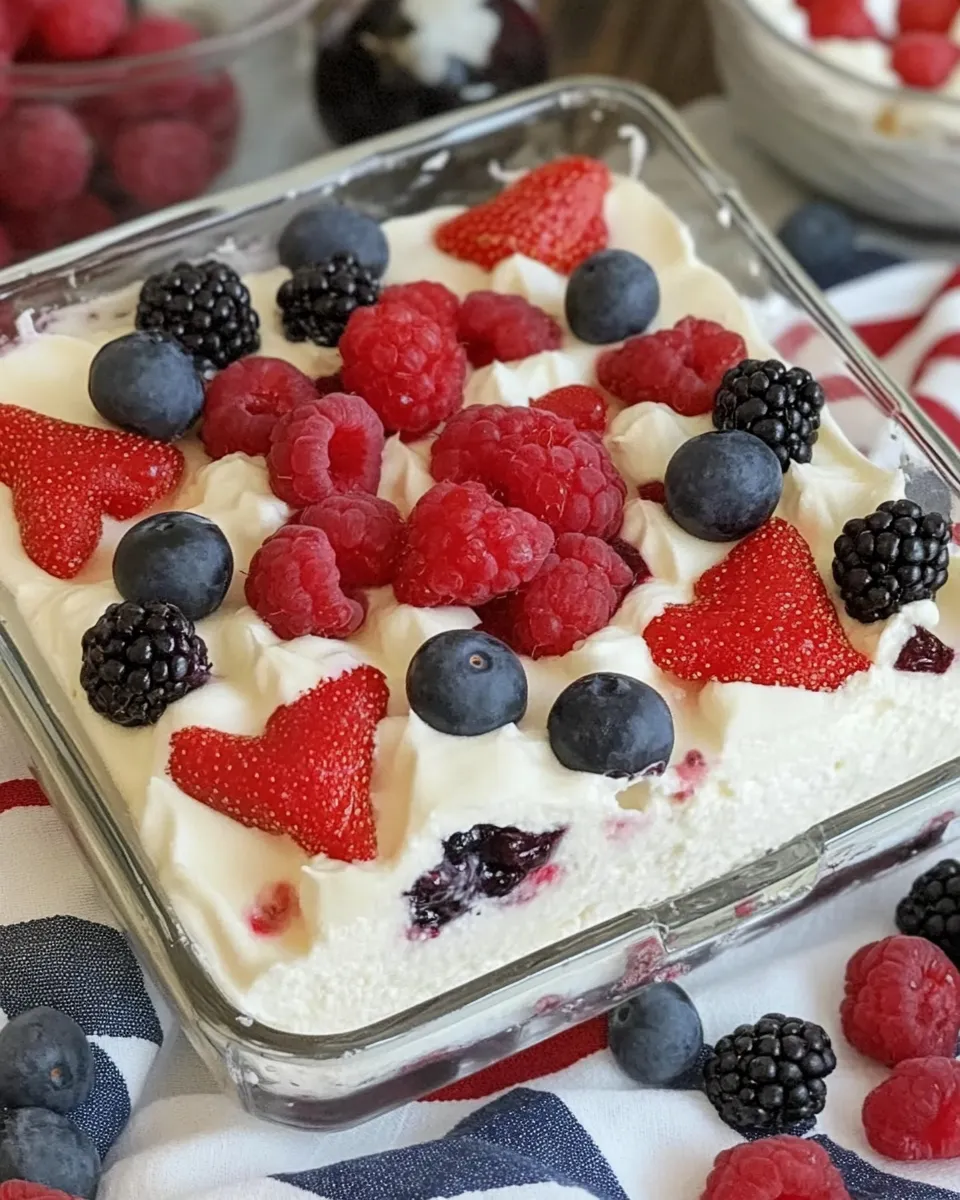
Step 6: Decorate with Berries
Now for the fun part! Arrange the sliced strawberries and blueberries on top of the cheesecake filling to create a flag design. Use the strawberries to form the stripes and place the blueberries in the corner for the stars.
Step 7: Chill and Serve
Cover the dessert with plastic wrap and refrigerate for at least 4 hours, or overnight if possible. This will allow the flavors to meld beautifully. When you’re ready to serve, slice into squares and enjoy your stunning Berry Cheesecake Flag Dessert!
Year-Round Variations
This versatile dessert can easily be adapted for different seasons and occasions. Here are some ideas to switch it up:
- Try using raspberries or blackberries for a different flavor profile.
- For a chocolate twist, incorporate cocoa powder into the crust.
- Add a layer of lemon curd beneath the cheesecake filling for a refreshing zing.
- Top with seasonal fruits like peaches or cherries in late summer.
Pitfalls & How to Prevent Them
When making the Berry Cheesecake Flag Dessert, there are a few common pitfalls to watch out for:
- Overmixing the cream cheese can lead to a grainy texture. Mix just until smooth.
- Ensure the crust is completely cooled before adding the cheesecake filling to prevent melting.
- Don’t skip the chilling time; this helps the cheesecake set properly and enhances the flavors.
- Be gentle when folding the whipped cream into the cheesecake mixture to maintain lightness.
Save for Later: Storage Tips
To keep your Berry Cheesecake Flag Dessert fresh and delicious, follow these storage tips:
- Store leftovers in an airtight container in the refrigerator for up to 3 days.
- If you want to make it ahead of time, it can be prepared a day in advance.
- Do not freeze the dessert, as the texture may change once thawed.
Berry Cheesecake Flag Dessert Q&A
Can I use a different type of cheese for the filling?
While cream cheese gives the best texture and flavor, mascarpone cheese can be used for a richer taste. Just keep in mind that the consistency may change slightly.
What can I use instead of heavy cream?
For a lighter option, you can substitute heavy cream with coconut cream or a non-dairy whipped topping. This will alter the flavor a bit but still yield a delicious dessert.
Can I make this dessert gluten-free?
Yes! Simply swap the all-purpose flour with a gluten-free flour blend, and make sure all other ingredients are gluten-free as well.
How do I prevent the berries from sinking into the cheesecake?
To help keep the berries in place, gently pat them dry before placing them on the cheesecake filling. You can also lightly toss them in a bit of flour before decorating.
If you enjoyed making the , you might also love these delicious recipes:
Final Bite
The Berry Cheesecake Flag Dessert is more than just a sweet treat; it’s a celebration of flavors and colors that brings everyone together. Whether you serve it at a summer gathering or a festive holiday get-together, it’s sure to impress. With its creamy texture, buttery crust, and fresh berries, it’s a dessert that will not only satisfy your sweet tooth but also create lasting memories. So gather your ingredients, invite some friends over, and let the festivities begin with this stunning dessert!

Berry Cheesecake Flag Dessert
Ingredients
For the Crust:
- 2 cups all-purpose flour
- 1/3 cup granulated sugar
- 1 cup cold butter (2 sticks), cubed
For the Cheesecake Filling:
- 1 package cream cheese (8 oz), softened
- 1/2 cup powdered sugar
- 1 teaspoon vanilla extract
- 1 cup heavy cream
For the Topping:
- 1 cup strawberries (sliced)
- 1 cup blueberries
Instructions
Instructions:
- Step 1: Prepare the Crust. Preheat your oven to 350°F (175°C). In a mixing bowl, combine the flour and sugar. Add the cold, cubed butter and mix until coarse crumbs form.
- Step 2: Bake the Crust. Press the mixture into the baking dish and bake for 15-20 minutes until edges are golden. Let it cool completely.
- Step 3: Make the Cheesecake Filling. Beat the cream cheese until smooth, then add powdered sugar and vanilla, mixing until combined.
- Step 4: Whip the Cream. Whip the heavy cream until stiff peaks form and fold it into the cream cheese mixture.
- Step 5: Assemble the Dessert. Spread the cheesecake filling evenly over the cooled crust.
- Step 6: Decorate with Berries. Arrange strawberries and blueberries on top to create a flag design.
- Step 7: Chill and Serve. Cover with plastic wrap and refrigerate for at least 4 hours before serving.
Equipment
- 9x13-inch Baking Dish
- Mixing Bowls
- Electric Mixer
- Spatula
- Knife
Notes
- Store leftovers in an airtight container in the refrigerator for up to 3 days.
- Prepare a day in advance for the best flavor.
- Do not freeze the dessert to maintain texture.