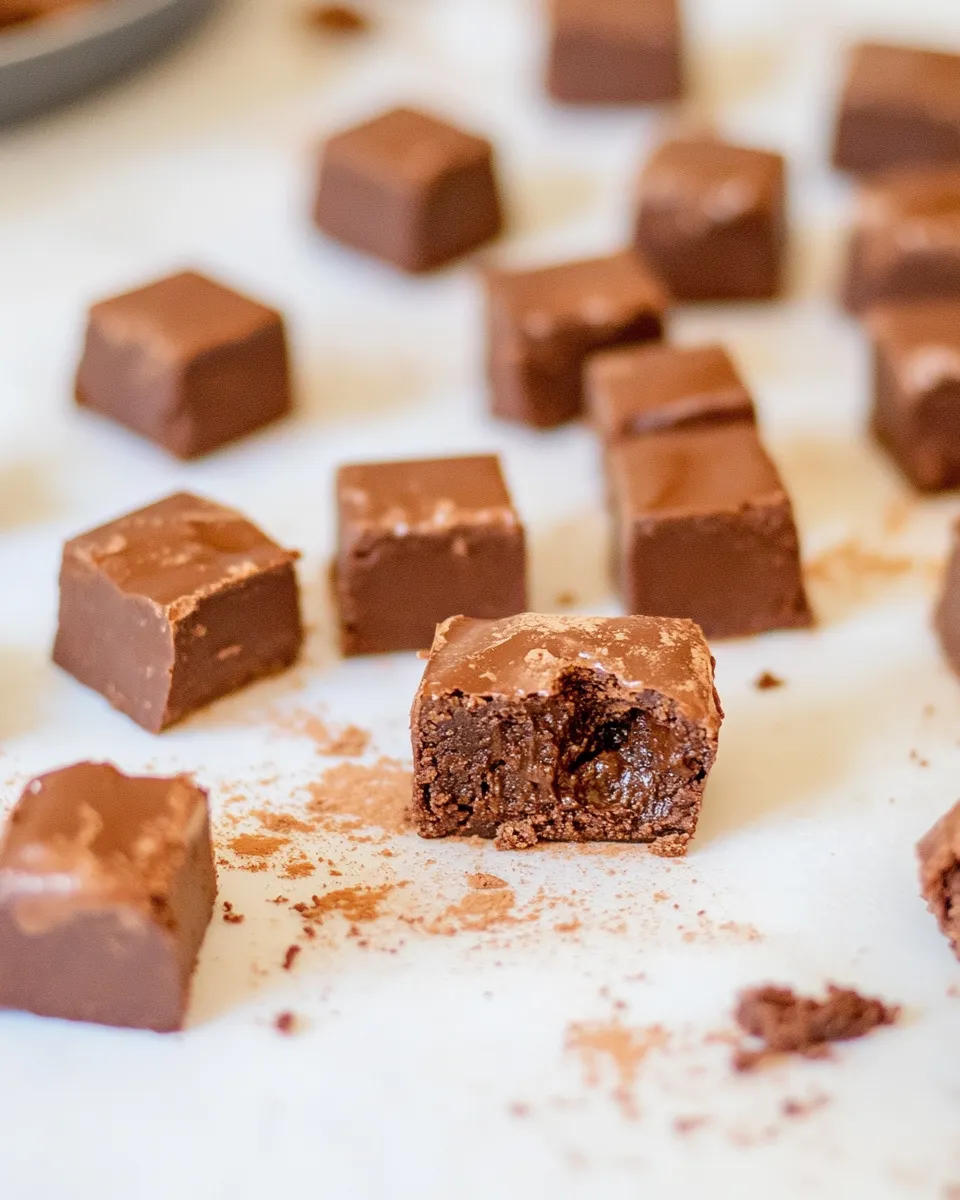
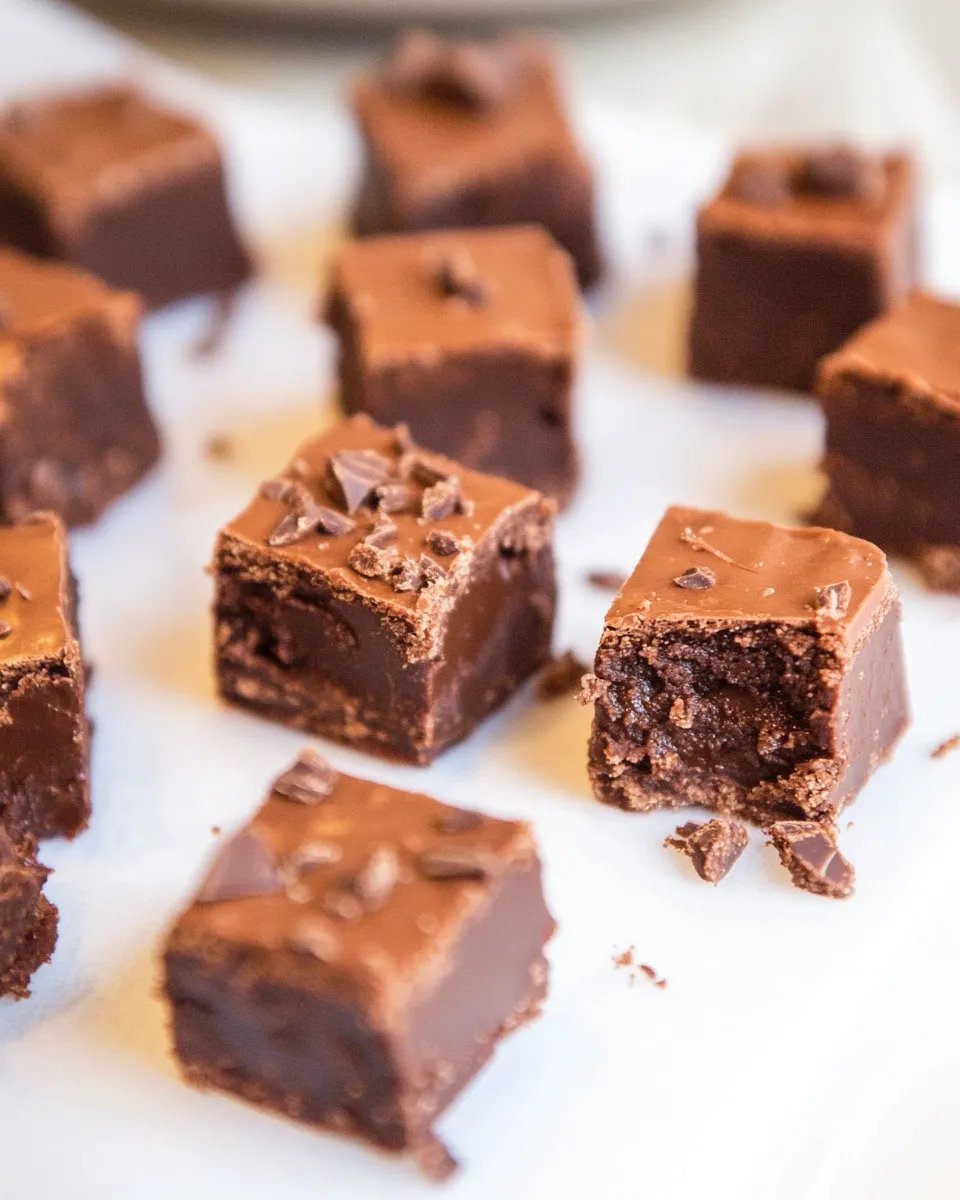
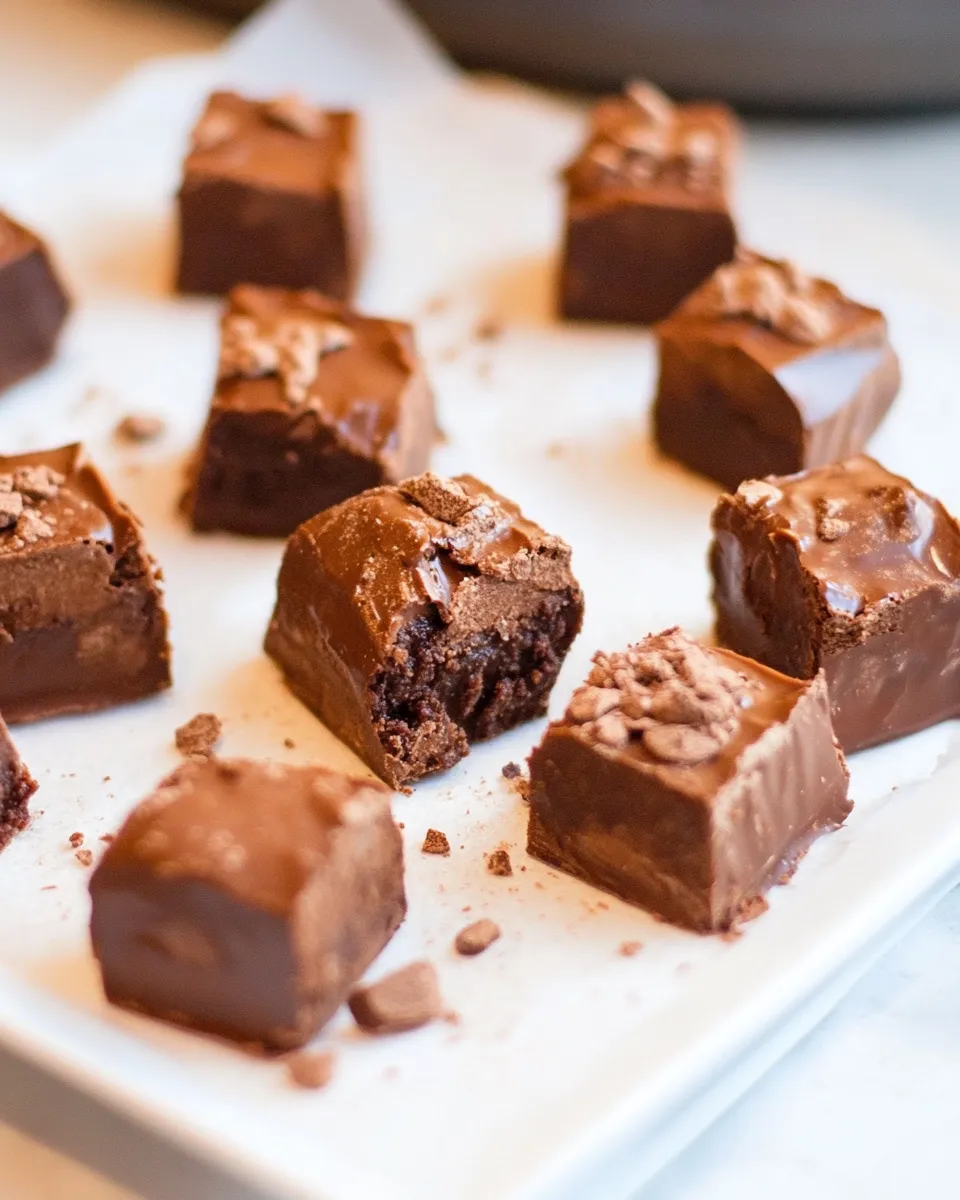
Are you ready to indulge in a decadent treat that combines the rich flavors of chocolate and hazelnut? These Nutella Brownie Truffle Bites are the perfect solution for satisfying your sweet tooth while impressing friends and family with minimal effort. With a soft, fudgy center surrounded by a delicate dusting of cocoa powder, every bite is a little piece of heaven. Plus, they can easily be made vegan or gluten-free, making them a versatile dessert for everyone to enjoy. Let’s dive into this delicious recipe that is bound to become a favorite!
Why It Works Every Time
The magic of Nutella Brownie Truffle Bites lies in their simplicity and the balance of flavors. The use of Nutella gives these truffles a creamy texture and a deep chocolate-hazelnut flavor, while the addition of cocoa powder intensifies the chocolate experience. The butter adds richness, while the confectioners’ sugar ensures the perfect sweetness without being overly sugary. These bites are easy to make and require no baking, making them a fantastic option for those who want a quick treat without the fuss.
What’s in the Bowl
To create these delightful Nutella Brownie Truffle Bites, you’ll need the following ingredients:
- 1 heaping cup Nutella (or substitute with store brand chocolate-hazelnut spread or Justin’s Chocolate-Hazelnut Butter for a vegan option)
- ½ cup unsalted butter (use vegan butter or margarine to keep it vegan)
- 1 cup confectioners’ sugar
- ⅓ cup unsweetened natural cocoa powder (Hershey’s Special Dark or Dutch-process brands may be substituted)
- ½ cup plus 1 to 3 tablespoons all-purpose flour (gluten-free flour may be substituted)
- ½ cup semi-sweet chocolate chips
Equipment & Tools
To prepare these Nutella Brownie Truffle Bites, you will need a few essential tools:
- Mixing bowl: For combining the ingredients.
- Spatula: To mix and scrape down the bowl.
- Measuring cups and spoons: For accurate measurements of ingredients.
- Baking sheet: To chill the truffle bites.
- Cookie scoop or spoon: For shaping uniform bites.
- Cocoa powder for dusting: To finish off the truffles.
Cooking Nutella Brownie Truffle Bites: The Process
Step 1: Prepare the Base Mixture
In a mixing bowl, combine the heaping cup of Nutella and ½ cup of softened unsalted butter. Use a spatula to mix until the mixture is smooth and well-blended.
Step 2: Incorporate the Dry Ingredients
Add in the 1 cup of confectioners’ sugar and ⅓ cup of cocoa powder. Mix thoroughly to avoid lumps. The mixture should start to thicken as the sugar and cocoa incorporate.
Step 3: Add the Flour
Gradually add ½ cup plus 1 to 3 tablespoons of all-purpose flour to the mixture, stirring until fully combined. The dough should be thick yet pliable. If it feels too sticky, add additional flour one tablespoon at a time until it reaches the desired consistency.
Step 4: Fold in the Chocolate Chips
Gently fold in the ½ cup of semi-sweet chocolate chips until evenly distributed throughout the dough.
Step 5: Chill the Mixture
Cover the bowl with plastic wrap and place it in the refrigerator for about 30 minutes. This will make it easier to handle when forming the truffle bites.
Step 6: Shape the Truffles
Once chilled, scoop out portions of the dough using a cookie scoop or spoon. Roll them into bite-sized balls and place them on a baking sheet lined with parchment paper.
Step 7: Dust with Cocoa Powder
Dust the truffle bites with additional cocoa powder for an elegant finish. This adds a touch of sophistication and enhances the chocolate flavor.
Step 8: Chill Again
Return the baking sheet to the refrigerator for an additional 30 minutes to set the truffles.
Dietary Swaps & Alternatives
If you’re looking to customize these Nutella Brownie Truffle Bites, consider the following swaps:
- Use vegan butter or margarine instead of unsalted butter to keep the recipe vegan.
- Substitute gluten-free flour for all-purpose flour if you need a gluten-free option.
- Opt for Justin’s Chocolate-Hazelnut Butter as a vegan alternative to Nutella.
- Choose dairy-free chocolate chips to keep the bites entirely vegan.
Chef’s Notes
- Ensure your butter is softened to room temperature for easy mixing.
- Feel free to experiment with flavors by adding a pinch of sea salt or a dash of vanilla extract for an extra layer of taste.
- For added texture, consider rolling the truffles in crushed nuts or sprinkles instead of cocoa powder.
- These truffles can be made ahead of time and stored in the fridge for a quick indulgence later.
Storage & Reheat Guide
Store your Nutella Brownie Truffle Bites in an airtight container in the refrigerator for up to one week. They can also be frozen for up to three months. To enjoy, simply remove them from the freezer and let them sit at room temperature for about 15 minutes before serving.
FAQ
Can I use a different type of nut butter?
Yes! You can substitute Nutella with any nut butter of your choice, but keep in mind that the flavor and texture will change accordingly.
How do I know when the truffles are set?
The truffles should feel firm to the touch and hold their shape when rolled. Chilling them for the recommended time will ensure they set properly.
Can I add other mix-ins to the truffles?
Absolutely! You can add chopped nuts, dried fruits, or even a hint of espresso powder for a different flavor profile.
What if my dough is too sticky?
If your dough feels too sticky to work with, simply add more flour, one tablespoon at a time, until it reaches the desired consistency.
The Takeaway
These Nutella Brownie Truffle Bites are the ultimate indulgence for chocolate lovers. With their rich flavor and delightful texture, they make for a fantastic dessert or a sweet snack anytime. The best part is how easy they are to whip up, making them a perfect option for gatherings or simply treating yourself. Enjoy the blissful combination of chocolate and hazelnut in every bite, and don’t forget to share (or not)! Happy indulging!

Nutella Brownie Truffle Bites
Ingredients
- 1 heaping cup Nutella (or substitute with store brand chocolate-hazelnut spread or Justin's Chocolate-Hazelnut Butter for a vegan option)
- ½ cup unsalted butter (use vegan butter or margarine to keep it vegan)
- 1 cup confectioners' sugar
- ⅓ cup unsweetened natural cocoa powder (Hershey's Special Dark or Dutch-process brands may be substituted)
- ½ cup plus 1 to 3 tablespoons all-purpose flour (gluten-free flour may be substituted)
- ½ cup semi-sweet chocolate chips
Instructions
- In a mixing bowl, combine the heaping cup of Nutella and ½ cup of softened unsalted butter. Use a spatula to mix until the mixture is smooth and well-blended.
- Add in the 1 cup of confectioners' sugar and ⅓ cup of cocoa powder. Mix thoroughly to avoid lumps. The mixture should start to thicken as the sugar and cocoa incorporate.
- Gradually add ½ cup plus 1 to 3 tablespoons of all-purpose flour to the mixture, stirring until fully combined. The dough should be thick yet pliable. If it feels too sticky, add additional flour one tablespoon at a time until it reaches the desired consistency.
- Gently fold in the ½ cup of semi-sweet chocolate chips until evenly distributed throughout the dough.
- Cover the bowl with plastic wrap and place it in the refrigerator for about 30 minutes. This will make it easier to handle when forming the truffle bites.
- Once chilled, scoop out portions of the dough using a cookie scoop or spoon. Roll them into bite-sized balls and place them on a baking sheet lined with parchment paper.
- Dust the truffle bites with additional cocoa powder for an elegant finish. This adds a touch of sophistication and enhances the chocolate flavor.
- Return the baking sheet to the refrigerator for an additional 30 minutes to set the truffles.
Equipment
- Mixing Bowl
- Spatula
- Measuring cups and spoons
- Baking Sheet
- Cookie scoop or spoon
- Cocoa powder for dusting
Notes
- Ensure your butter is softened to room temperature for easy mixing.
- Feel free to experiment with flavors by adding a pinch of sea salt or a dash of vanilla extract for an extra layer of taste.
- For added texture, consider rolling the truffles in crushed nuts or sprinkles instead of cocoa powder.
- These truffles can be made ahead of time and stored in the fridge for a quick indulgence later.