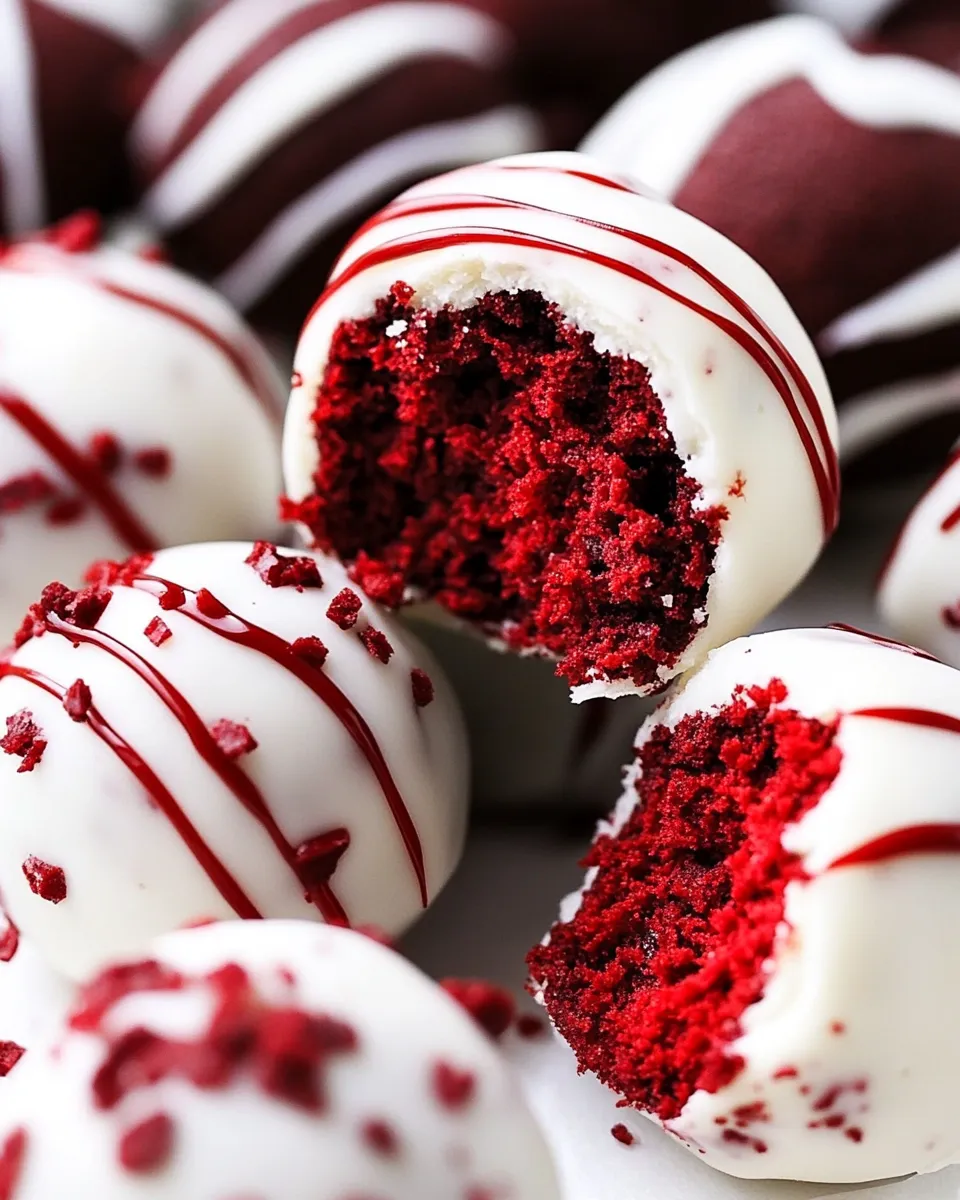
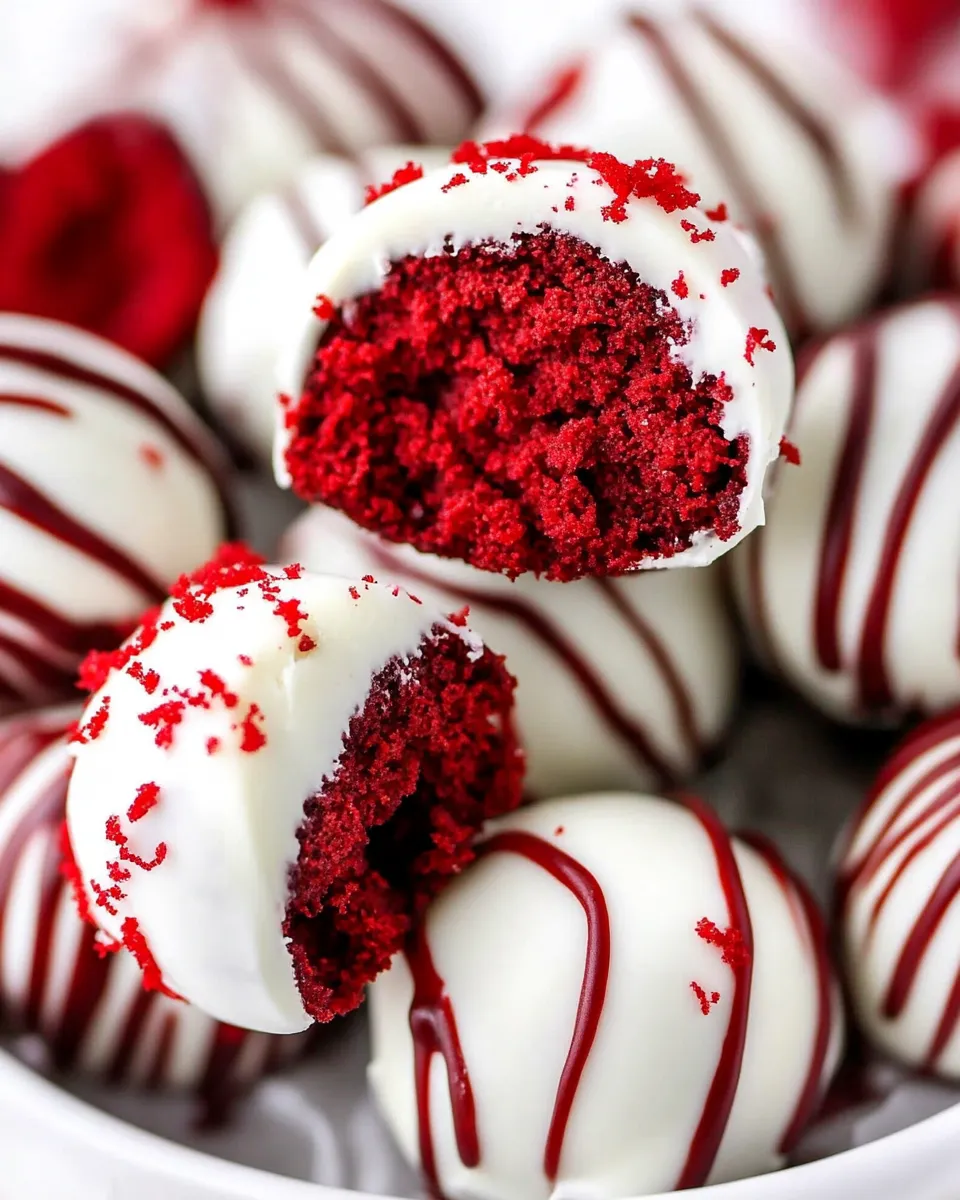
Red Velvet Cake Truffles are the perfect sweet treat that combines the delight of red velvet cake with the convenience of bite-sized indulgence. These truffles are rich, creamy, and oh-so-decadent, making them an excellent choice for celebrations, gifts, or just because you deserve a little something special. With a simple mix of ingredients and a few easy steps, you’ll have a delightful dessert that everyone will love.
The Upside of Red Velvet Cake Truffles
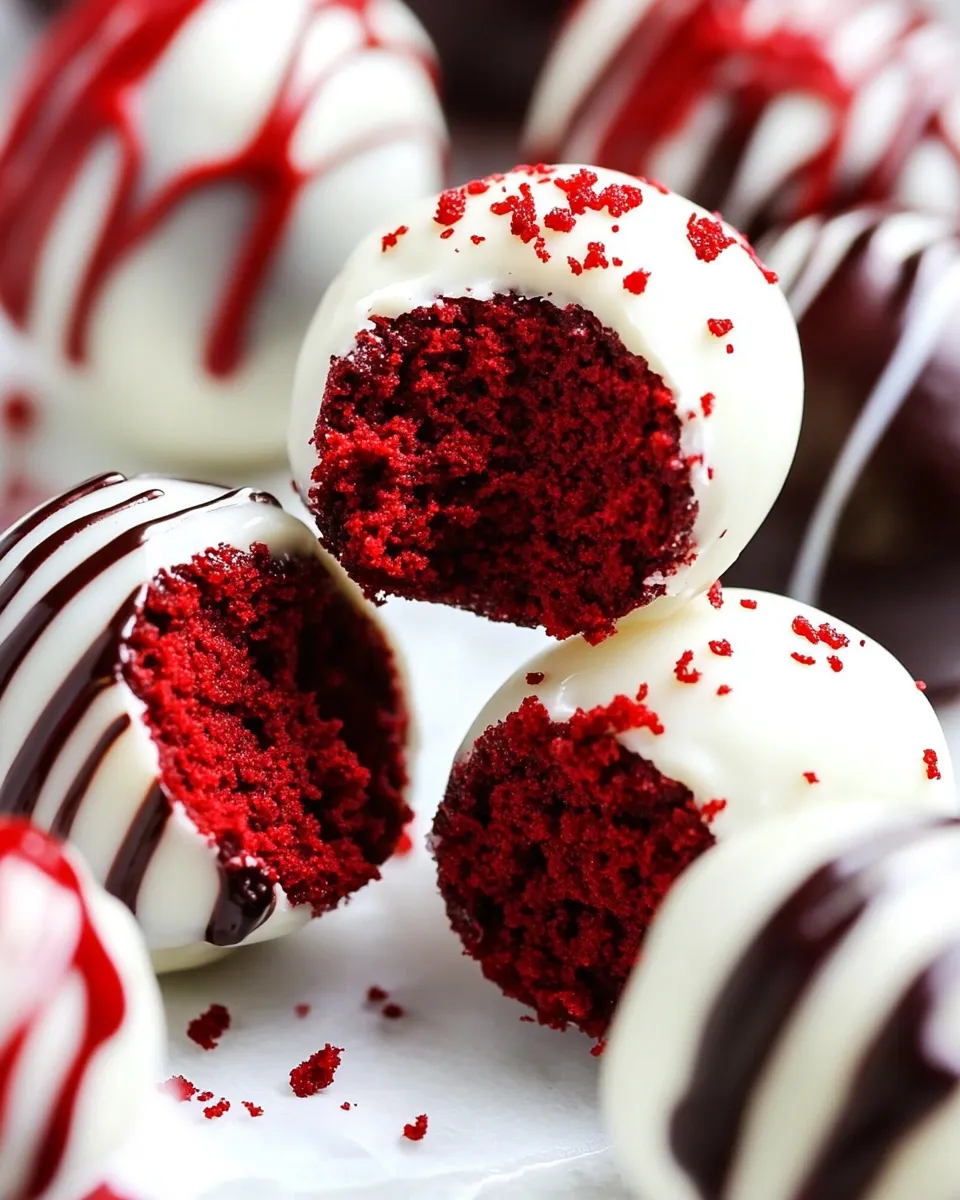
If you’re wondering why you should dive into the world of Red Velvet Cake Truffles, let’s talk about the perks. First, they are incredibly easy to make. Using a box of red velvet cake mix means you can skip the intricate baking process while still achieving a deliciously moist cake. Second, these truffles can be made ahead of time, making them a fantastic option for parties or holiday gatherings. Finally, they are versatile! You can coat them in dark chocolate, white chocolate, or even a sprinkle of crushed nuts for added texture and flavor.
What to Buy
To prepare these delightful Red Velvet Cake Truffles, you’ll need the following ingredients:
- 1 box red velvet cake mix
- Ingredients listed on the cake mix box (typically eggs, water, and oil)
- 18 oz package cream cheese (1/3 less fat), softened
- 12 ounce package milk, dark, or white chocolate chips
- 2 teaspoons vegetable oil (optional)
Don’t forget to check your pantry for the essentials listed on the cake mix box before heading out to shop!
Prep & Cook Tools
Gathering your kitchen tools ahead of time will help make the process smoother. Here’s what you’ll need:
- Mixing bowl – for preparing the cake mix
- Baking pan – to bake the cake
- Electric mixer – to blend the cream cheese and cake crumbs
- Cookie scoop or tablespoon – for forming the truffles
- Double boiler or microwave-safe bowl – for melting chocolate
- Wax paper – for cooling the truffles
With these tools on hand, you’re ready to create something delicious!
The Method for Red Velvet Cake Truffles
Making Red Velvet Cake Truffles is a fun and satisfying process. Follow these steps to create your own batch:
Step 1: Bake the Cake
Start by preheating your oven according to the instructions on the red velvet cake mix box. Prepare your baking pan by greasing it lightly. In a mixing bowl, combine the red velvet cake mix with the ingredients listed on the box, such as eggs, water, and oil. Mix well until all ingredients are fully incorporated. Pour the batter into the prepared pan and bake according to package instructions. Allow the cake to cool completely.
Step 2: Crumble the Cake
Once the cake has cooled, crumble it into a large mixing bowl. You want to achieve fine crumbs, so don’t be afraid to get your hands in there or use a fork to break it down.
Step 3: Mix with Cream Cheese
Add the softened cream cheese to the cake crumbs. Using an electric mixer or your hands, blend the mixture until it is well combined and forms a dough-like consistency. The cream cheese adds richness and helps bind the truffles together.
Step 4: Form the Truffles
Using a cookie scoop or tablespoon, portion out the mixture and roll it into small balls. Place each truffle on a baking sheet lined with wax paper. Once you have rolled all the mixture, place the truffles in the refrigerator for about 30 minutes to firm up.
Step 5: Melt the Chocolate
While the truffles are chilling, melt the chocolate chips. You can do this in a double boiler or in the microwave in 30-second intervals, stirring until smooth. If you like a smoother consistency, add 2 teaspoons of vegetable oil to the melted chocolate.
Step 6: Coat the Truffles
Once the truffles are firm, dip each one into the melted chocolate, ensuring they are completely covered. Use a fork to lift them out, letting any excess chocolate drip off. Return the coated truffles to the wax paper-lined baking sheet.
Step 7: Set and Serve
Allow the chocolate to set completely at room temperature or place the truffles back in the refrigerator for quicker results. Once set, your Red Velvet Cake Truffles are ready to serve!
Tailor It to Your Diet
These Red Velvet Cake Truffles can easily be adapted to suit various dietary needs. Here are some ideas:
- Gluten-Free: Substitute the red velvet cake mix with a gluten-free version.
- Dairy-Free: Use a dairy-free cream cheese alternative and dairy-free chocolate chips.
- Lower Sugar: Choose a sugar-free cake mix and reduced-sugar chocolate chips.
- Vegan: Use a vegan cake mix, replace eggs with applesauce, and choose vegan chocolate chips.
Feel free to get creative with your ingredients based on your dietary preferences!
Chef’s Notes
- For a festive touch, consider adding some sprinkles or crushed nuts on top of the chocolate coating.
- These truffles can be made ahead of time and stored in the refrigerator for up to a week.
- If you like a slight crunch, try rolling the truffles in crushed pecans or walnuts after dipping them in chocolate.
- Experiment with different flavor profiles by adding extracts, such as vanilla or almond, to the cream cheese mixture.
Save for Later: Storage Tips
To keep your Red Velvet Cake Truffles fresh and delicious:
Store them in an airtight container in the refrigerator for up to one week. You can also freeze them for longer storage; just ensure they are well-wrapped to prevent freezer burn. When ready to enjoy, simply thaw them in the refrigerator overnight.
Red Velvet Cake Truffles Q&A
Can I use a homemade red velvet cake recipe instead of cake mix?
Absolutely! If you have a favorite homemade recipe for red velvet cake, feel free to use it. Just make sure the cake is cooled and crumbled before mixing with the cream cheese.
What if I don’t have cream cheese?
If cream cheese isn’t available, you can use mascarpone cheese or a nut-based cream cheese alternative. Both will provide a creamy texture for your truffles.
Can I make these truffles in advance?
Yes! These truffles can be made up to a week in advance. Just store them in an airtight container in the refrigerator until you’re ready to serve.
What type of chocolate works best for coating?
You can use milk chocolate, dark chocolate, or white chocolate according to your preference. Each will add a unique flavor to your truffles, so feel free to experiment!
If you’re looking for more healthy-ish dessert ideas, check these out:
See You at the Table
With their rich flavor and delightful presentation, Red Velvet Cake Truffles are sure to impress at your next gathering. Whether you’re serving them at a birthday party, holiday celebration, or simply enjoying them with friends over coffee, these truffles will be a hit. So gather your ingredients, roll up your sleeves, and let’s indulge in the sweet joy of these delightful treats!

Red Velvet Cake Truffles
Ingredients
For the Truffles:
- 1 box red velvet cake mix
- 1 package cream cheese (1/3 less fat) softened
- 18 oz chocolate chips milk, dark, or white
- 2 teaspoons vegetable oil optional
- 3 items ingredients listed on the cake mix box typically eggs, water, and oil
Instructions
Instructions:
- Step 1: Bake the Cake - Preheat your oven according to the instructions on the red velvet cake mix box. Prepare your baking pan by greasing it lightly. In a mixing bowl, combine the red velvet cake mix with the ingredients listed on the box, such as eggs, water, and oil. Mix well until all ingredients are fully incorporated. Pour the batter into the prepared pan and bake according to package instructions. Allow the cake to cool completely.
- Step 2: Crumble the Cake - Once the cake has cooled, crumble it into a large mixing bowl. You want to achieve fine crumbs, so don’t be afraid to get your hands in there or use a fork to break it down.
- Step 3: Mix with Cream Cheese - Add the softened cream cheese to the cake crumbs. Using an electric mixer or your hands, blend the mixture until it is well combined and forms a dough-like consistency. The cream cheese adds richness and helps bind the truffles together.
- Step 4: Form the Truffles - Using a cookie scoop or tablespoon, portion out the mixture and roll it into small balls. Place each truffle on a baking sheet lined with wax paper. Once you have rolled all the mixture, place the truffles in the refrigerator for about 30 minutes to firm up.
- Step 5: Melt the Chocolate - While the truffles are chilling, melt the chocolate chips. You can do this in a double boiler or in the microwave in 30-second intervals, stirring until smooth. If you like a smoother consistency, add 2 teaspoons of vegetable oil to the melted chocolate.
- Step 6: Coat the Truffles - Once the truffles are firm, dip each one into the melted chocolate, ensuring they are completely covered. Use a fork to lift them out, letting any excess chocolate drip off. Return the coated truffles to the wax paper-lined baking sheet.
- Step 7: Set and Serve - Allow the chocolate to set completely at room temperature or place the truffles back in the refrigerator for quicker results. Once set, your Red Velvet Cake Truffles are ready to serve!
Equipment
- Mixing Bowl
- Baking pan
- Electric Mixer
- Cookie scoop or tablespoon
- Double boiler or microwave-safe bowl
- Wax paper
Notes
- For a festive touch, consider adding some sprinkles or crushed nuts on top of the chocolate coating.
- These truffles can be made ahead of time and stored in the refrigerator for up to a week.
- If you like a slight crunch, try rolling the truffles in crushed pecans or walnuts after dipping them in chocolate.
- Experiment with different flavor profiles by adding extracts, such as vanilla or almond, to the cream cheese mixture.