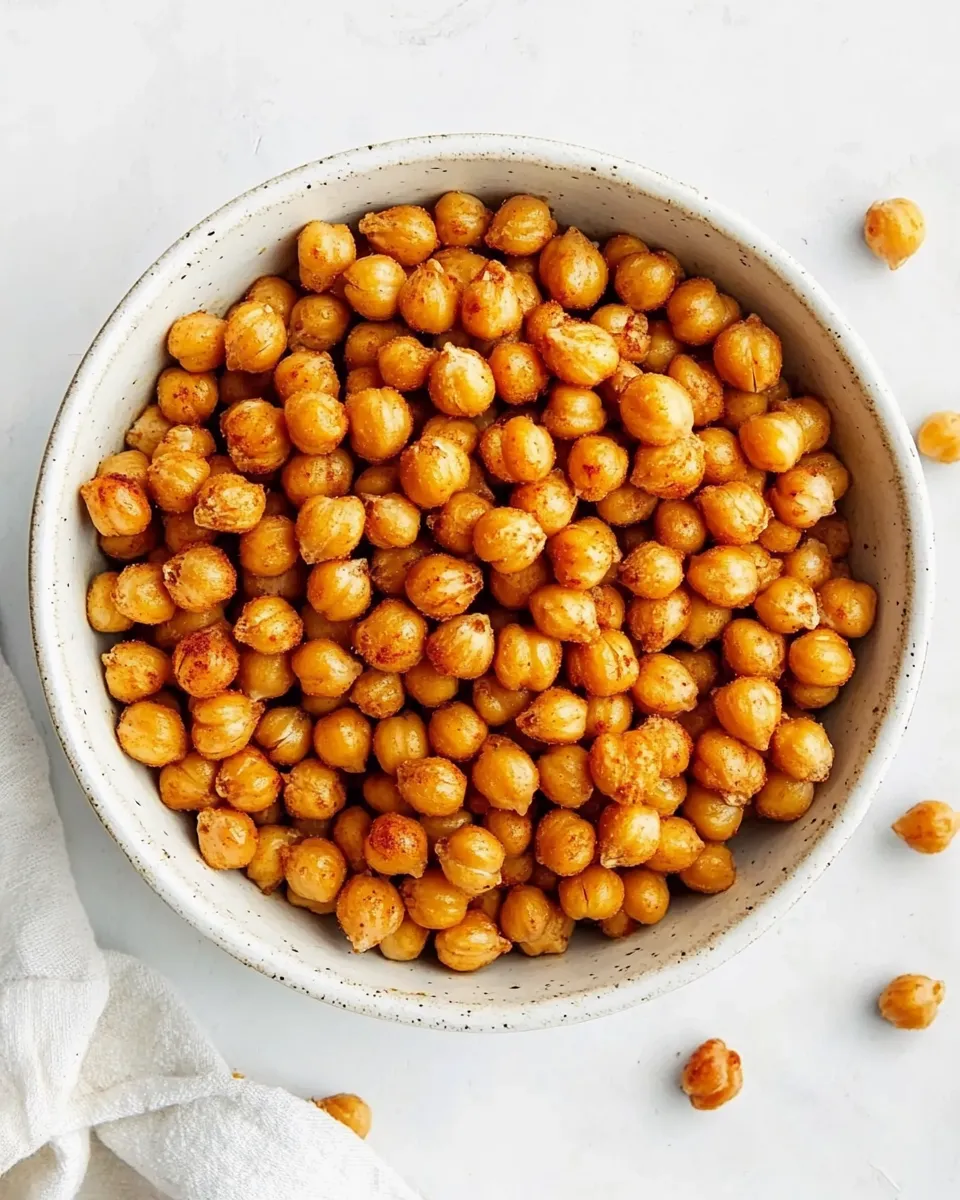
Looking for a quick and delicious snack that’s packed with protein and full of flavor? Look no further! These Crispy Air Fryer Chickpeas (3 Ways!) are the perfect solution for satisfying those munchies without the guilt. They are crunchy, easy to make, and oh-so-versatile. Whether you’re in the mood for something savory, cheesy, or a little spicy, I’ve got you covered with three different flavor profiles that will keep your taste buds dancing. Let’s dive into this simple yet delightful recipe!
Why You’ll Love This Recipe

Crispy air fryer chickpeas are not only a fantastic snack option, but they also bring a wealth of benefits to your table. They are:
- Quick to Make: With minimal prep time, you can have a crunchy snack in under 20 minutes.
- Nutritious: Packed with protein and fiber, chickpeas make for a healthy choice.
- Versatile: Customize the seasoning to match your mood or dietary preferences.
- Guilt-Free: Air frying cuts down on oil, making these chickpeas a healthier alternative to traditional frying.
What You’ll Gather
To whip up these crispy treats, you will need:
- 3 (15 ounce) cans of chickpeas
- 3 tablespoons of olive oil
- 3 teaspoons of garlic powder
- 1.5 teaspoons of salt
- 1/2 teaspoon of paprika
- 1 teaspoon of black pepper
- 2 tablespoons of Parmesan cheese (optional)
- 1.5 tablespoons of homemade taco seasoning (or store-bought)
Must-Have Equipment

- Air Fryer: The star of the show! A good quality air fryer is essential for achieving that perfect crunch.
- Colander: To rinse and drain the chickpeas effectively.
- Baking Sheet: For drying the chickpeas before air frying.
- Mixing Bowls: To combine your chickpeas with the seasonings.
How to Prepare Crispy Air Fryer Chickpeas (3 Ways!)
Ready to get cooking? Here’s how to make these delicious crispy chickpeas in three different ways.
Step 1: Rinse and Dry the Chickpeas
Start by draining and rinsing the chickpeas thoroughly in a colander. This step is crucial to remove excess sodium from the canned chickpeas and to ensure they roast perfectly. After draining, transfer them to a clean kitchen towel and pat them dry gently. The drier they are, the crispier they will become!
Step 2: Choose Your Flavor
You can prepare the chickpeas in three delightful ways: Garlic Paprika, Cheesy Parmesan, and Spicy Taco.
For Garlic Paprika Chickpeas:
1. In a mixing bowl, combine the rinsed chickpeas with 1 tablespoon of olive oil, 1 teaspoon of garlic powder, 1/2 teaspoon of salt, 1/2 teaspoon of paprika, and 1/4 teaspoon of black pepper.
2. Toss everything together until the chickpeas are evenly coated.
For Cheesy Parmesan Chickpeas:
1. In another bowl, mix 1 tablespoon of olive oil with 2 tablespoons of Parmesan cheese, 1 teaspoon of garlic powder, and 1/2 teaspoon of salt.
2. Add the rinsed chickpeas and stir until they are well coated with the cheesy mixture.
For Spicy Taco Chickpeas:
1. In a separate bowl, combine 1 tablespoon of olive oil with 1.5 tablespoons of homemade taco seasoning and a pinch of salt.
2. Toss the chickpeas in this mixture until they are fully coated.
Step 3: Air Fry the Chickpeas
1. Preheat your air fryer to 400°F (200°C).
2. Place the seasoned chickpeas in the air fryer basket in a single layer. Depending on the size of your air fryer, you may need to do this in batches.
3. Air fry for about 15-20 minutes, shaking the basket halfway through cooking to ensure even crispiness. Keep an eye on them, as cooking times may vary based on the air fryer model.
Step 4: Cool and Enjoy!
Once they’re golden and crispy, remove the chickpeas from the air fryer and let them cool for a few minutes. This will help them crisp up even more. Enjoy them on their own or toss them into salads, grain bowls, or snack mixes!
No-Store Runs Needed
One of the best things about these Crispy Air Fryer Chickpeas (3 Ways!) is that you likely have almost everything you need right in your pantry! Check out this list:
- Canned chickpeas
- Olive oil
- Garlic powder
- Salt
- Paprika
- Black pepper
- Parmesan cheese (optional)
- Taco seasoning (homemade or store-bought)
What I Learned Testing
Throughout the process of creating these crispy chickpeas, I discovered a few tips that made a noticeable difference:
- Drying the chickpeas thoroughly is key for achieving that irresistible crunch.
- Don’t overcrowd the air fryer basket; working in batches yields better results.
- Experiment with different seasonings! The flavor possibilities are endless and can cater to your unique taste preferences.
Save It for Later
These crispy chickpeas make for a fantastic snack that can be stored for later. Here’s how:
- Allow the chickpeas to cool completely before storing.
- Place them in an airtight container at room temperature.
- They are best enjoyed within a few days but can last up to a week.
Ask the Chef
Can I use dried chickpeas instead of canned?
Yes, you can certainly use dried chickpeas! Just make sure to soak and cook them until tender before proceeding with the air fryer steps.
How do I make homemade taco seasoning?
A simple blend includes chili powder, cumin, garlic powder, onion powder, paprika, and a pinch of salt. Adjust the spices to your liking!
Can I use different oils?
Absolutely! While olive oil works great, you can try coconut oil or avocado oil for different flavor profiles.
What if I don’t have an air fryer?
You can roast these chickpeas in the oven at 400°F (200°C) for about 25-30 minutes, tossing them halfway through for even cooking.
If you’re looking for more healthy snack ideas, check out these favorites:
Hungry for More?
If you loved these Crispy Air Fryer Chickpeas (3 Ways!), be sure to explore more quick and easy recipes on our blog. From savory to sweet, there’s something here for everyone!
Delightful, nutritious, and quick to prepare, these crispy air fryer chickpeas are the ultimate snack for any occasion. Whether you’re enjoying them solo, throwing them into a salad, or mixing them into a trail mix, they will surely become a staple in your kitchen. Happy snacking!

Crispy Air Fryer Chickpeas (3 Ways!)
Ingredients
Main Ingredients:
- 3 cans chickpeas (15 ounce each)
- 3 tablespoons olive oil
- 3 teaspoons garlic powder
- 1.5 teaspoons salt
- 1/2 teaspoon paprika
- 1 teaspoon black pepper
- 2 tablespoons Parmesan cheese (optional)
- 1.5 tablespoons homemade taco seasoning (or store-bought)
Instructions
Instructions:
- Step 1: Rinse and Dry the Chickpeas. Drain and rinse the chickpeas thoroughly in a colander. Pat them dry with a kitchen towel.
- Step 2: Choose Your Flavor. Prepare chickpeas in three ways: Garlic Paprika, Cheesy Parmesan, and Spicy Taco.
- For Garlic Paprika Chickpeas: In a mixing bowl, combine chickpeas with 1 tablespoon olive oil, 1 teaspoon garlic powder, 1/2 teaspoon salt, 1/2 teaspoon paprika, and 1/4 teaspoon black pepper. Toss until coated.
- For Cheesy Parmesan Chickpeas: Mix 1 tablespoon olive oil with 2 tablespoons Parmesan cheese, 1 teaspoon garlic powder, and 1/2 teaspoon salt. Add chickpeas and stir until coated.
- For Spicy Taco Chickpeas: Combine 1 tablespoon olive oil with 1.5 tablespoons taco seasoning and a pinch of salt. Toss chickpeas until fully coated.
- Step 3: Air Fry the Chickpeas. Preheat air fryer to 400°F (200°C). Place chickpeas in the basket and air fry for 15-20 minutes, shaking halfway through.
- Step 4: Cool and Enjoy! Once golden and crispy, remove chickpeas and let cool for a few minutes before serving.
Equipment
- Air Fryer
- Colander
- Baking Sheet
- Mixing Bowls
Notes
- Ensure chickpeas are thoroughly dried for maximum crispiness.
- Don't overcrowd the air fryer; cook in batches if necessary.
- Feel free to experiment with different seasonings for unique flavors.