
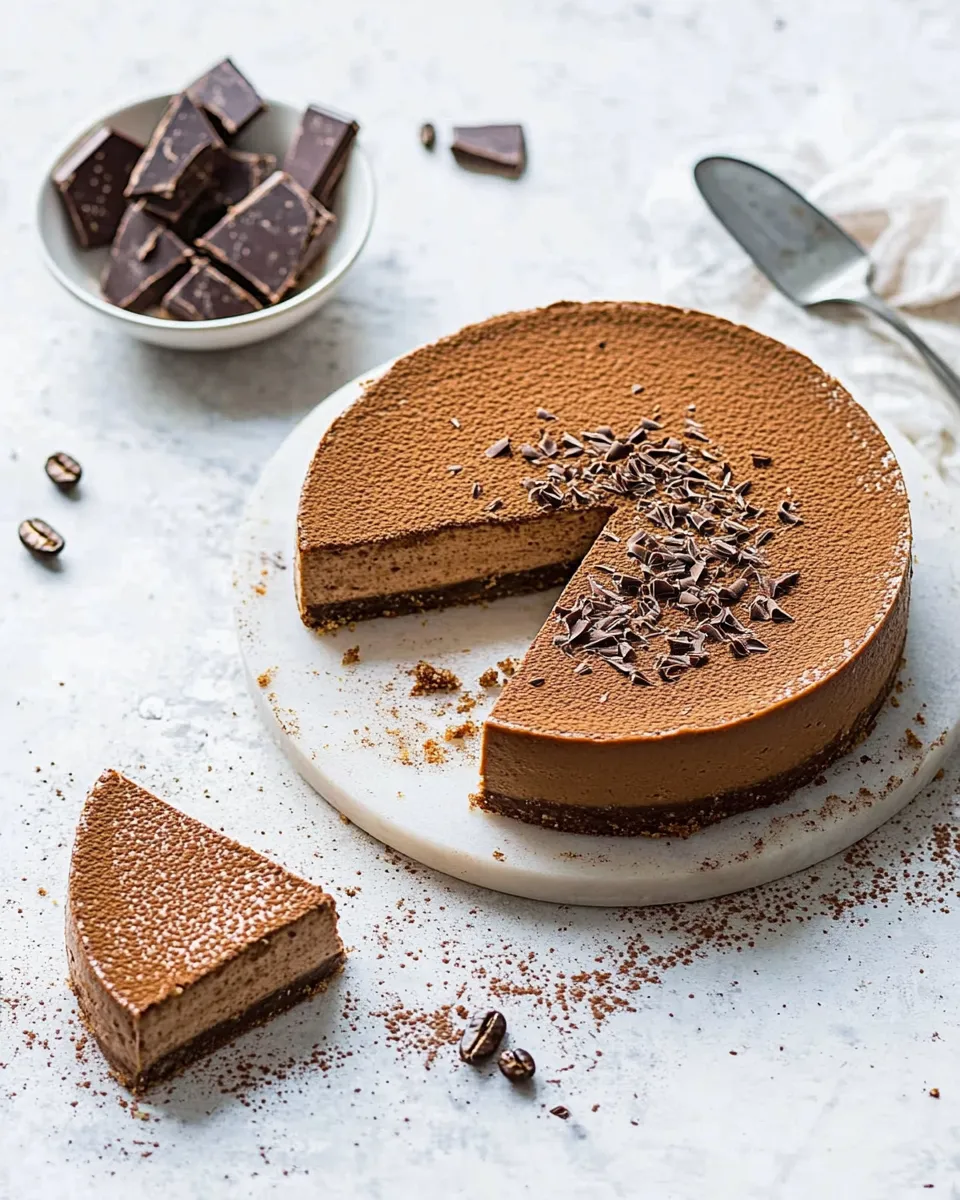
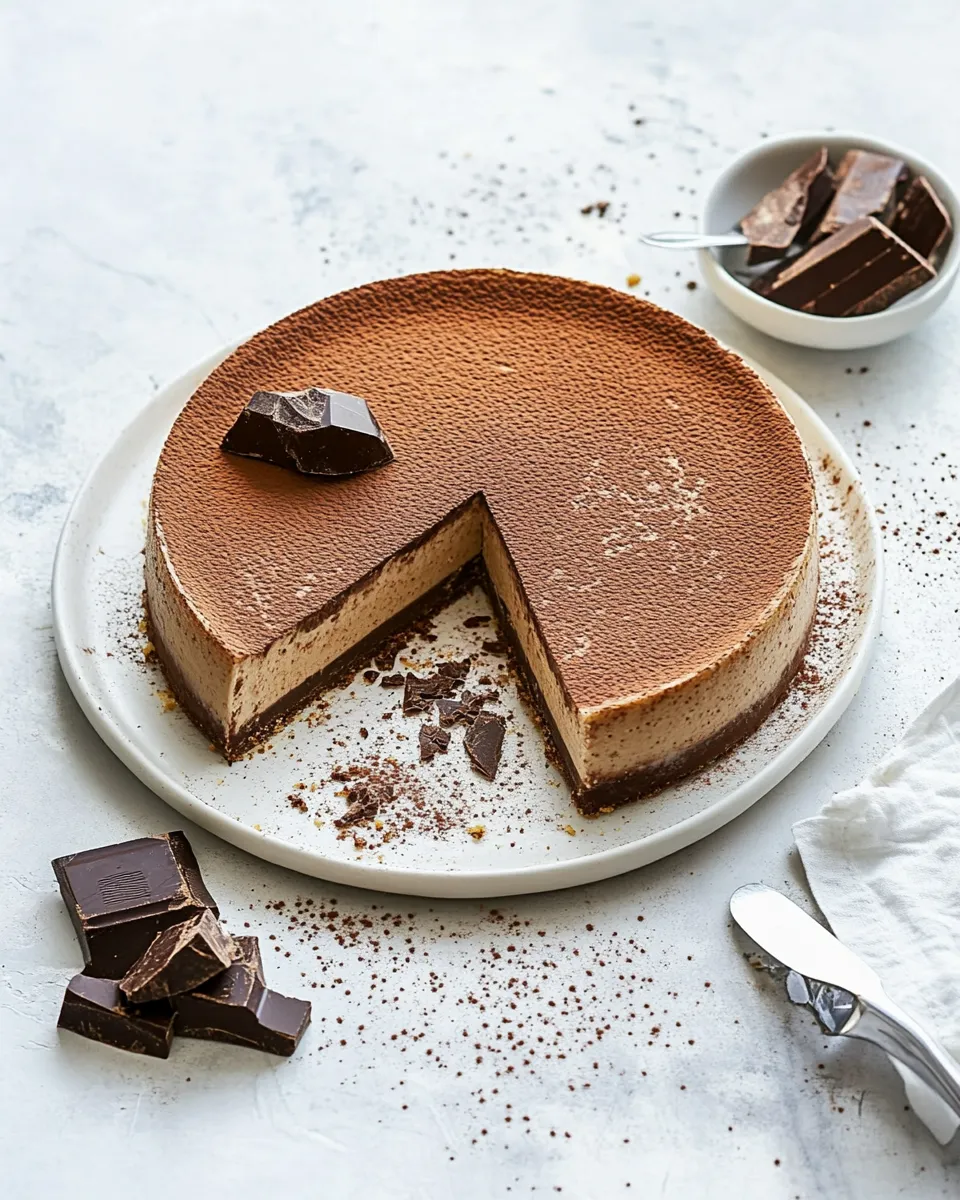
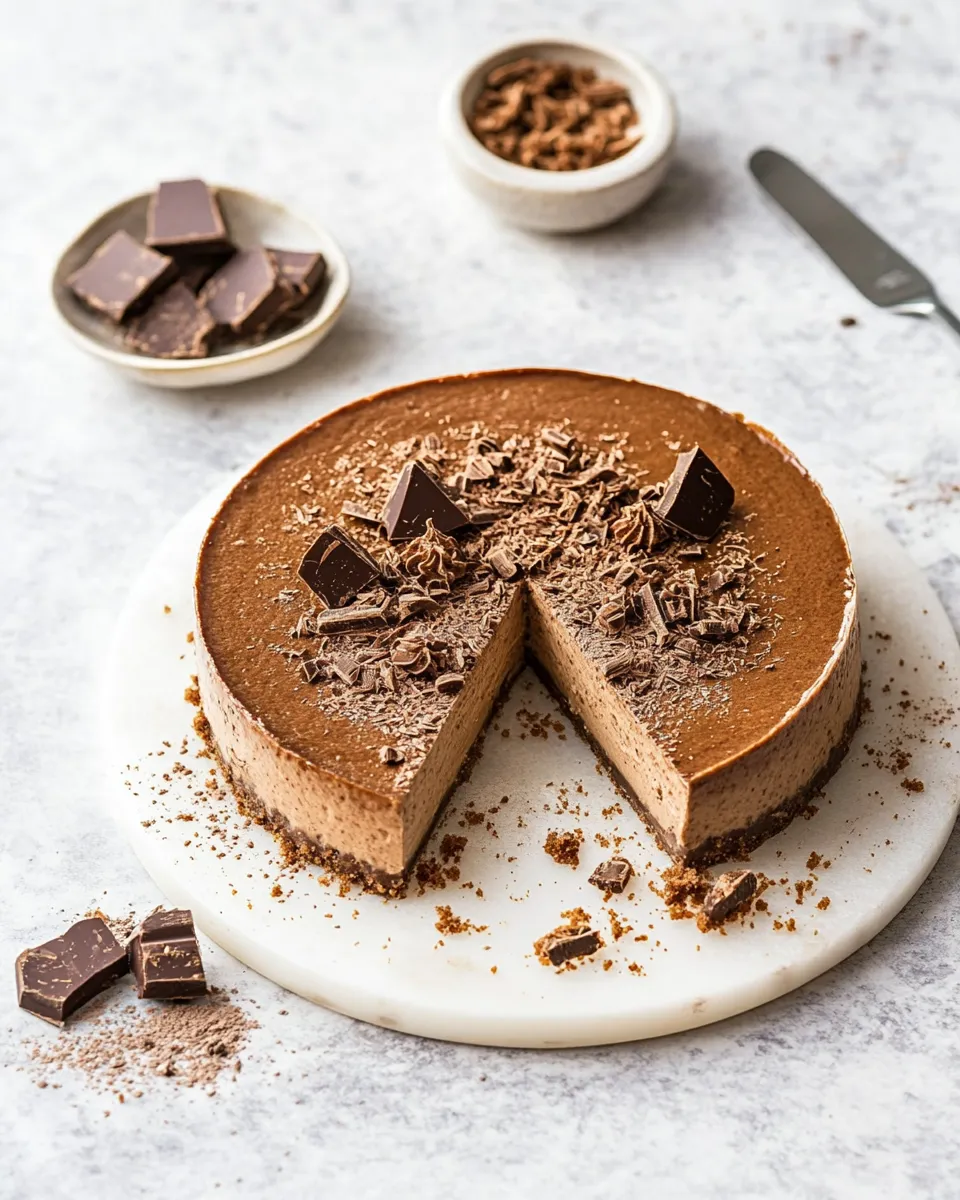
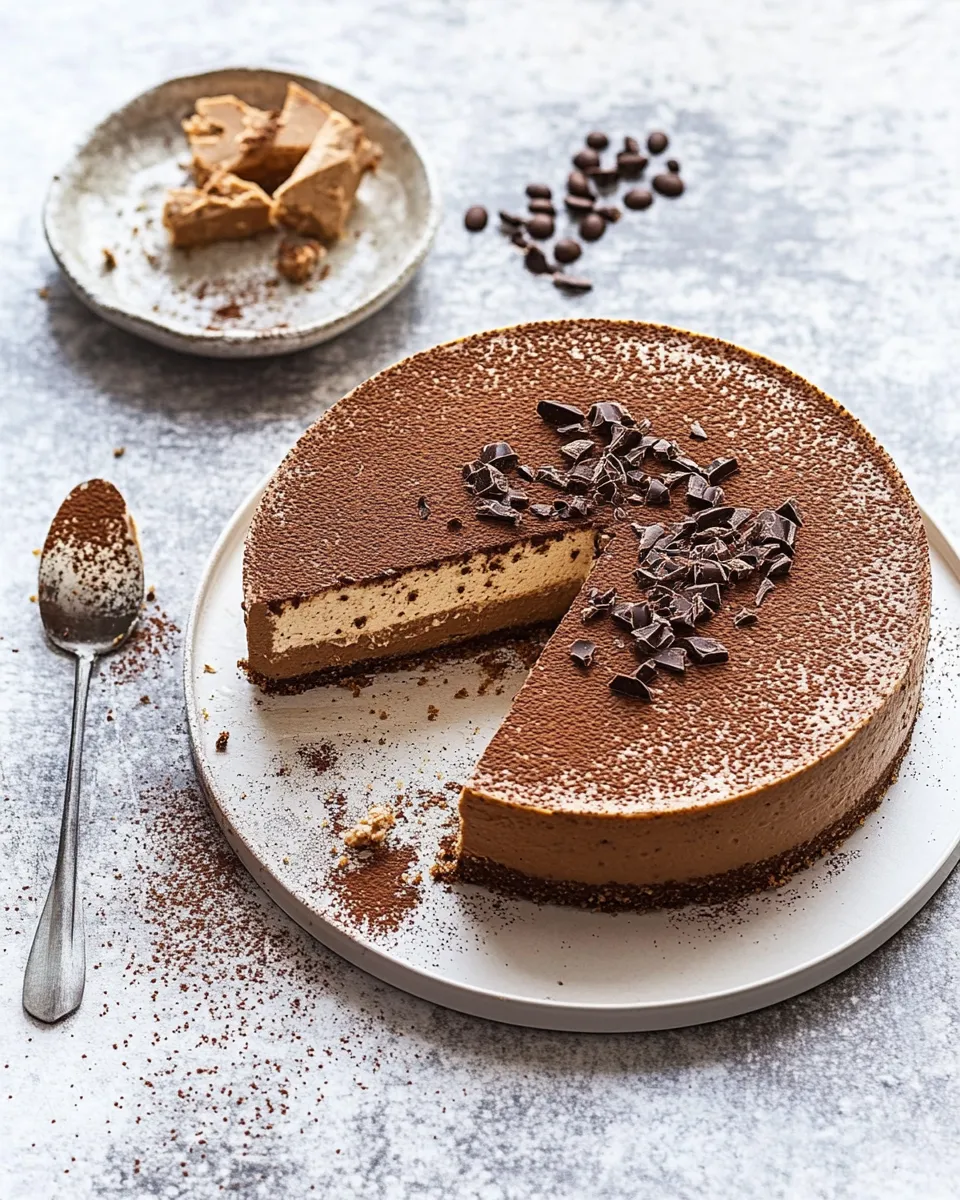
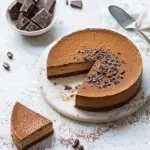
Are you ready to treat yourself to a decadent dessert that effortlessly combines rich chocolate and bold espresso flavors? This Easy No-Bake Chocolate Espresso Cheesecake is not only a feast for the eyes but also a delight for your taste buds. With a velvety cream cheese filling and a buttery biscuit base, this cheesecake is a simple yet impressive dessert that can be whipped up in no time. Plus, there’s no baking involved! Perfect for warm days or whenever you’re craving something sweet, this cheesecake is sure to become a staple in your dessert repertoire.
Why This Recipe Belongs in Your Rotation
This Easy No-Bake Chocolate Espresso Cheesecake deserves a special spot in your recipe collection for several reasons. Firstly, it’s incredibly easy to prepare, making it ideal for both novice bakers and seasoned pros. Secondly, the combination of dark chocolate and espresso creates a rich flavor profile that is perfect for chocolate lovers and coffee enthusiasts alike. Lastly, this cheesecake can be made ahead of time, allowing for stress-free entertaining. Just prepare it a day in advance, chill it, and you’re ready to impress your guests.
Ingredient Notes
- 200 grams dark chocolate (70% cocoa solids) – Use high-quality dark chocolate for the best flavor. This adds a rich depth that complements the espresso.
- 60 ml espresso (allowed to cool) – Freshly brewed espresso works best, but you can use strong brewed coffee as an alternative.
- 200 grams digestive biscuits or plain Graham crackers – These form the base of your cheesecake. Choose your favorite for a crunchy texture.
- 100 grams butter (melted) – This binds the biscuit crumbs together for a deliciously buttery crust.
- 250 ml cream – Whipping cream adds fluffiness and richness to the filling.
- 400 grams cream cheese – Use full-fat cream cheese for a smooth and creamy texture.
- 200 grams caster sugar – This sweetens the cheesecake without adding grittiness.
- Additional cream to serve – Whip some extra cream for a luxurious topping when serving.
Tools & Equipment Needed
- 9-inch springform pan – Perfect for easily removing the cheesecake once set.
- Mixing bowls – For combining the ingredients.
- Electric mixer – This will help you achieve creamy, well-mixed filling.
- Spatula – Useful for folding in ingredients and spreading the filling smoothly.
- Double boiler or microwave – For melting the chocolate gently.
Easy No-Bake Chocolate Espresso Cheesecake Made Stepwise
Step 1: Prepare the Biscuit Base
Begin by crushing the digestive biscuits or Graham crackers into fine crumbs. You can do this by placing them in a plastic bag and rolling over them with a rolling pin or using a food processor for a quicker method.
Step 2: Mix the Crust
In a mixing bowl, combine the crushed biscuits with the melted butter. Stir until the crumbs are evenly coated and resemble wet sand.
Step 3: Press the Crust into the Pan
Transfer the crumb mixture into the bottom of a 9-inch springform pan. Press it down firmly and evenly to form a solid base. Place the pan in the refrigerator to chill while you prepare the filling.
Step 4: Melt the Chocolate
Using a double boiler or microwave, gently melt the dark chocolate. If using a microwave, heat in 20-second intervals, stirring in between until smooth. Allow it to cool slightly.
Step 5: Whip the Cream
In a separate bowl, whip the cream until soft peaks form. This will give your cheesecake a light and airy texture. Be careful not to over-whip.
Step 6: Combine Cream Cheese and Sugar
In another bowl, beat the cream cheese and caster sugar together until smooth and creamy. Make sure there are no lumps.
Step 7: Add the Espresso and Chocolate
Pour the cooled espresso and melted chocolate into the cream cheese mixture. Mix until well combined.
Step 8: Fold in the Whipped Cream
Gently fold the whipped cream into the chocolate-espresso mixture. Use a spatula and be careful not to deflate the whipped cream too much; you want to keep the filling light and fluffy.
Step 9: Assemble the Cheesecake
Pour the cheesecake filling onto the chilled biscuit crust. Spread it out evenly with a spatula.
Step 10: Chill the Cheesecake
Cover the springform pan with plastic wrap and place it in the refrigerator. Let the cheesecake chill for at least 4 hours or overnight for the best results.
Step 11: Serve and Enjoy
Once set, carefully remove the cheesecake from the springform pan. Decorate with additional melted dark chocolate and whipped cream. Slice and enjoy your Easy No-Bake Chocolate Espresso Cheesecake!
Make It Year-Round
- Seasonal Flavor Variations: You can easily adapt this cheesecake for different seasons by incorporating flavors like peppermint during the holidays or fresh berries in the summer.
- Perfect for Any Occasion: This cheesecake is suitable for birthdays, dinner parties, or just a cozy night in with friends.
- Experiment with Toppings: Top with chocolate shavings, crushed nuts, or a dusting of cocoa powder for a delightful finish.
Common Errors (and Fixes)
- Crust Falling Apart: Ensure the butter is melted and mixed thoroughly with the crumbs. If it’s too crumbly, add a bit more melted butter.
- Cheesecake Not Setting: Make sure to chill the cheesecake long enough. If it’s still soft after the recommended chilling time, consider adding more whipped cream to stabilize it.
- Over-whipped Cream: If your whipped cream becomes grainy, stop whipping immediately. Use it as is in the mixture; it will still work but will be less airy.
- Lumps in Filling: Make sure the cream cheese is at room temperature before mixing. This helps in achieving a smooth consistency.
Save It for Later
Once your Easy No-Bake Chocolate Espresso Cheesecake is ready, you can store it in the refrigerator for up to 5 days. For longer storage, consider freezing it. Just wrap it tightly in plastic wrap and then in aluminum foil. It can be frozen for up to 3 months. Thaw in the refrigerator overnight before serving.
Frequently Asked Questions
Can I use milk chocolate instead of dark chocolate?
While you can use milk chocolate, it will result in a sweeter cheesecake. Dark chocolate is recommended for a balanced flavor with the espresso.
Is there a substitute for cream cheese?
Yes, you can use mascarpone cheese or a vegan cream cheese alternative for a dairy-free version.
How can I make this cheesecake gluten-free?
Simply use gluten-free biscuits in place of the digestive biscuits or Graham crackers to make a gluten-free crust.
Can I add more espresso flavor?
Absolutely! You can increase the amount of espresso in the filling or add a splash of coffee liqueur for an extra kick.
Bring It to the Table
This Easy No-Bake Chocolate Espresso Cheesecake is more than just a dessert; it’s a celebration of flavors that brings joy to any gathering. Whether you’re serving it at a dinner party, a family gathering, or simply indulging yourself, this cheesecake is sure to impress. With its creamy texture and rich taste, it invites everyone to take a bite and savor the moment. So grab your ingredients, roll up your sleeves, and create this stunning dessert that’s as delicious as it is easy! Enjoy every slice of your Easy No-Bake Chocolate Espresso Cheesecake!
Easy No-Bake Chocolate Espresso Cheesecake
Ingredients
For the Crust:
- 200 grams dark chocolate (70% cocoa solids) high-quality for best flavor
- 200 grams digestive biscuits or plain Graham crackers for the base
- 100 grams butter melted
For the Filling:
- 60 ml espresso allowed to cool
- 250 ml cream whipping cream
- 400 grams cream cheese full-fat for best texture
- 200 grams caster sugar to sweeten without grittiness
- Additional cream to serve
Instructions
Instructions:
- Step 1: Prepare the Biscuit Base - Begin by crushing the digestive biscuits or Graham crackers into fine crumbs.
- Step 2: Mix the Crust - In a mixing bowl, combine the crushed biscuits with the melted butter. Stir until the crumbs resemble wet sand.
- Step 3: Press the Crust into the Pan - Transfer the crumb mixture into the springform pan and press down firmly to form a solid base. Chill in the refrigerator.
- Step 4: Melt the Chocolate - Using a double boiler or microwave, gently melt the dark chocolate and allow it to cool slightly.
- Step 5: Whip the Cream - In a separate bowl, whip the cream until soft peaks form, being careful not to over-whip.
- Step 6: Combine Cream Cheese and Sugar - Beat the cream cheese and caster sugar together until smooth and creamy.
- Step 7: Add the Espresso and Chocolate - Pour the cooled espresso and melted chocolate into the cream cheese mixture and mix until well combined.
- Step 8: Fold in the Whipped Cream - Gently fold the whipped cream into the chocolate-espresso mixture.
- Step 9: Assemble the Cheesecake - Pour the filling onto the chilled biscuit crust and spread evenly.
- Step 10: Chill the Cheesecake - Cover and refrigerate for at least 4 hours or overnight.
- Step 11: Serve and Enjoy - Remove from the pan, decorate, slice, and enjoy!
Equipment
- 9-inch springform pan
- Mixing Bowls
- Electric Mixer
- Spatula
- Double boiler or microwave
Notes
- Make this cheesecake ahead of time for stress-free entertaining.
- Experiment with seasonal flavors like peppermint or berries.
- Store leftovers in the refrigerator for up to 5 days or freeze for up to 3 months.


