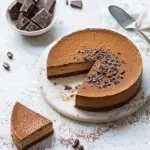
Easy No-Bake Chocolate Espresso Cheesecake
This Easy No-Bake Chocolate Espresso Cheesecake is a rich and creamy dream! Perfect for chocolate and coffee lovers.
Servings: 8 servings
Ingredients
For the Crust:
- 200 grams dark chocolate (70% cocoa solids) high-quality for best flavor
- 200 grams digestive biscuits or plain Graham crackers for the base
- 100 grams butter melted
For the Filling:
- 60 ml espresso allowed to cool
- 250 ml cream whipping cream
- 400 grams cream cheese full-fat for best texture
- 200 grams caster sugar to sweeten without grittiness
- Additional cream to serve
Instructions
Instructions:
- Step 1: Prepare the Biscuit Base - Begin by crushing the digestive biscuits or Graham crackers into fine crumbs.
- Step 2: Mix the Crust - In a mixing bowl, combine the crushed biscuits with the melted butter. Stir until the crumbs resemble wet sand.
- Step 3: Press the Crust into the Pan - Transfer the crumb mixture into the springform pan and press down firmly to form a solid base. Chill in the refrigerator.
- Step 4: Melt the Chocolate - Using a double boiler or microwave, gently melt the dark chocolate and allow it to cool slightly.
- Step 5: Whip the Cream - In a separate bowl, whip the cream until soft peaks form, being careful not to over-whip.
- Step 6: Combine Cream Cheese and Sugar - Beat the cream cheese and caster sugar together until smooth and creamy.
- Step 7: Add the Espresso and Chocolate - Pour the cooled espresso and melted chocolate into the cream cheese mixture and mix until well combined.
- Step 8: Fold in the Whipped Cream - Gently fold the whipped cream into the chocolate-espresso mixture.
- Step 9: Assemble the Cheesecake - Pour the filling onto the chilled biscuit crust and spread evenly.
- Step 10: Chill the Cheesecake - Cover and refrigerate for at least 4 hours or overnight.
- Step 11: Serve and Enjoy - Remove from the pan, decorate, slice, and enjoy!
Equipment
- 9-inch springform pan
- Mixing Bowls
- Electric Mixer
- Spatula
- Double boiler or microwave
Notes
- Make this cheesecake ahead of time for stress-free entertaining.
- Experiment with seasonal flavors like peppermint or berries.
- Store leftovers in the refrigerator for up to 5 days or freeze for up to 3 months.