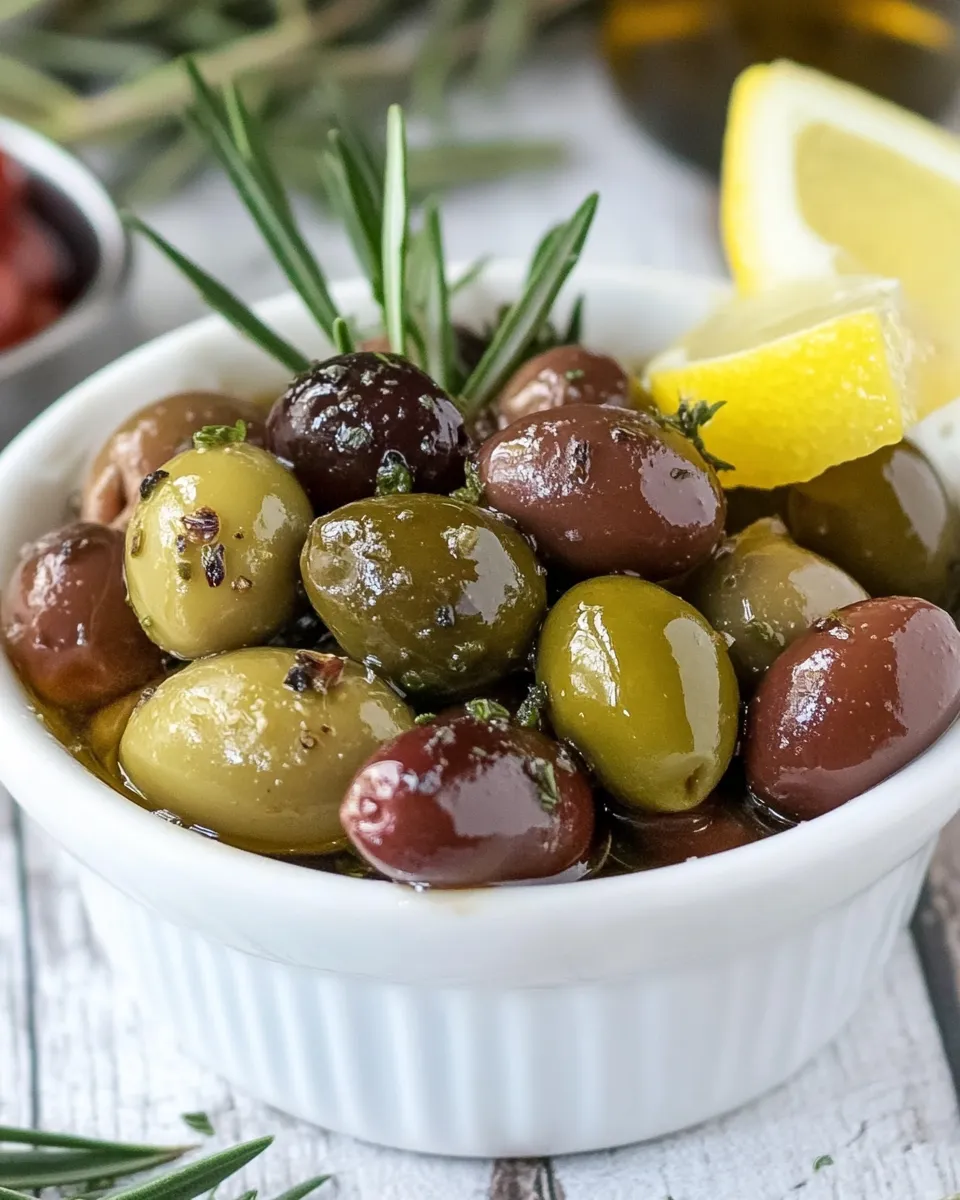
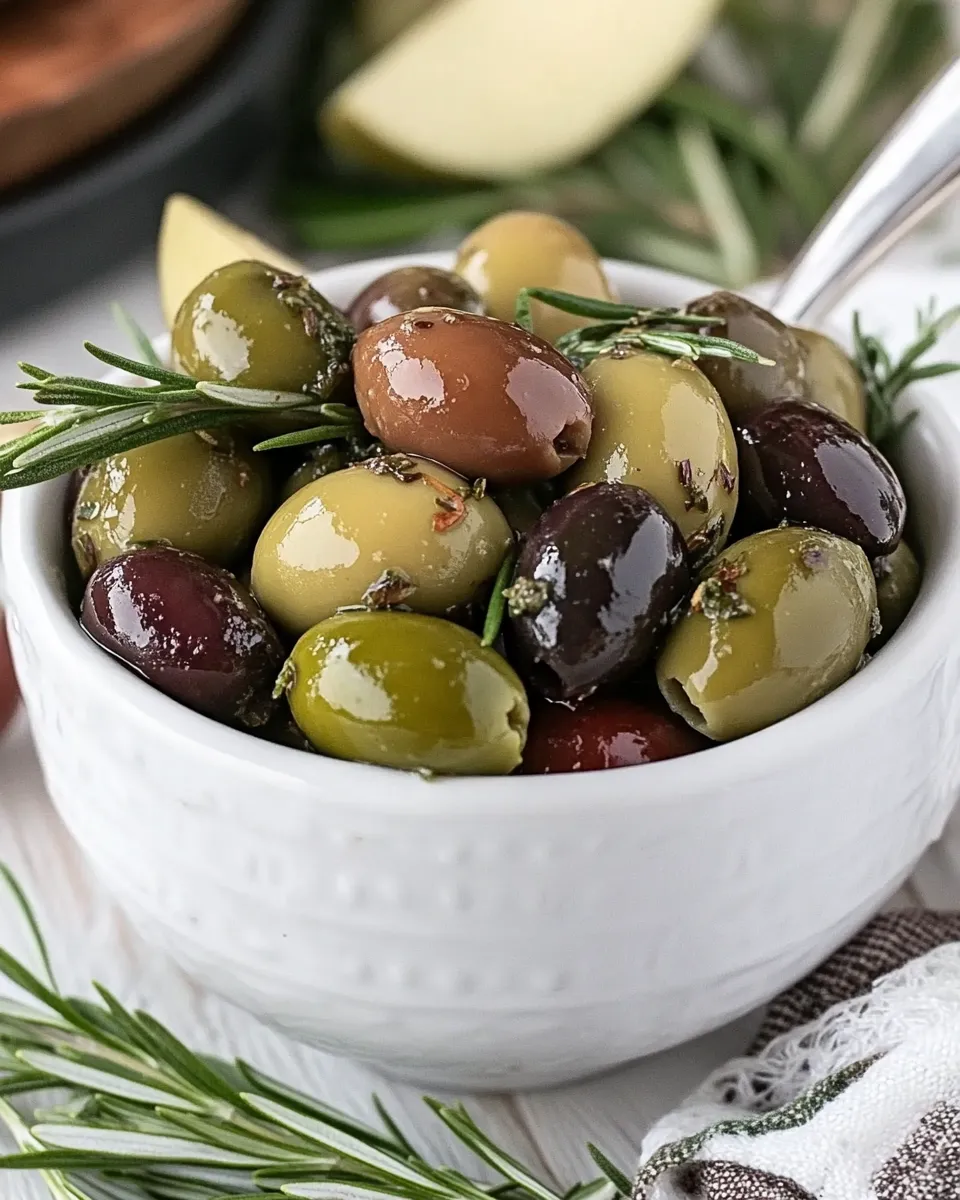
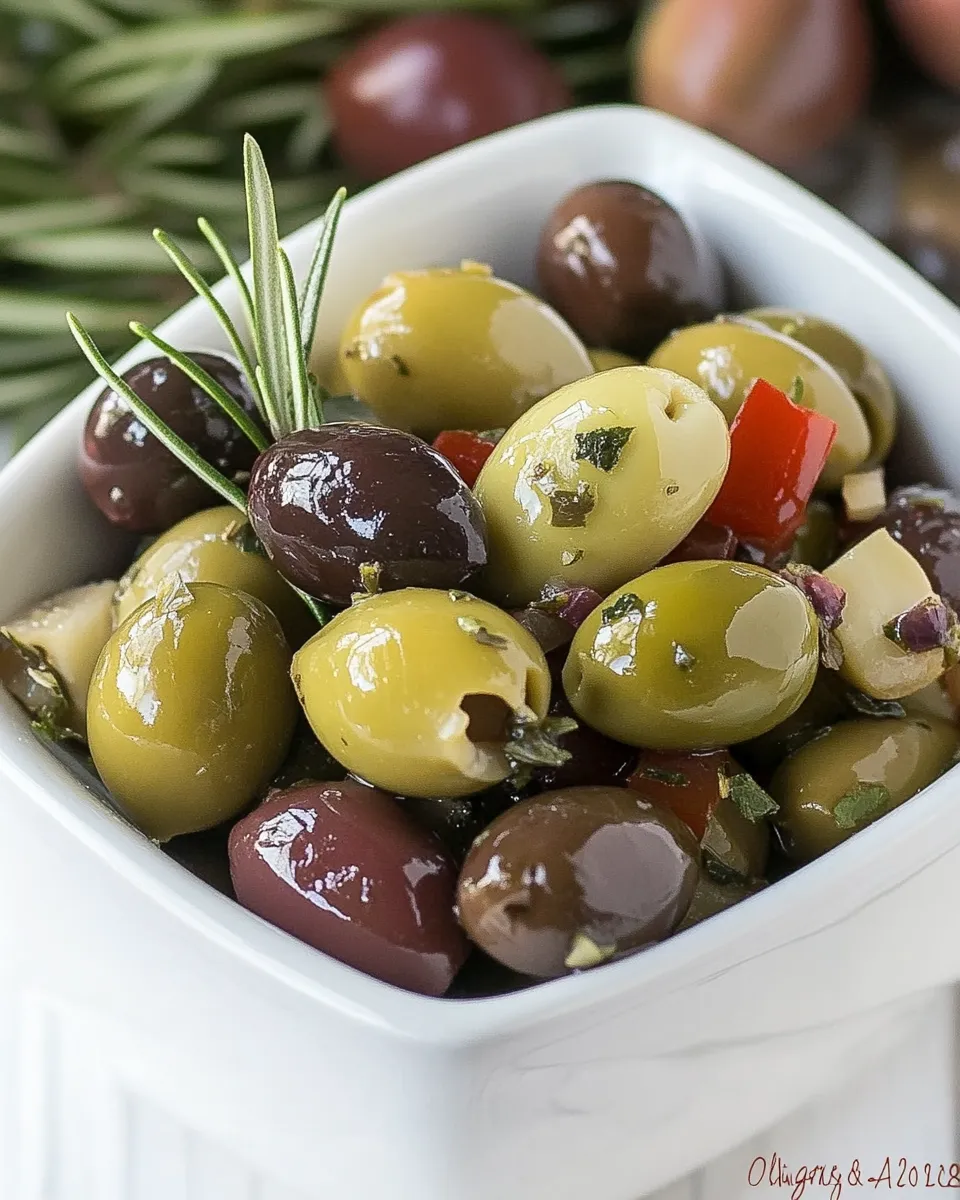
There’s something undeniably delightful about a bowl of herbed olives. Whether served as an appetizer at a dinner party or enjoyed as a snack while unwinding after a long day, these flavorful bites can elevate any occasion. Infused with aromatic herbs, zesty citrus, and a touch of spice, herbed olives are a versatile dish that pairs wonderfully with cheese, bread, or simply enjoyed on their own. Let’s dive into how you can create this simple yet elegant treat at home!
What You’ll Love About This Recipe
– Flavor Explosion: The combination of herbs, garlic, and spices creates a complex flavor profile that’s sure to impress.
– Customizable: Feel free to mix and match herbs and spices based on your taste preferences.
– Make Ahead: These olives taste even better after sitting for a day, making them perfect for meal prep.
– Perfect for Entertaining: They make a beautiful centerpiece for any appetizer spread.
Ingredient Breakdown
To create these delectable herbed olives, you’ll need the following ingredients:
- 2 cups of olives: Choose your favorites—Kalamata, Castelvetrano, or green olives work beautifully.
- 3 rosemary sprigs: Discard the stems and chop two of the sprigs for maximum flavor.
- 3 sprigs of thyme: Discard the stems and chop two sprigs to enhance the herby essence.
- 1 teaspoon coriander seeds: For a subtle warmth and depth.
- 1 teaspoon peppercorns: Adds a hint of heat and complexity.
- 1 teaspoon fennel seeds: For a slightly sweet, anise-like flavor.
- 1/2 cup olive oil: Extra virgin is best for a rich, robust taste.
- 4 garlic cloves: Sliced into quarters to infuse the oil.
- 2 bay leaves: Cut lengthwise to release their aromatic oils.
- 1 teaspoon red pepper flakes: For a spicy kick.
- 2 strips of orange or lemon zest: To add a bright citrus note.
- Salt to taste: Enhances all the flavors beautifully.
Before You Start: Equipment
Before you get your hands dirty, gather the following equipment:
- Glass jar or container: To store the herbed olives.
- Cutting board and knife: For chopping herbs and slicing garlic.
- Measuring spoons: For precise ingredient measurements.
- Mixing spoon: To combine all the ingredients thoroughly.
Herbed Olives, Made Easy
Now that you have your ingredients and equipment ready, let’s get started on making these delicious herbed olives.
Step 1: Prepare the Olives
Begin by rinsing the olives under cold water to remove excess brine. This step is crucial to prevent the olives from being overly salty. Once rinsed, pat them dry with a paper towel and set aside.
Step 2: Combine the Ingredients
In a large mixing bowl, combine the chopped rosemary, chopped thyme, coriander seeds, peppercorns, fennel seeds, olive oil, sliced garlic, bay leaves, red pepper flakes, and citrus zest. Stir well to ensure that all the ingredients are evenly distributed.
Step 3: Add the Olives
Gently add the olives to the bowl and toss them in the herbed oil mixture until they are well coated. This step is essential for allowing the flavors to meld together beautifully.
Step 4: Transfer and Marinate
Transfer the herbed olives along with the oil mixture into a glass jar or airtight container. Seal the container tightly and let it marinate in the refrigerator for at least 24 hours. This waiting period allows the olives to absorb all the delicious flavors.
Step 5: Serve and Enjoy
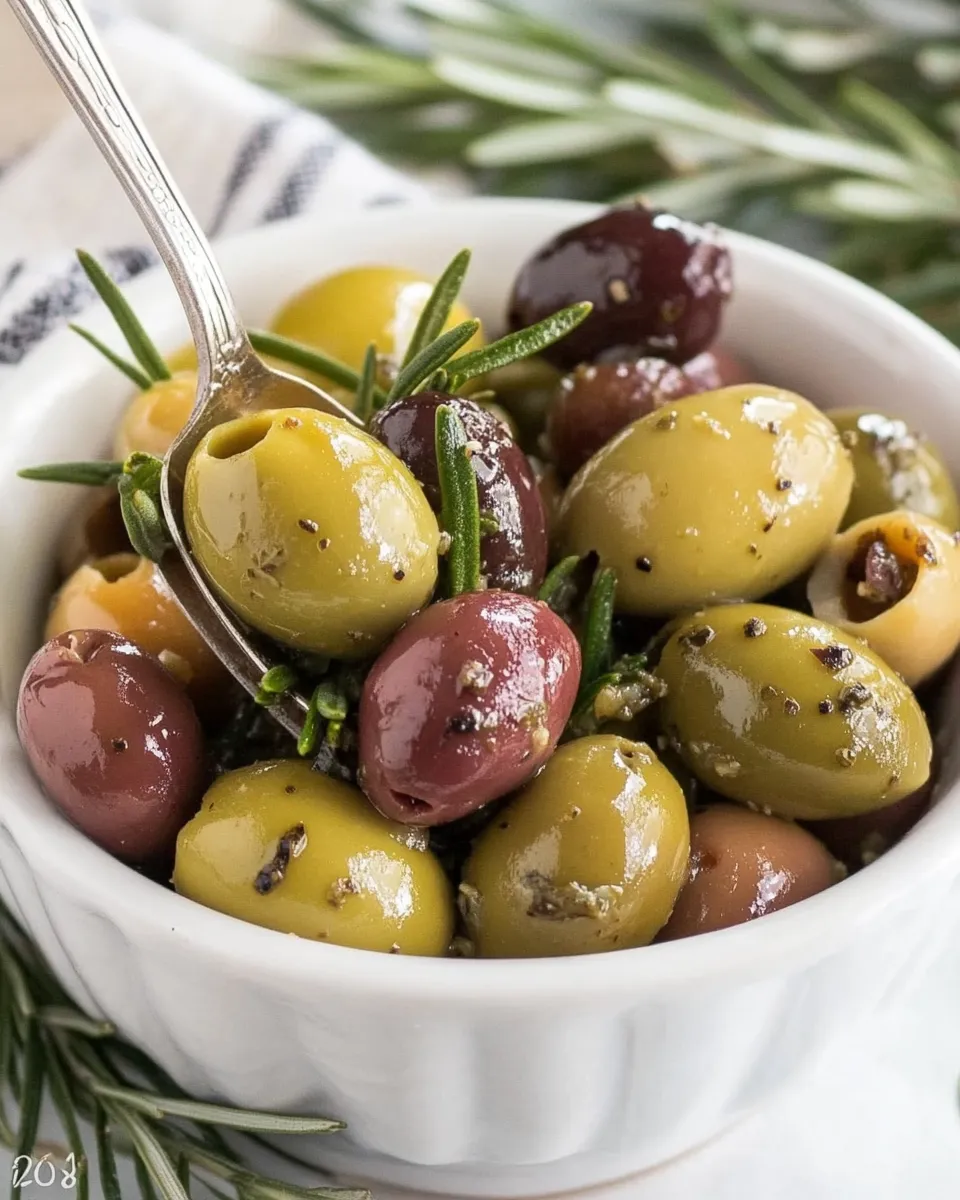
When you’re ready to enjoy your herbed olives, simply take them out of the refrigerator and let them come to room temperature. Serve them in a beautiful bowl, drizzled with some of the infused oil, and watch as they disappear in no time!
Smart Substitutions
If you’re looking to experiment or work with what you have on hand, consider these substitutions:
- Olives: Use any variety you like, such as green, black, or mixed olives.
- Herbs: Fresh basil, oregano, or dill can be great alternatives.
- Citrus zest: Lemon zest can be used instead of orange zest for a tangy twist.
- Spices: Feel free to omit or replace the red pepper flakes with your favorite chili flakes or powder.
Troubles You Can Avoid
To ensure your herbed olives turn out great, keep the following tips in mind:
- Make sure to rinse your olives well to avoid overly salty bites.
- Let the olives marinate for at least 24 hours to develop the best flavor.
- Store them in an airtight container to maintain freshness.
- Don’t skip the garlic; it adds essential flavor!
Store, Freeze & Reheat
If you find yourself with leftovers (which is rare!), here’s how to store them:
- Refrigerate: Keep the herbed olives in an airtight container in the fridge for up to two weeks.
- Freeze: Although freezing is not recommended due to texture changes, it is possible. Place them in a freezer-safe container for up to three months.
- Reheat: If you prefer warm olives, gently heat them in a pan over low heat, being careful not to cook them too long.
Troubleshooting Q&A
What if my olives are too salty?
If your olives are too salty, rinse them under cold water again before marinating. You can also dilute the brine with additional olive oil.
Can I use dried herbs instead of fresh?
Yes, you can use dried herbs, but remember that dried herbs are more potent. Use about one-third of the amount you would use for fresh herbs.
How long can I keep the herbed olives?
Herbed olives can be stored in the refrigerator for up to two weeks. They tend to taste better as they sit and the flavors meld.
Can I add cheese to the herbed olives?
Absolutely! Adding feta or goat cheese can give a delightful twist to your herbed olives. Just be sure to keep the cheese submerged in the oil.
If you’re looking for more healthy snack ideas, check these out:
Make It Tonight
Now that you have all the steps and tips for creating the perfect herbed olives, why not gather your ingredients and make them tonight? These little flavor bombs are sure to be a hit at any gathering or simply as a treat for yourself. Pair them with some crusty bread, a glass of wine, or your favorite cheese, and enjoy the delightful medley of flavors that only homemade herbed olives can offer.
The beauty of herbed olives is in their simplicity and versatility. With just a handful of ingredients and a bit of patience, you’ll create a dish that’s bursting with flavor and perfect for any occasion. Enjoy your culinary adventure!
Herbed Olives
Ingredients
For the Herbed Olives:
- 2 cups olives Choose favorites like Kalamata or green olives.
- 3 sprigs rosemary Chopped, discard stems.
- 3 sprigs thyme Chopped, discard stems.
- 1 teaspoon coriander seeds
- 1 teaspoon peppercorns
- 1 teaspoon fennel seeds
- 1/2 cup olive oil Extra virgin for best flavor.
- 4 cloves garlic Sliced into quarters.
- 2 leaves bay leaves Cut lengthwise.
- 1 teaspoon red pepper flakes
- 2 strips orange or lemon zest For a bright citrus note.
- to taste salt Enhances flavors.
Instructions
Instructions
- Step 1: Rinse the olives under cold water to remove excess brine. Pat them dry and set aside.
- Step 2: In a large mixing bowl, combine the chopped rosemary, chopped thyme, coriander seeds, peppercorns, fennel seeds, olive oil, sliced garlic, bay leaves, red pepper flakes, and citrus zest. Stir well.
- Step 3: Gently add the olives to the bowl and toss them in the herbed oil mixture until well coated.
- Step 4: Transfer the herbed olives and the oil mixture into a glass jar or airtight container. Seal tightly and let marinate in the refrigerator for at least 24 hours.
- Step 5: Serve at room temperature, drizzled with some infused oil.
Equipment
- Glass Jar or Container
- Cutting board and knife
- Measuring spoons
- Mixing spoon
Notes
- Rinse olives well to avoid saltiness.
- Marinate for at least 24 hours for best flavor.
- Store in an airtight container for up to two weeks.
- Don't skip the garlic; it adds essential flavor!