
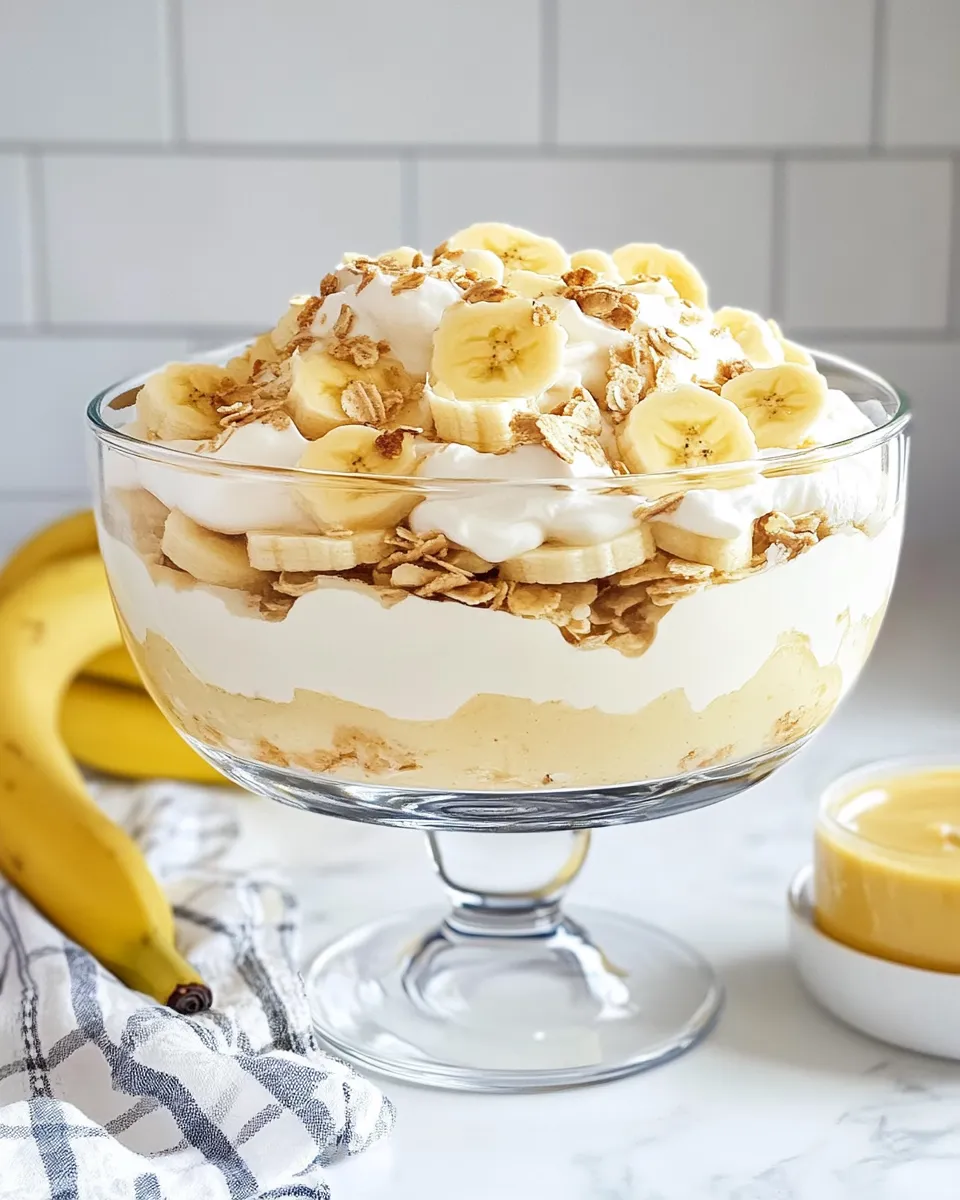
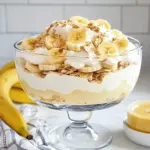
There’s something incredibly comforting about a classic dessert, and for me, Homemade Banana Pudding is right at the top of the list. This creamy, dreamy treat combines layers of luscious vanilla pudding, ripe bananas, and crunchy Nilla Wafer cookies, all topped off with a cloud of homemade whipped cream. It’s the perfect dessert to share at gatherings or to enjoy on a quiet evening at home. With just a few simple ingredients, you can create a dessert that not only tastes amazing but also brings a sense of nostalgia with each spoonful.
Why I Love This Recipe
This Homemade Banana Pudding recipe is not just delicious; it’s also incredibly easy to prepare. The homemade vanilla pudding is rich and velvety, and when paired with fresh bananas and Nilla Wafers, it creates a harmonious blend of flavors and textures. I love how this dessert can be made ahead of time, allowing the flavors to meld beautifully. Whether it’s a summer barbecue or a family gathering, this pudding is always a hit. Plus, there’s something so satisfying about making everything from scratch!
The Essentials
To create your own Homemade Banana Pudding, you will need the following ingredients:
- 1 batch Homemade Vanilla Pudding – This serves as the creamy base of your dessert.
- 3 medium or 4 small bananas – Sliced just before assembly for the freshest flavor.
- About 6 ounces of Nilla Wafer cookies – These provide a delightful crunch.
- Homemade whipped cream – To top off your pudding for that extra indulgence.
Cook’s Kit
To make your Homemade Banana Pudding, gather the following tools:
- Mixing bowls – For combining your pudding ingredients.
- Whisk – To ensure your pudding mixture is smooth and lump-free.
- Spatula – For folding in the whipped cream.
- 9×9 inch baking dish or individual serving cups – For layering your pudding.
- Knife – To slice your bananas.
The Method for Homemade Banana Pudding
Step 1: Prepare the Vanilla Pudding
Begin by making your Homemade Vanilla Pudding. In a saucepan, combine milk, sugar, cornstarch, and a pinch of salt. Cook over medium heat, whisking constantly until the mixture thickens. Remove from heat and stir in vanilla extract. Let it cool slightly.
Step 2: Slice the Bananas
While the pudding cools, slice your bananas into thin rounds. If you’re making this dessert to serve later, consider tossing the banana slices in a little lemon juice to prevent browning.
Step 3: Assemble the Pudding
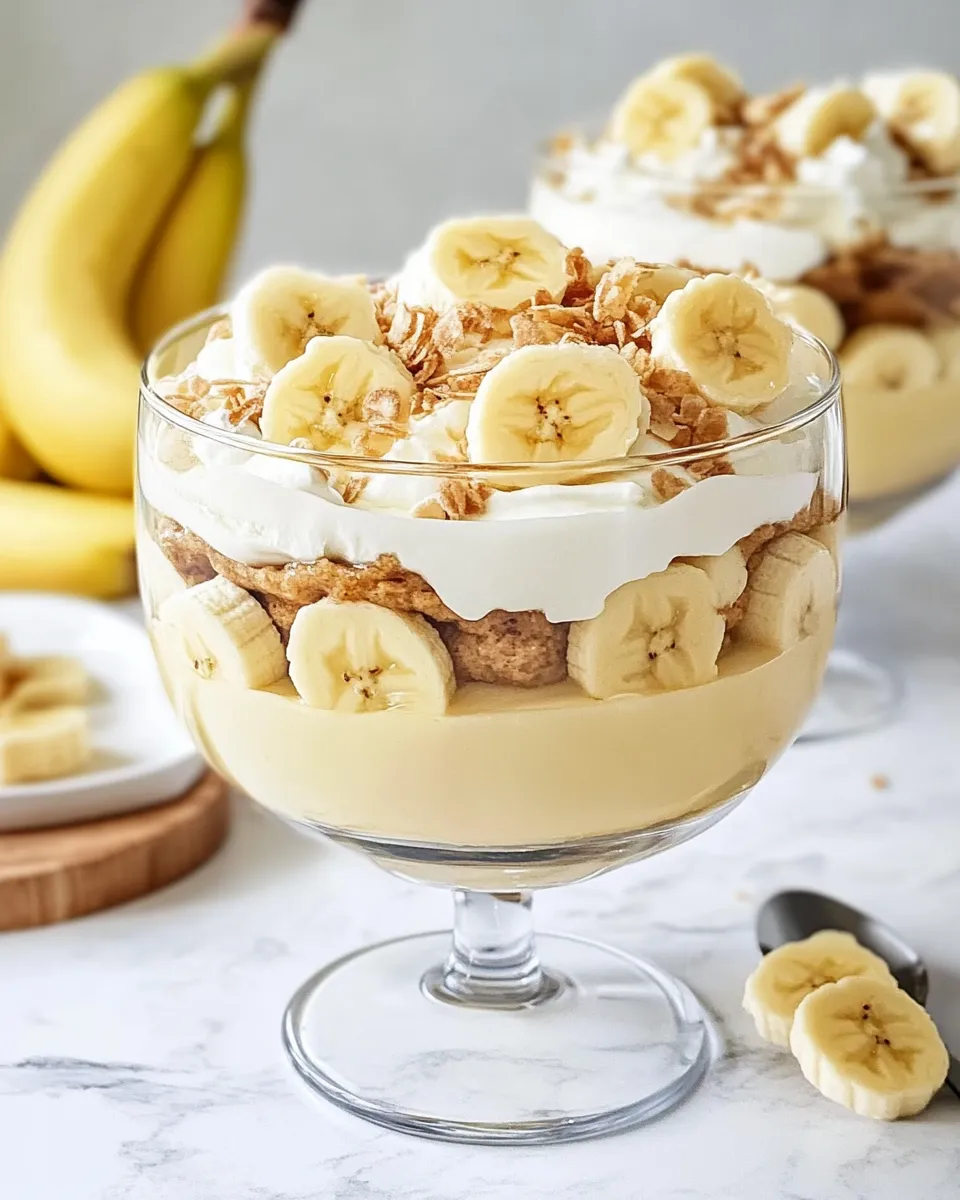
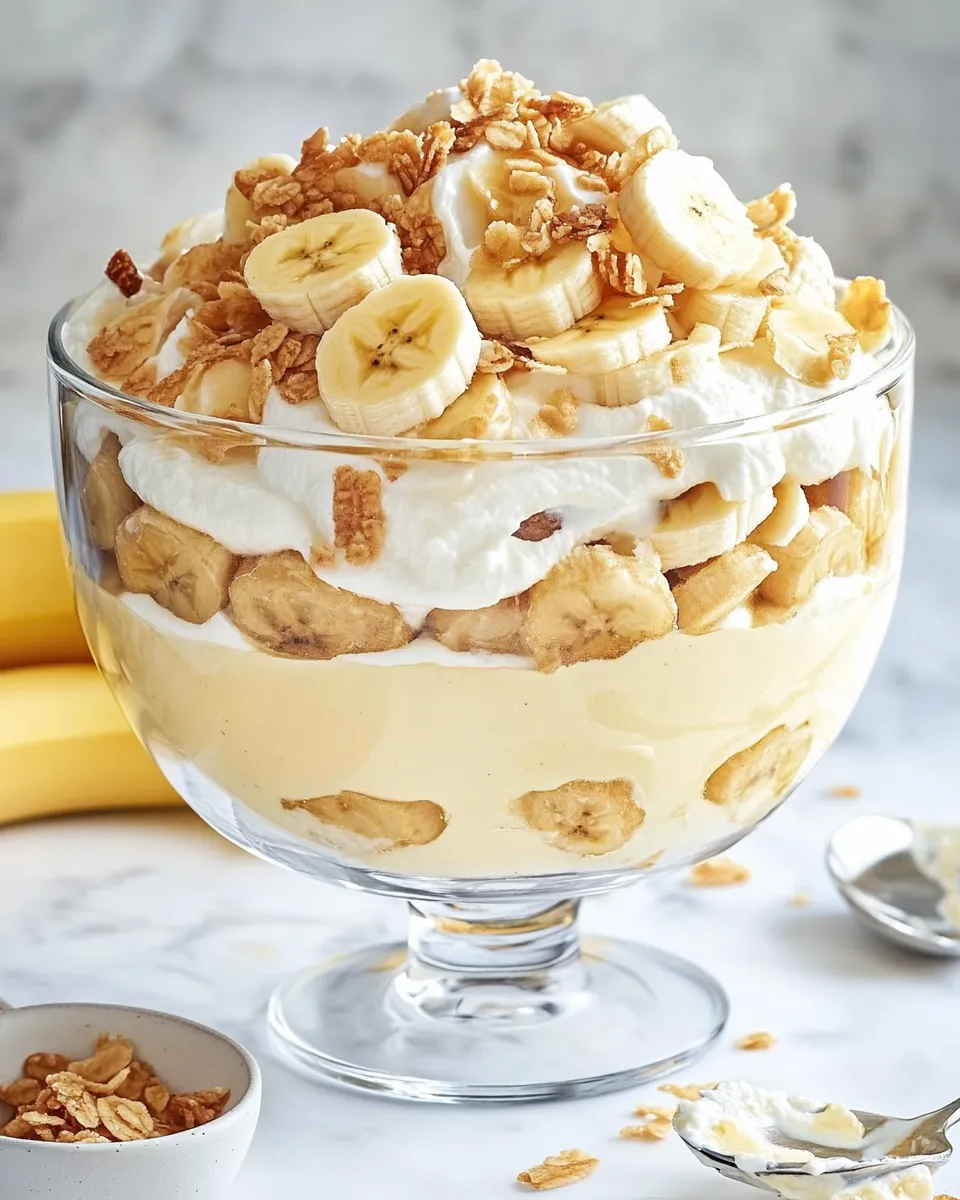
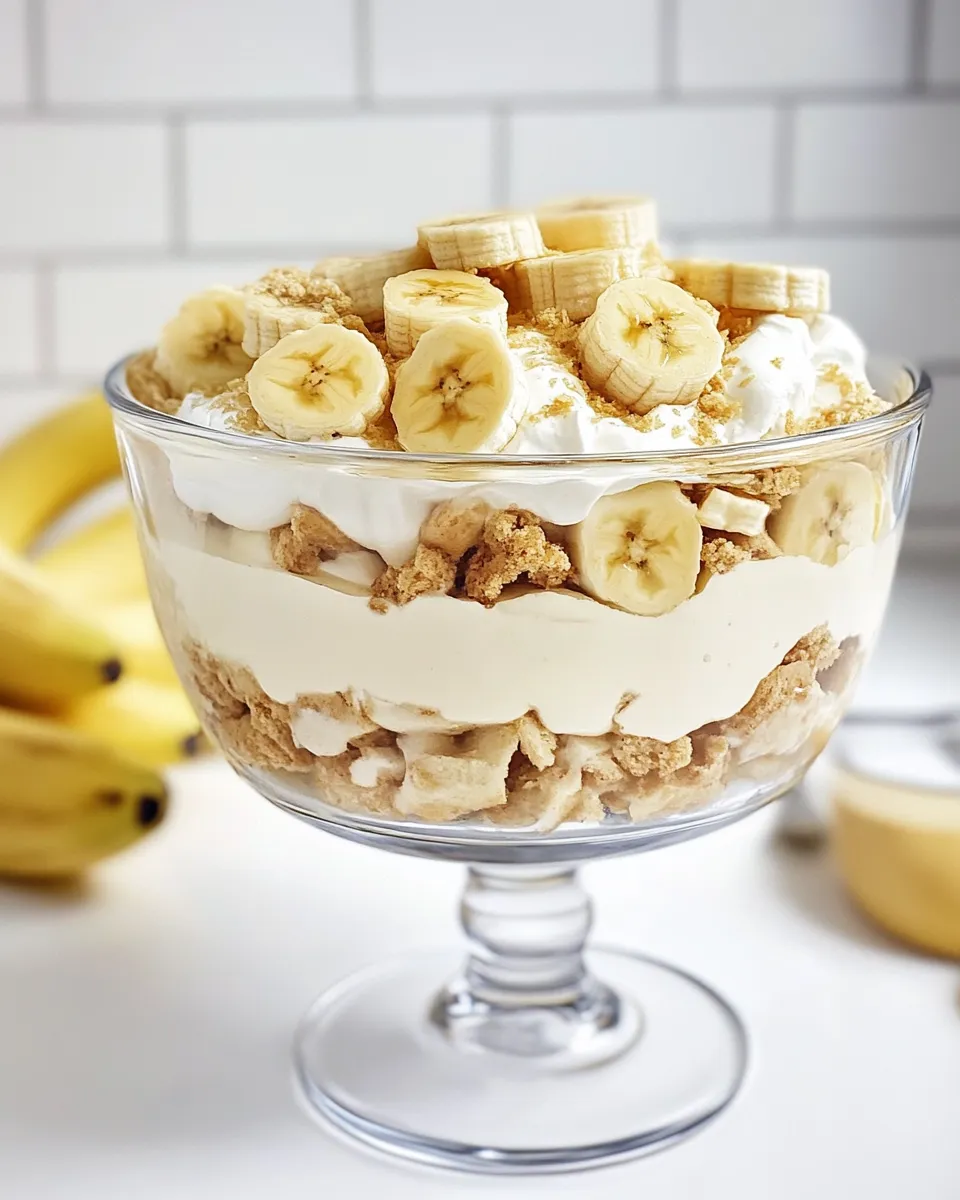
In your chosen dish, layer the Nilla Wafer cookies, followed by a layer of banana slices. Pour a generous layer of the homemade vanilla pudding over the bananas. Repeat the layers until you run out of ingredients, finishing with a layer of pudding on top.
Step 4: Make the Whipped Cream
In a mixing bowl, whip heavy cream with a bit of sugar until soft peaks form. Gently fold this whipped cream into the remaining pudding mixture to create a light and fluffy topping.
Step 5: Top and Chill
Spread the whipped cream over the top of your assembled pudding. For an extra touch, you can garnish with a few banana slices or crushed Nilla Wafers. Cover and refrigerate for at least 4 hours, or overnight for the best flavor.
Warm & Cool Weather Spins
This Homemade Banana Pudding can be adjusted for different seasons:
- In the summer – Add a layer of fresh berries for a fruity twist.
- In the winter – Consider adding a dash of cinnamon or nutmeg to the pudding for a cozy flavor.
- For a chocolate version – Use chocolate pudding instead of vanilla and layer with chocolate wafers.
- For a tropical spin – Incorporate shredded coconut or pineapple chunks for a tropical vibe.
Cook’s Notes
- This recipe is best served chilled, allowing the flavors to combine beautifully.
- Feel free to adjust the sweetness of the pudding based on your preference.
- If you prefer a thicker pudding, add a little extra cornstarch during cooking.
- Use ripe bananas for the best flavor, but not overly ripe as they may become mushy.
Store, Freeze & Reheat
For optimal freshness, store your Homemade Banana Pudding in the refrigerator, covered tightly to prevent it from absorbing odors. It’s best consumed within 3-4 days, as the bananas may brown and the cookies can lose their crunch.
Freezing is not recommended, as the texture of the pudding, bananas, and whipped cream can change once thawed. If you have leftovers, keep them chilled and enjoy them within a few days!
Questions People Ask
Can I make this pudding ahead of time?
Absolutely! In fact, making it a day in advance allows the flavors to meld beautifully. Just be sure to store it in the refrigerator until you’re ready to serve.
Can I use store-bought pudding instead of homemade?
While homemade pudding is highly recommended for its rich flavor, you can use store-bought if you’re short on time. Just make sure it’s a vanilla flavor to maintain the essence of the dish.
How do I prevent the bananas from browning?
Tossing the banana slices in a little lemon juice will help prevent browning. You can also slice them right before serving for the freshest taste.
Can I use a different type of cookie?
Yes! While Nilla Wafers are traditional, you can substitute with graham crackers, shortbread cookies, or even chocolate wafers for a different flavor profile.
The Last Word
There’s nothing quite like the joy of digging into a comforting bowl of Homemade Banana Pudding. Each layer tells a story of simplicity and nostalgia, reminding us of family gatherings and sunny afternoons. Whether served at a celebration or enjoyed as a sweet treat after dinner, this dessert is sure to bring smiles and satisfied bellies. So, gather your ingredients, roll up your sleeves, and create your own delightful batch of banana pudding—your taste buds will thank you!
Homemade Banana Pudding
Ingredients
For the Pudding:
- 1 batch Homemade Vanilla Pudding
- 3 medium bananas sliced just before assembly
- 6 ounces Nilla Wafer cookies approximately
- 1 batch Homemade whipped cream for topping
Instructions
Instructions
- Step 1: Prepare the Vanilla Pudding - In a saucepan, combine milk, sugar, cornstarch, and a pinch of salt. Cook over medium heat, whisking constantly until thickened. Remove from heat and stir in vanilla extract. Let cool slightly.
- Step 2: Slice the Bananas - While the pudding cools, slice your bananas into thin rounds. Toss in lemon juice if serving later to prevent browning.
- Step 3: Assemble the Pudding - In your dish, layer Nilla Wafer cookies, banana slices, and vanilla pudding. Repeat layers, finishing with pudding on top.
- Step 4: Make the Whipped Cream - In a bowl, whip heavy cream with sugar until soft peaks form. Fold into remaining pudding mixture for a light topping.
- Step 5: Top and Chill - Spread whipped cream over the pudding. Garnish with banana slices or crushed Nilla Wafers. Cover and refrigerate for at least 4 hours or overnight.
Equipment
- Mixing Bowls
- Whisk
- Spatula
- 9x9 inch baking dish or individual serving cups
- Knife
Notes
- This recipe is best served chilled, allowing the flavors to meld.
- Adjust sweetness of the pudding to your preference.
- For thicker pudding, add extra cornstarch during cooking.
- Use ripe bananas for the best flavor, avoiding overly ripe ones.


