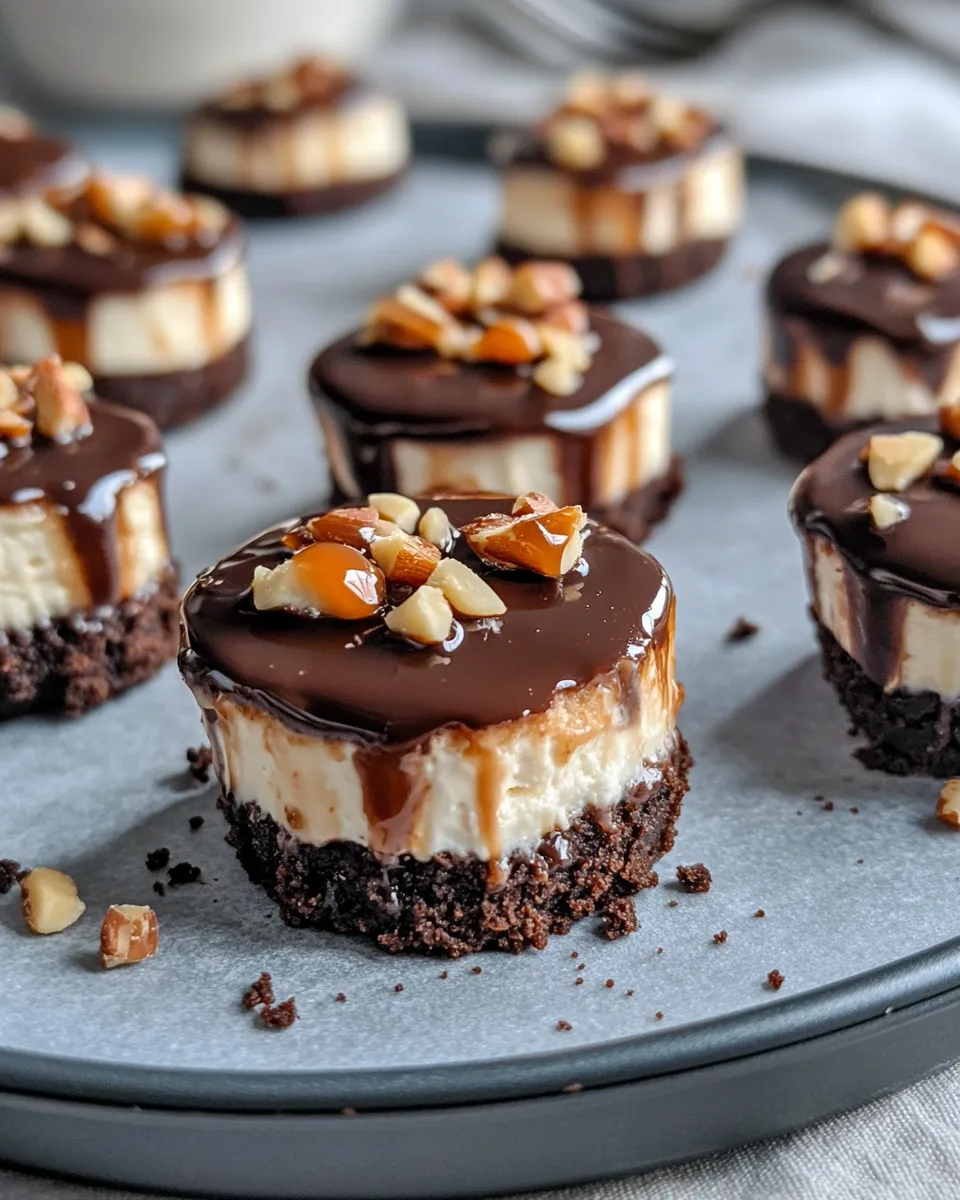
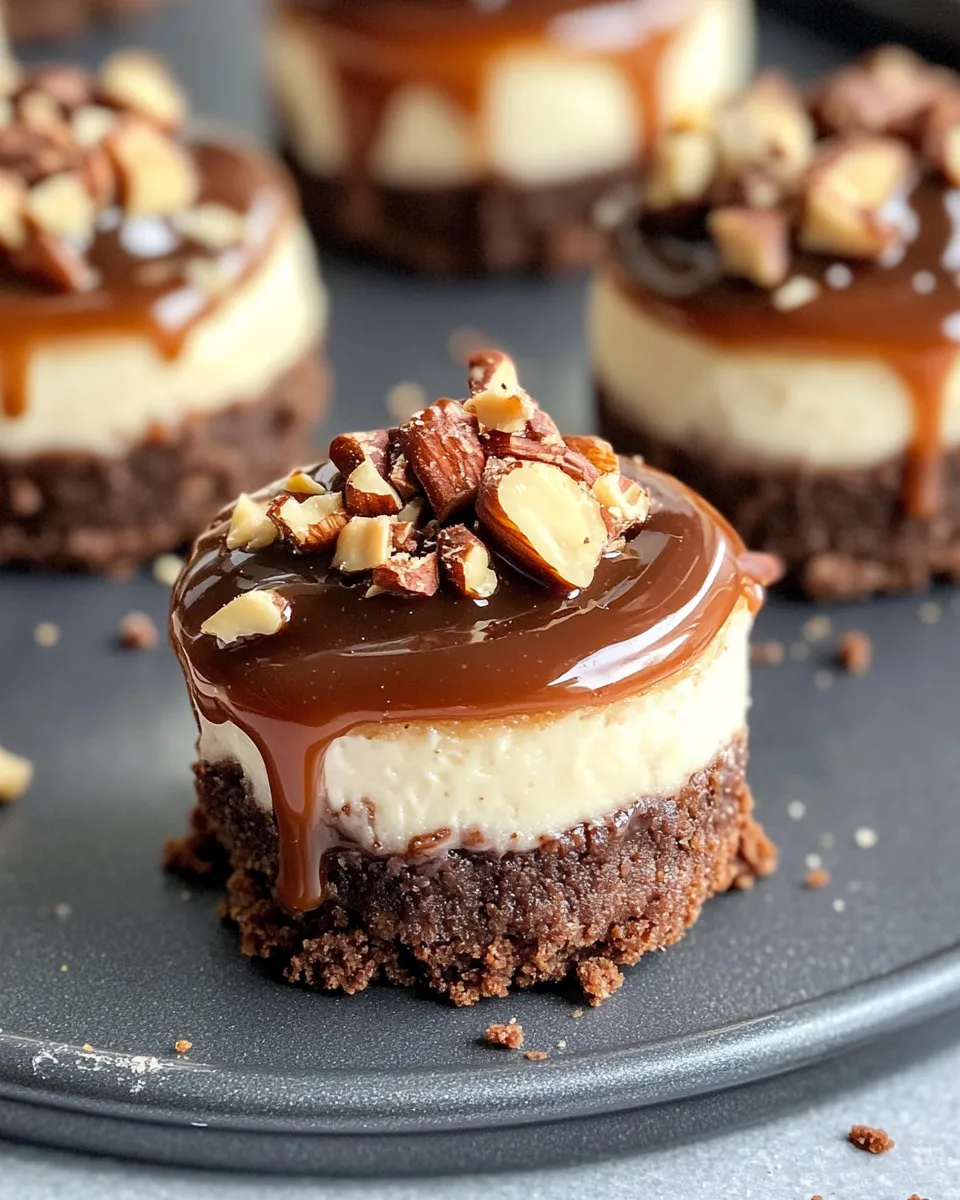
If you’re on the hunt for a dessert that feels indulgent yet comes together in a snap, these No-Bake Chocolate Caramel Cheesecake Bites are your go-to treat. Imagine the rich creaminess of cheesecake combined with the lusciousness of chocolate and caramel, all nestled atop a chocolatey graham cracker crust. The best part? No oven required! Whether you’re making these for a last-minute gathering or just craving something sweet without the fuss, these bites hit all the right notes.
Why No-Bake Chocolate Caramel Cheesecake Bites is Worth Your Time
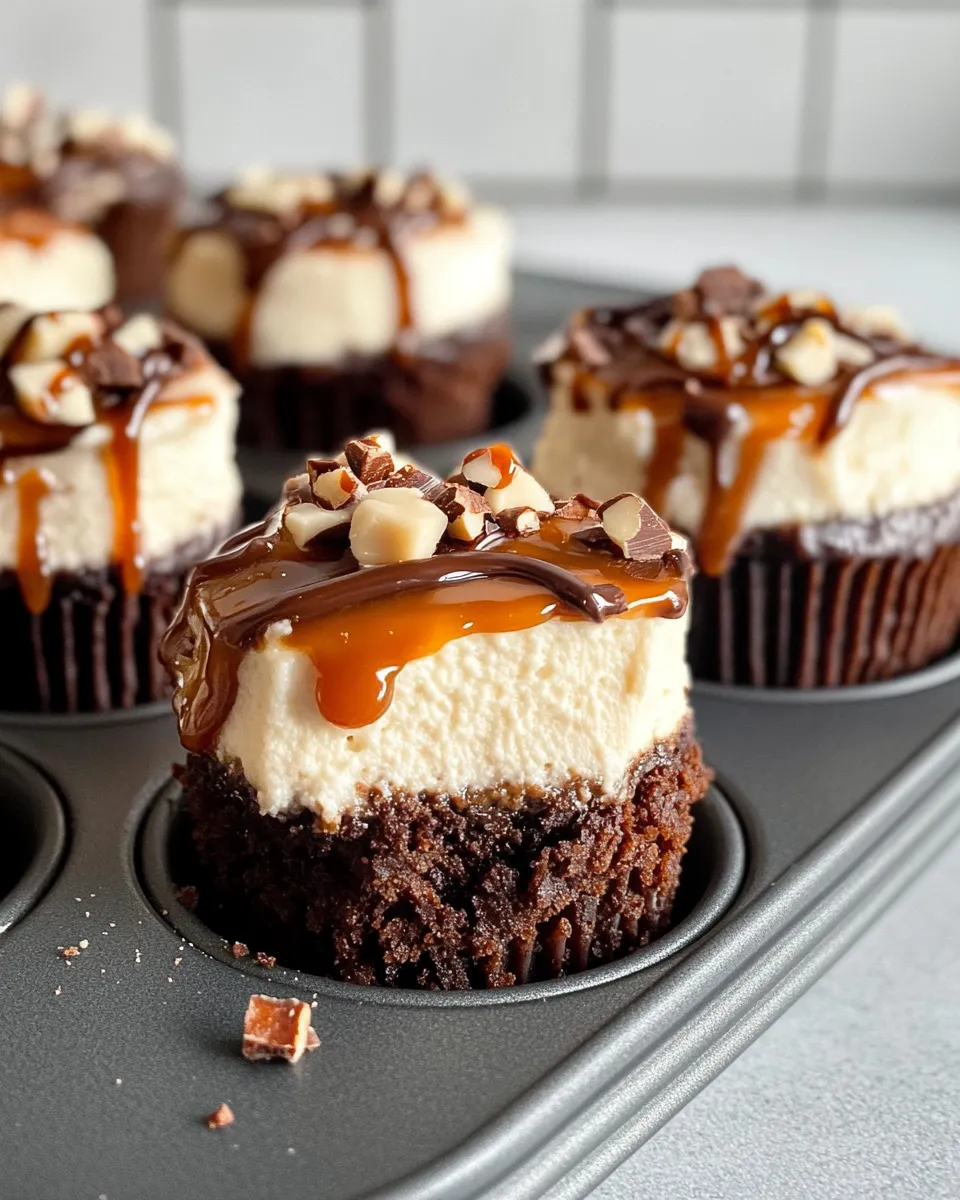
This recipe is a total game-changer for dessert lovers who want decadent flavor without the lengthy baking process. The balance of textures—from the crumbly crust to the creamy cheesecake filling and gooey caramel drizzle—makes every bite a delight. Plus, they’re perfectly portioned as bite-sized treats, which means no guilt over oversized slices. If you love desserts like Salted Pretzel Caramel Crunch Cookies or crave the combo of chocolate and caramel, these cheesecake bites will quickly become a staple in your recipe box. They’re simple, elegant, and sure to impress even the pickiest sweet tooth.
Ingredient Rundown
- 1 cup graham cracker crumbs – This forms the base, adding a buttery crunch with a hint of sweetness.
- 1/4 cup unsweetened cocoa powder – Adds a deep chocolate flavor to the crust, making it richer and more complex.
- 1/2 cup unsalted butter, melted – Binds the crust ingredients together and adds that irresistible buttery taste.
- 1 cup cream cheese, softened – The star ingredient in the cheesecake filling, bringing creamy texture and tang.
- 1/2 cup powdered sugar – Sweetens the cheesecake filling perfectly without any graininess.
- 1 teaspoon vanilla extract – Enhances the overall flavor with its warm, fragrant notes.
- 1/2 cup caramel sauce – Adds gooey sweetness and a beautiful golden color that complements the chocolate.
- 1/2 cup chocolate chips – Used for drizzling or melting on top for a chocolate finish.
- 1/4 cup chopped nuts (optional) – For added crunch and texture; walnuts or pecans work beautifully.
Tools & Equipment Needed
- Mixing bowls – For combining crust and filling ingredients separately.
- Hand mixer or stand mixer – To whip the cream cheese and sugar until smooth and fluffy.
- Measuring cups and spoons – Precision ensures balanced flavors.
- Mini muffin pan or silicone molds – Perfect for shaping your cheesecake bites.
- Spatula – For scraping down the bowl and folding ingredients.
- Microwave-safe bowl – To melt chocolate chips for drizzling.
- Refrigerator – To chill and set the bites before serving.
The Method for No-Bake Chocolate Caramel Cheesecake Bites
Step 1: Prepare the Crust
In a medium bowl, mix together the graham cracker crumbs and unsweetened cocoa powder. Pour in the melted butter and stir until the mixture resembles wet sand. This chocolatey crust base is the perfect foundation for your cheesecake bites.
Step 2: Press the Crust into Molds
Spoon the crust mixture evenly into your mini muffin pan or silicone molds. Use the back of a spoon or your fingers to firmly press the crumbs down, creating an even layer that will hold together once chilled.
Step 3: Make the Cheesecake Filling
In a large bowl, beat the softened cream cheese until smooth. Gradually add the powdered sugar and vanilla extract, continuing to mix until the filling is silky and lump-free. This creamy filling is what makes these bites irresistibly luscious.
Step 4: Add Caramel Swirl
Gently fold in half of the caramel sauce into the cream cheese mixture to create a beautiful marbled effect. Save the rest of the caramel for drizzling on top later.
Step 5: Assemble the Bites
Fill each crust-lined mold with the cheesecake mixture, smoothing the tops with a spatula. Drizzle the remaining caramel sauce over each bite for that signature gooey caramel touch. Sprinkle chopped nuts on top if you like an extra crunch.
Step 6: Chill and Set
Pop the tray into the refrigerator for at least 4 hours, or overnight if possible. This allows the cheesecake to firm up and the flavors to meld beautifully.
Step 7: Melt Chocolate and Drizzle
Once set, melt the chocolate chips in a microwave-safe bowl in 30-second intervals, stirring in between until smooth. Drizzle the melted chocolate over the chilled cheesecake bites for an elegant finish.
Step 8: Serve and Enjoy!
Carefully remove the cheesecake bites from the molds and serve immediately. These little bites pack a big punch of flavor and are perfect for parties, snacks, or a sweet treat anytime.
Tailor It to Your Diet
- Use dairy-free cream cheese and butter substitutes to make these bites suitable for a dairy-free lifestyle.
- Swap the caramel sauce for a date caramel to reduce refined sugar content.
- Omit the nuts or replace with seeds like pumpkin or sunflower seeds for nut-free versions.
- Choose sugar-free chocolate chips or make your own for a lower-sugar option.
If You’re Curious
Wondering about the flavor combos or ingredient substitutions? Here are some quick answers:
- The cocoa powder in the crust adds a subtle chocolatey depth without overpowering the caramel’s sweetness.
- Using cream cheese softened to room temperature helps avoid lumps and ensures a smooth texture.
- Chilling the bites overnight enhances the cheesecake’s firmness and lets the flavors develop fully.
- You can experiment with different nuts like pecans or almonds to change up the texture.
- For a festive touch, sprinkle a pinch of flaky sea salt on top to contrast the sweetness, inspired by treats like Chocolate Dipped Salted Caramel Shortbread.
Freezer-Friendly Notes
These No-Bake Chocolate Caramel Cheesecake Bites freeze beautifully, making them perfect for prepping ahead of time.
- Place the bites on a parchment-lined tray and freeze until firm, about 2 hours.
- Transfer to an airtight container or freezer-safe bag and store for up to 2 months.
- To serve, thaw in the refrigerator for 1-2 hours or until soft enough to enjoy.
- Freezing might slightly change the texture of the caramel, but the flavor remains delicious.
Your Top Questions
Can I use a different crust base instead of graham crackers?
Absolutely! Crushed digestive biscuits or even chocolate cookies work well as a crust base. Just be sure to adjust the cocoa powder accordingly if your cookies are already chocolate-flavored.
Is it necessary to use unsweetened cocoa powder?
Using unsweetened cocoa powder gives you control over the sweetness and balances the caramel nicely. If you use sweetened cocoa, you may want to reduce the powdered sugar in the filling.
How do I prevent the cheesecake bites from sticking to the molds?
Using silicone molds makes removal easier due to their flexibility. If you’re using a metal or plastic muffin pan, consider lining it with mini cupcake liners or greasing the molds lightly with butter.
Can I make these bites without nuts?
Definitely! The nuts are optional and can be omitted if you prefer or have allergies. You can also substitute with seeds or simply leave them off altogether.
Explore More
- Salted Pretzel Caramel Crunch Cookies – For another caramel and chocolate combo with a salty twist.
- Chocolate Dipped Salted Caramel Shortbread – A buttery shortbread with rich caramel and chocolate layers.
- Salted Caramel Turtle Pecan Cookies – Indulgent cookies loaded with pecans, caramel, and chocolate.
That’s a Wrap
These No-Bake Chocolate Caramel Cheesecake Bites are proof that you don’t need an oven to whip up something truly special. Whether it’s a weekday treat or a party pleaser, their rich flavors and simple preparation make them a winner every time. With the versatility to customize ingredients and the ability to prep ahead, you’ll find yourself reaching for this recipe again and again. So go ahead, indulge in these luscious bites and savor every gooey, chocolatey moment!
Share on Pinterest
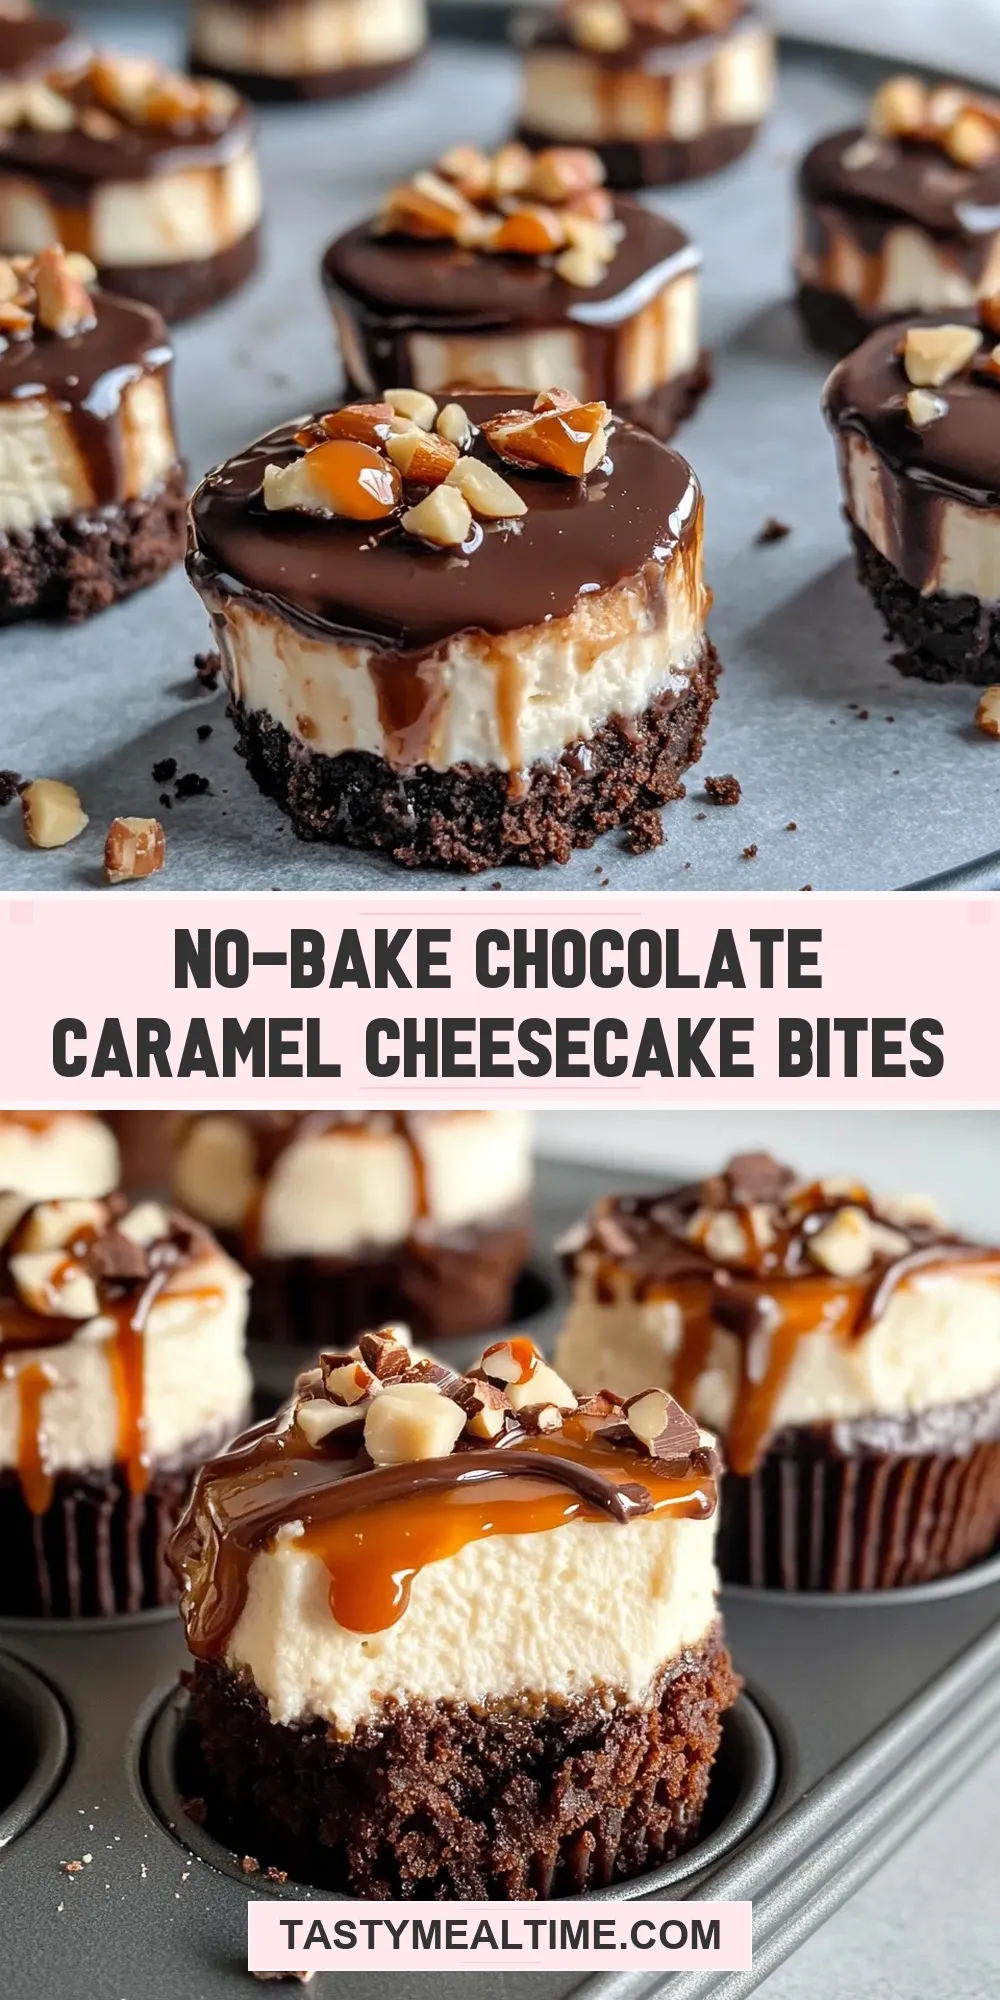
No-Bake Chocolate Caramel Cheesecake Bites
Ingredients
Crust
- 1 cup graham cracker crumbs
- 1/4 cup unsweetened cocoa powder
- 1/2 cup unsalted butter melted
Filling & Toppings
- 1 cup cream cheese softened
- 1/2 cup powdered sugar
- 1 teaspoon vanilla extract
- 1/2 cup caramel sauce
- 1/2 cup chocolate chips
- 1/4 cup chopped nuts optional, walnuts or pecans
Instructions
Prepare the Crust
- In a medium bowl, mix together the graham cracker crumbs and unsweetened cocoa powder. Pour in the melted butter and stir until the mixture resembles wet sand.
Press the Crust into Molds
- Spoon the crust mixture evenly into your mini muffin pan or silicone molds. Use the back of a spoon or your fingers to firmly press the crumbs down, creating an even layer that will hold together once chilled.
Make the Cheesecake Filling
- In a large bowl, beat the softened cream cheese until smooth. Gradually add the powdered sugar and vanilla extract, continuing to mix until the filling is silky and lump-free.
Add Caramel Swirl
- Gently fold in half of the caramel sauce into the cream cheese mixture to create a beautiful marbled effect. Save the rest of the caramel for drizzling on top later.
Assemble the Bites
- Fill each crust-lined mold with the cheesecake mixture, smoothing the tops with a spatula. Drizzle the remaining caramel sauce over each bite for that signature gooey caramel touch. Sprinkle chopped nuts on top if desired.
Chill and Set
- Pop the tray into the refrigerator for at least 4 hours, or overnight if possible, to allow the cheesecake to firm up and the flavors to meld beautifully.
Melt Chocolate and Drizzle
- Melt the chocolate chips in a microwave-safe bowl in 30-second intervals, stirring in between until smooth. Drizzle the melted chocolate over the chilled cheesecake bites for an elegant finish.
Serve
- Carefully remove the cheesecake bites from the molds and serve immediately. Enjoy these rich, bite-sized treats at parties or as a sweet snack anytime.
Equipment
- Mixing Bowls
- Hand Mixer or Stand Mixer
- Measuring cups and spoons
- Mini muffin pan or silicone molds
- Spatula
- Microwave-safe bowl
- Refrigerator
Notes
- Use dairy-free cream cheese and butter substitutes to make these bites suitable for a dairy-free lifestyle.
- Freeze the bites on a parchment-lined tray before transferring to an airtight container for up to 2 months.
- Try different nuts or seeds for varied texture and to accommodate allergies.
- Chilling overnight enhances firmness and flavor melding.
- For nut-free versions, omit nuts or replace with pumpkin or sunflower seeds.