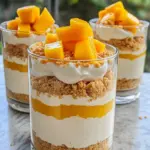
No-Bake Mango Cheesecake Pots
This No-Bake Mango Cheesecake Pots recipe is SO EASY! Creamy, tropical, and luscious dessert perfect for any occasion with no oven needed.
Servings: 6 servings
Ingredients
- 1 cup cream cheese softened
- 1/2 cup Greek yogurt for tanginess and creaminess
- 1/2 cup mango puree fresh or frozen mango blended smooth
- 1/4 cup honey or maple syrup natural sweetener
- 1 teaspoon vanilla extract
- 1/2 cup whipped cream folded in for lightness
- 1 cup graham cracker crumbs
- 1/4 cup unsalted butter melted, for the crust
- fresh mango slices for topping
Instructions
- Start with the graham cracker crumbs and melted butter. Combine them in a bowl until the crumbs are evenly coated and resemble wet sand. Divide this mixture evenly into your serving pots and press it gently but firmly on the bottom to create a compact crust layer. Place the pots in the refrigerator while you prepare the filling.
- If you’re using fresh mango, peel and chop about one medium-sized mango, then blend it until smooth. If you have pre-made mango puree, you’re ready to go. Set aside 1/2 cup for the cheesecake filling.
- In a large bowl, beat the softened cream cheese with an electric mixer until smooth and creamy. Add the Greek yogurt, honey (or maple syrup), and vanilla extract. Mix until well combined. Next, gently fold in the mango puree, blending it evenly through the mixture.
- Carefully fold the whipped cream into the cream cheese mixture using a spatula. This step is crucial to keep the filling light and airy. Make sure to combine just until no streaks remain.
- Spoon the cheesecake filling over the chilled crust in each pot. Smooth the tops with the back of a spoon or spatula. Finish each pot by topping it with fresh mango slices arranged beautifully.
- Refrigerate the pots for at least 4 hours, preferably overnight. This chilling time allows the cheesecake filling to set beautifully. Serve chilled for the best texture and flavor.
Equipment
- Mixing Bowls
- Electric mixer or hand whisk
- Measuring cups and spoons
- Blender or food processor
- Spoons or spatula
- Small serving pots or glasses
- Refrigerator
Notes
- Use low-fat or fat-free cream cheese and Greek yogurt to make this dessert lighter.
- Substitute honey or maple syrup with zero-calorie sweeteners like stevia or monk fruit for a diet-friendly option.
- Try gluten-free or whole-grain graham cracker crumbs to accommodate dietary preferences.
- Store cheesecake pots covered in the refrigerator for up to 3 days for best freshness.
- Freezing is possible but may alter texture; thaw overnight in the refrigerator before serving.